Your cart is currently empty!
Blog
Start Your Honey Business In Bermondsey Street, London
Views: 0
Bermondsey Street is located in north London, and this is where you will find the most popular concentration of beekeeping. In fact, honey production in this area is among the highest in Europe, and people from all over the world come to take advantage of the rich and tasty offerings that the city has to offer. As a result, a lot of people come to visit this particular location, which is where you are likely to find all of the finest honeys in the entire country. If you love honey, then there is no reason for you not to visit this particular London spot on a regular basis.
The bees in this location need all of the help they can get when it comes to pollinating. That is why it is very important that you make sure that you are able to observe them while they are working, so that you can find out how they behave. The good news is that you do not have to leave your home in order to find all of the best honey around. All you have to do is look into a few different locations to find the best choices in the industry.
If you want to find a local source for European-style honey, then you should head over to Clifton. This is a busy place in itself, so it might be a bit of a challenge to find what you are looking for. However, you should not give up hope because there is plenty of potential to find what you are looking for. It is just a matter of scouring the streets for the right supplies.
While there is a large concentration of local suppliers in Clifton and Bermondsey Street, you will still find other local suppliers if you look further afield. For example, the Stocksbridge area might provide you with a better selection of honey than you have ever seen before. This area is known for having a high quality of beekeeping, so if you can find the location that you love, then you have an amazing opportunity to own a colony of bees that is sure to produce a wonderful harvest of honey.
If you are interested in keeping bees but you live somewhere that does not support the hobby, then you should consider taking a trip down to London. There, you can visit the hive of the City of London and you will be able to view the city’s swarms of bees firsthand. You will also be able to find the perfect location to raise your bees from. The swarm in central London is amazing to behold, so if you are serious about turning honey into cash, then you need to take a trip down to this location.
When you are ready to begin collecting your honey, you will need to find the right location for the bees. You will want to build hives close to water so that they can feed their young. The swarms of bees in central London can get very large during the summertime, so you will need to keep an eye on them and make sure that the hives are not too close to any hot source of water. Honey is produced by the worker bees that are able to forage near their hives during different times of the day. If the hive is far enough away, then the worker bees will not have to work as hard in order to collect the honey.
August, 2023 | Talking Camping
Views: 0
 3 min read
In the dynamic realm of companionship, Riverside escorts offer a range of benefits that extend beyond mere company. These professionals…
 3 min read
Have you ever planned a trip to Las Vegas, excited about the glitz, glamour, and fun but concerned about running…
ABC OF ROCK CLIMBING – Page 2 of 5 – Rock Climbing Info, News, Shop & Travel
Views: 0

Last updated on July 3, 2023

Last updated on November 16, 2020

Last updated on November 16, 2020

Last updated on November 16, 2020

Last updated on November 15, 2020
{ TOP 7 } Best Climbing Shorts – 2020 Reviews
Views: 0
A lot of the rock climbing season is during the warmer months — a.k.a. shorts season. Depending on your preferences and the environment, rock climbing pants might not be the ideal clothing for your trip to the crag. If you’re interested in giving your legs a little more freedom and breathing room without sacrificing durability, flexibility, and functionality, these are the best climbing shorts to do just that.
As you can guess, buying rock climbing shorts isn’t the same as buying regular shorts. There are several additional factors you’ll need to keep in mind when purchasing rock climbing shorts like durability, flexibility, comfort, length, and features.
Your rock climbing shorts are going to go through a lot during trip after trip to the crag. From rock scrambles to kneebars to lead falls, the fabric of your rock climbing shorts will need to pull through a lot of scrapes, pulls, and abrasive situations. Even off the wall, hanging out at the crag generally means sitting in the dirt. And things aren’t always dry. Do you climb somewhere with a lot of rain? Somewhere hot enough for excessive sweating to be a problem? Maybe you’ll need shorts with waterproofing or water-resistant durability. All of these different factors mean durability is one of the most important things you’ll need to consider when purchasing rock climbing shorts. Most rock climbing shorts designed specifically for rock climbing will already use materials that are thick, tear-resistant, and durable — all the shorts on this list, for example, are made with special combinations of durable material. But if you plan to diverge from this list, keep an eye on what types of materials are used. How thick is the material? Is it too easy to stretch over your fingers? Is it going to hold up against rock?
Flexibility
On the other hand, you don’t want your rock climbing shorts to be too stiff — flexibility is also key. The idea that your upper body is the only area where you’ll need ease of movement is a misconception — from heel hooks to kneebars to feet cuts to hand-foot matches, your lower body needs to be able to move just as easily. Keep an eye out for flexibility features when you’re looking for rock climbing shorts. Do they have a gusseted inseam? Are they made of a flexible material that stretches easily without sacrificing durability? Some rock climbing shorts also come with elastic waistbands to avoid the additional binding that a belt would cause. The last thing you need is your shorts to inhibit a crucial move whether that’s the crux of a boulder problem or a dyno on a lead climb. While this might be hard to test out in a fitting room, pay attention to how the fabric feels, what it’s made of, and if the shorts include any additional flexibility features.
Comfort
Depending on what type of rock climbing you’re doing, there’s a chance you’re going to spend an extended amount of time in your rock climbing shorts. While it’s less likely that you’ll wear shorts up a long, multi-day, multi-pitch route — it gets cold up the side of a cliff face no matter what season it is and pants are generally the wiser move — you might spend a whole day of bouldering in your rock climbing shorts or even a multi-day trip to a top rope, sport, or trad crag. You want your rock climbing shorts to be comfortable. Since a lot of rock climbing pants are designed to be flexible, they’re generally made with materials that wear relatively comfortably. However, fabrics that are water-resistant and durable tend to be less comfortable. If comfort is a more of an issue for you than water-resistance or super durability, maybe be on the lookout for a pair of shorts with softer, more flexible materials. Again, however, there’s a possibility of sacrificing durability for comfort. Keep this in mind if you’re planning on rock climbing in more aggressive environments that could take a harsher toll on the fabric of your shorts.
Length
This is one of the less important factors and depends a lot on your personal preference — but it’s still certainly something to keep in mind. Wearing shorts means that you’re sacrificing some of the skin protection that comes with wearing long pants on rock climbing trips — you might be in for some scraped knees or shins. There are longer length shorts to mitigate this danger to your legs. If you’d rather not deal with a lot of scrapes, keep an eye out for shorts with a longer inseam. There are also dynamic moves to keep in mind. Rock climbing involves a lot of high heels and far stretches. If you’re interested in full coverage, make sure you try on the shorts and see how effective your chosen length is at doing what you want it to do.
Features
A lot of rock climbing shorts come with additional features designed specifically for rock climbing. These include angled pockets for easy gear retrieval, integrated belts, gusseted inseams, thigh pockets with zips, UV protection, integrated toothbrush pockets, and more. Keep an eye out for these features as they are all specifically designed to improve your climbing capabilities.

In first place for the best rock climbing shorts available on Amazon is the prAna Mojo. It’s no surprise that prAna — of course, known for its quality rock climbing clothes — shows up multiple times on this list of best rock climbing shorts. The Mojo starts at $37 making it one of the expensive options on this list — a pleasant surprise from prAna’s line of clothing. The material is quick-drying and UPF 50+ making it perfect for the summer climbing months. It does only come in one color — black. The 10” seam is also one of the shorter options, but the gusseted crotch ensures that you still have plenty of space to move around in these shorts.
They come with all of the durability you’ve come to expect from prAna’s line of clothing. They also come with plenty of pockets for secure storage including two front hand pockets and a back pocket with a velcro flap for protecting those all-important items like keys. The elastic waistband provides plenty of flexibility and movement, but if you’re the type of person that likes the security of a belt you might want to consider that before purchasing a pair of shorts with an elastic waistband. The only downside to these shorts may be that some climbers thought they could be stretchier.
- Features: Quick-drying, UPF 50+
- Colors: Black
- Pockets: Two front pockets, back pocket with velcro flap
- Waistband: Elastic
- Inseam: 10”
- Comfortable lightweight polyester fabric
- UPF 50+ fabric resists wrinkles and protects skin from UV
- Diamond gusseted crotch
- Durable

If you’re looking for a pair of shorts specifically designed for females, you can’t go wrong with the Arc’Teryx Parapet. These shorts start at $65 — about what you might expect for an Arc’Teryx pair of shorts. In fact, this is rather inexpensive compared to some of their other clothing items. That being said, it is one of the more expensive options on this list. They do tend to run large so consider sizing down if you’re interested in a snugger fit. As with all rock climbing gear, it is — of course — in your best interest to try these shorts on before you purchase them.
There are plenty of options for colors on these shorts — choose anything from black to creekside to dark masset to purple reign to fiesta to fit your personal style. The mid-thigh inseam leaves plenty of space for high knees, knee drops, toe hooks, heel hooks, and other movement your legs might need to make. As far as pocket storage goes, you’ve got two hand pockets, two back pockets, and a zippered thigh pocket to secure your belongings however you see fit. With 94% nylon and 6% elastane, these shorts are going to stretch however you need them to, and a UPF 50+ material will resist wrinkles and protect your skin from UV.
- Features: Gusseted Crotch, Trim Fit, Quick-Drying, Sun Protection
- Colors: Black, Creekside, Dark Masset, Purple Reign, Fiesta
- Pockets: 2 hand, 2 back, 1 zippered thigh
- Waistband: Belt Loops
- Inseam: Mid-thigh
- Terra Tex (94% nylon, 6% elastane)
- UPF 50+ fabric resists wrinkles and protects skin from UV
- Diamond gusseted crotch
- Durable
- Expensive
- Sizes run large

If you have a preference for more coverage, the longer inseam of the prAna Stretch Zion might be what you need. These shorts start at $69 so you’re paying a little more for those extra inches of length — but you’re also paying for everything else that prAna shorts come with such as abrasion-resistant Stretch Zion performance fabric, UPF 50+ protection, and not one, not two, but 14 color options.
The prAna Stretch Zion also includes fun additional design features like a dual-entry cargo pocket — anything you store in this pocket will be secure, and you can get to it in multiple ways. It also has a streamlined adjustable waistband so you can make the waistband as tight or loose as you want without worrying about a belt getting in your way. Again the 12” inseam is one of the longer inseams you’re going to find on rock climbing pants. The extra length won’t hinder your movement, however, because the shorts are also designed with a gusseted crotch and ventilation. Keep in mind that these shorts are known to run small.
- Features: Abrasion-resistant Stretch Zion performance fabric, UPF 50+ ultraviolet protection
- Colors: 14 color options
- Pockets: Angled dual-entry cargo pocket
- Waistband: Streamlined adjustable waistband
- Inseam: 12”
- Abrasion-resistant Stretch Zion performance fabric
- UPF 50+ fabric resists wrinkles and protects skin from UV
- Free-range gusseted crotch
- Well-ventilated

If you’re particularly interested in convertible pants that can be worn as long pants or shorts, the prAna Stretch Zion Convertible has everything the prAna Stretch Zion short offers — plus it’s convertible. These pants can be either 30” or 12” depending on what you need at the time. And, based on the elements, convertible pants can certainly come in handy. Start with shorts at the bottom of a multi-pitch and — once things get cold up the cliff face — add that extra length back on for warmth and protection. The pants are made of an all-weather nylon and spandex finish so they’ll hold up to anything the rock can throw at them. And they come in two colors.
You’ll get two front hand pockets, 1 rear welt pocket, and a zippered cargo pocket with these pants along with an integrated webbing belt so you can adjust them to fit however you’d like. They’re quick-drying and 3% spandex so they’ll stretch exactly how you want them to and need them to at just the right time. Climbers have said they wear a little baggy so if you’re interested in a slim or more-fitted style you might want to size down.
- Features: Convertible, All-Weather Nylon/Spandex Finish, Inseam gusset,
- Colors: Charcoal, Dark Khaki
- Pockets: 2 front hand, 1 rear welt, zippered cargo
- Waistband: Integrated Webbing Belt
- Inseam: 30 in” or 12”
- Convertible
- Quick-Drying
- 97% Nylon, 3% Spandex
- Built-in adjustable belt

If you’re interested in cheap rock climbing shorts, you’re not going to find a better pair than the Singbring. They’re certainly no prAna or Arc’Teryx — but that’s why they’re $15 unlike the $60 to $90 you’re going to drop on a pair of rock climbing shorts from prAna or Arc’Teryx. What do you get for $15? Everything you need in a pair of lightweight rock climbing shorts. These shorts have some of the shortest inseam length out of the rock climbing shorts on this list at 7”. If you’re not interested in that style and prefer more coverage, Singbring does make shorts with longer inseams — they’re just slightly more expensive.
The Singbring shorts are made of a 95% polyester and 5% spandex material so they’re plenty stretchy. They come in three colors — black, Army green, and gray. With three zipper pockets, you’re not going to lose track of your belongings. However, some climbers have said that the zippers aren’t the smoothest and you might find yourself in a pickle if you need to get into one of them relatively quickly up on the wall. But if you’re looking for a lightweight, quick-drying, inexpensive rock climbing shorts these are the ones you’re looking for.
- Features: Lightweight, Quick-Drying
- Colors: Black, Army Green, Gray,
- Pockets: 3 zipper pockets
- Waistband: Elastic
- Inseam: 7”
- 95% polyester, 5% spandex
- Inexpensive

If you’re looking for something a little more exotic than the above rock climbing shorts, you might be interested in the Fjallraven Nikka. These foreign shorts come with a $120 price tag and all the bells and whistles you would expect in a rock climbing short. They come in three colors — dark olive, black, sand, and beige. They also have two zipper pockets and one button cargo pocket to store everything you might need headed up the wall securely. The waistband is a button, unlike the other pairs of shorts on this list. Keep this in mind if you’re concerned about things catching, snagging, or breaking. A button closure is far less streamlined than a lot of the other waistband options.
These pants are durable, water-resistant, and feature additional pockets for storage. However, these are the most expensive option on this list and — as far as we can tell — the quality is not that far superior to that of the prAna or Arc’Teryx shorts. Keep this in mind if you’re working with a budget. They also have wider legs than some of the other pants on this list — if you’ve got a bulkier bottom half these might be helpful to give your legs a little more breathing room. On the flip side, if you’re interested in a slimmer fit, one of the other pairs of shorts on this list might be more appropriate.
- Features: Water-Resistant
- Colors: Dark Olive, Black, Sand, Beige
- Pockets: 2 zipper, button cargo
- Waistband: Button
- Durable
- Additional Pockets
- Water-Resistant

Of all the pairs of shorts on this list, none are more versatile than the Outdoor Research Ferrosi. Looking at these shorts, you wouldn’t know that they were specifically designed for rock climbing. They certainly look like they’d be fine for casual wear out on the town or down days at work. And yet, they have all the features and durability that you want in a pair of rock climbing shorts.
At $50, these shorts aren’t the cheapest option out there, but they’re also far from being the most expensive. They come in 9 colors with UPF 50+ protection and abrasion-resistant material. With 86% nylon and 14% spandex, they’re super stretchy. The waistband is adjustable with a button, zipper fly, and belt loops — use what you want and don’t use what you don’t want to in order to get your fit just right. The 10” seam is a moderate length — not the longest on this list nor the shortest. In every way, these shorts are a versatile, middle-of-the-road pair of rock climbing shorts. Some climbers found them baggy.
- Features: Gusseted Crotch, UPF 50+, Abrasion-Resistant
- Colors: 9 colors
- Pockets: 2 front, zip thigh pocket, back pockets
- Waistband: Button and Zipper Fly with Belt Loops
- Inseam: 10”
- Can be dressed up or down
- 86% Nylon, 14% Spandex
Rock climbing can be a year-round activity with the right gear and apparel. This includes rock climbing shorts. Whether you’re interested in a pair you can dress up or down, a pair you can wear long or short, an inexpensive pair, or a pair with all the bells and whistles, this list has the best climbing shorts for you.
{ TOP 25 } Best Camping Tents – 2020 Reviews
Views: 0
When it comes to camping, there’s no piece of gear that’s more important than your tent. As your home away from home when you’re in the great outdoors, a quality tent is essential for protecting you from the elements each night. But, with so many different models out there on the market today, finding the best camping tent for your needs is incredibly difficult.
To ensure that you have all the information you need to find the right tent, we’ve compiled the ultimate resource for the best rated camping tents. We’ll talk you through the basics of choosing a camping tent and answer the most common questions we get about these shelters. Plus, we’ll even provide our recommendations for the top rated camping tent brands and models out there.
Start here to learn about the different features you should consider in a tent.
Learn more about the most reliable camping tent manufacturers in the industry.
Check out the safety guidelines from expert to stay happy and safe outdoors.
Learn about common mistakes when buying tents so you choose the right one.
The process of choosing a camping tent can be tricky because there are many different factors you need to consider when selecting the model that best fits your needs. With so many tents out there, this can be a daunting task, so it’s important to know what to look for in a camping tent. Here are some of the most important features and characteristics to keep in mind:
In the world of tents, you can buy either a double wall or a single wall model. Basically, a double wall tent has two parts – an inner tent body and a waterproof tent fly. This is by far the most popular model for tents as it provides a lot of versatility in a range of different conditions.
Double wall tents are ideal because they offer ample breathability, due to their mesh inner body, while also protecting campers from the wind and rain. Single wall tents, on the other hand, tend to be lighter and more compact than their double wall cousins. However, they are often less breathable and less weather-resistant.
The most common tents are known as “freestanding” tents because they can be set up without being anchored to the ground. While the majority of tents available on the market today are freestanding tents, which are easier to set up, semi-freestanding models are becoming more popular.
Semi-freestanding tents tend to weigh less because they use fewer poles in their construction. This makes them common in the ultralight world, but they often aren’t strong enough for very harsh conditions.
Tents can come in a variety of different shapes, each with its own advantages and disadvantages. Most modern backpacking tents will be either dome, a-frame, or tunnel tents. These three shapes tend to be best in high winds, but offer less livable space than alternative models. Car camping tents, however, will generally have a cabin shape, which helps maximize interior space.
The sleeping capacity of a tent is of the utmost importance because it dictates the number of people you can fit inside. While the most popular backpacking tents are made for two people, you can find models that fit up to twelve campers.
Generally speaking, it’s best to buy a tent that can accommodate the average number of people you go camping with. However, if you really like your personal space, it might be a good idea to get a slightly larger tent. Although this means carrying a bit of extra weight, that added space can be essential for storing your gear inside your shelter at night.
No one likes to feel cramped, but a tent is an inherently confined space. For the most part, backpacking tents will offer minimal interior space because they’re trying to minimize weight and packed size for backcountry adventures. Car camping tents, on the other hand, will often provide much more interior space and comfort than backpacking models.
If maximizing interior space is important to you, look for a tent that’s got straight-sided walls and tall ceilings. These two features will increase the livable space inside a tent and make it much more comfortable to be in. However, tents with straight walls and tall ceilings tend to be heavier and less durable than more compact models.
The doors of a tent might seem like a boring thing to look at, but they can make a huge difference to the functionality of the tent. Having small doors makes it more difficult to get in and out of the tent at night. Plus, if you only have one door, you’ll have to crawl over your tent mates to answer nature’s call while camping.
Thus, the most comfortable tents will have multiple large doors that allow for easy entry and exit. Additionally, the best tents will have one or more vestibules, which are basically covered openings to your tent. Vestibules are an ideal place to store your gear outside of your tent to protect it from the elements.
Keep in mind, though, that more doors and larger vestibules translate to heavier and bulkier tents. So, while these features are great, they do have some drawbacks.
The main purpose of a tent is to protect you from the elements, but some tents do this better than others. The most waterproof tents will be made of a durable, high denier ripstop nylon with a DWR coating. The DWR coating helps water bead off the surface of the tent to stop it from soaking through.
Wind resistance, on the other hand, has less to do with the materials of the tent and more to do with the structure of the shelter itself. Generally, dome shape and tunnel tents will hold up better in the wind than cabin tents.
This is because the straight-sided walls and high ceilings of a cabin tent catch the wind and can cause the poles in the tent to break. Therefore, if weather-resistance is your goal, it’s best to look for a more compact dome or tunnel backpacking tent for your adventures.
No one likes to spend hours setting up their tent when they get to camp. So, finding a tent that’s quick and easy to set up is ideal. Most modern tents will feature some form of color-coded system to help you figure out where to put the poles during the setup process.
Generally speaking, tents with fewer poles will be easier to set up. You’ll also find that freestanding tents are a bit easier to pitch than semi-freestanding varieties. So, if you struggle with setting up tents, look for a relatively simple freestanding model.
The last thing you want is to spend your hard-earned money on a tent, only to have it break after a day or two in the mountains. Durability is a concern for any camper, so it’s certainly something you should look for when shopping for a tent.
The most durable tents on the market will be made with a high-denier ripstop nylon fly and robust aluminum poles. While you’ll certainly find other materials in some of the most popular tents, lightweight fabrics and thin carbon or aluminum poles tend to break easily in high winds. Therefore, if durability is your top concern, look for a tent with some beefy poles and thick rainfly fabric.
The weight of a tent is more of a concern for backpackers and climbers than it is for car campers. However, even if you don’t have to carry a tent on your back, a heavy shelter is still a pain to transport and set up.
Generally, lightweight tents will be less durable than heavier alternatives, unless you’re willing to pay top dollar for premium lightweight fabrics. Ultimately, every camper needs to decide whether they want to prioritize weight, durability, or cost when it comes to their tent.
The packed size of a tent greatly affects your ability to pack it into your backpack on a camping trip. Although this is less of a concern for car campers, backpackers tend to prefer tents that are quite compact. A bulky tent is quite annoying to pack and can make things difficult for you at camp each morning on a backpacking trip.
When buying a new tent, it’s often a good idea to buy from a trusted brand. While there are dozens of tent manufacturers out there, these are some of the best brands in the business today:
Utah-based Black Diamond Equipment was founded in the late 1980s by world-class climber Yvon Chouinard of Patagonia fame. Although it started out as a climbing gear company, Black Diamond expanded its repertoire over the years to include a large line of hiking and camping gear. These days, their line-up of tents are known for being some of the most durable and functional, particularly for adventures deep into the mountains.
MSR, or Mountain Safety Research, is a Seattle-based company that specializes in stoves, water filters, snowshoes, and tents. MSR is constantly innovating, finding new ways to create lightweight, yet robust tents that are designed to withstand the test of time. They offer everything from super light shelters to durable four-season tents so they’re a great companion on any camping trip.
The North Face was founded by legendary climber Doug Tompkins as a climbing gear manufacturing company in the late 1960s. Since then, they’ve branched out, becoming well known for their technical and lifestyle clothing. When it comes to tents, The North Face makes a fantastic line-up of burly expedition tents that are perfect for an extended trip into remote terrain.
Nemo is a New Hampshire-based company that’s popular for its cutting-edge, innovative technology. Most of Nemo’s tents fall into the “lightweight” category, but they’re always looking for new ways to improve on the classic tent design. One of their most popular innovations is AirSupport Technology, which increases the durability of tent poles for use in harsh weather.
Marmot has been making outdoor sporting goods since the mid-1970s, particularly for campers and hikers. Their line-up of tents focuses on simplicity and value, so they’re a great company to check out if you’re on a budget.
As an industry leader in outdoor sporting goods for 120 years, Coleman is perhaps the best-known name on this list. While Coleman got its start as a manufacturer of gasoline lanterns, these days, they have a huge line-up of camping gear available for your adventures. Coleman’s tents are affordable, functional, and comfortable, so they’re popular amongst car campers around the world.
Looking for a new camping tent? We know you have a lot of different models to choose from. So, here are our top picks for the best rated camping tents on the market today:
Here are 8 best rated camping tents, categorized by sleeping capacity:

With an amazing combination of livability and lightweight, the MSR Hubba NX 1 is a solo backpacker’s dream tent. Specifically designed for three season camping, the Hubba NX 1 uses Easton Syclone Poles and Xtreme Shield waterproof technology for maximum weather-resistance in the mountains.
Although it packs down small and weighs just over 2 lbs (1kg), the Hubba NX 1 features plenty of interior head and elbow room for your comfort. It also has a large side-entry vestibule, which is perfect for storing gear at night while you sleep. Plus, the Hubba NX 1 has an incredibly simple set-up system, thanks to its single pole and color-coordinated rainfly.

Nemo designed the Dragonfly to help bridge the gap between weight and comfort in the world of backpacking tents and it certainly lives up to expectations. Thanks to its two large doors and two vestibules, it’s easy to get in and out of the Dragonfly at night, even while storing your gear.
The Dragonfly has a single pre-bent DAC Featherlight pole that cuts weight while providing plenty of durability and an easy set-up. The Dragonfly’s inner tent is made with a white no-see-um mesh netting to protect you from the bugs while the integrated 20D nylon tub floor keeps you dry in the rain. There are also plenty of pockets in this 2 person tent so you can stay organized while you camp.

This spacious, yet lightweight three person tent from Marmot is great for a variety of camping adventures. The Fortress 3 uses a full fabric inner tent with large mesh panels to strike the perfect balance between insulation and breathability. Its two large D-shaped doors make it easy to get in and out of the tent while the vertical walls of the Fortress maximize interior living space.
The Fortress 3 has integrated pockets for organizing gear inside the tent while a special lampshade pocket can hold a headlamp and provide light for the entire tent. If that wasn’t enough, the Fortress 3 is fully seam-taped around the fly and floor for increased weather-resistance in poor conditions.

A veritable fortress in the outdoors, the North Face Bastion 4 is a do-anything 4 person tent for all exploits in the backcountry. The Bastion 4 features a dome-shaped construction with crisscrossing poles for added strength and durability in the most severe storms. It also has high-strength guylines and equalizers to help keep your tent anchored down in high winds.
Inside the tent, the Bastion 4 has 10 interior pockets and lots of hanger loops for easy organization. The downside to the Bastion 4 is that it’s quite heavy, but as one of the most durable four season tents out there, a little extra weight seems like a fair compromise.

A time-tested classic of the camping world, the North Face Wawona 6 is a fantastic shelter for car camping in a small group. This spacious palace-like tent has enough room to sleep 6 campers, providing them with ample headroom, extensive personal space, and the ability to stand upright.
Unlike many other tents in our review, the Wawona 6 is a single-wall tent, so it’s easy to pitch in just a few minutes. It features a huge front vestibule that’s great for gear storage, as well as a second door in the rear for convenience. Inside the Wawona 6, there are plenty of mesh pockets and hang loops for gear storage, as well as a drying line so you can always have dry clothes when you’re on the go.

Do you love camping but hate the bugs? If so, the Coleman Evanston Dome 8 just might be the best 8 person tent for your needs. This beloved Coleman tent is incredibly easy to pitch in just a few minutes, making it ideal for camping with a large family. Although it’s easy to set up, the Evanston Dome 8 features Coleman’s WeatherTec System which protects you and your family from the rain and the wind while you’re out and about.
The Coleman Evanston 8 is large enough to fit two queen-sized airbeds for maximum comfort, or you can house 8 campers in their sleeping bags. The best part? The Evanston Dome 8 has a very spacious front mesh screen porch that provides ample outdoor living space without the bugs. What more could you want?

As one of the best camping tents under $200, the Ozark Trail Dark Rest Instant Cabin is a good value for the money. This large cabin-shaped tent is easy to set up in just 60 seconds with no assembly, thanks to its pop-up design. The Dark Rest Instant Cabin also integrates Ozark Trail’s proprietary dark rest technology to block sunlight, cooling down the tent and making it easier for you to get a good night’s sleep.
Inside the tent, there are multiple skylights and ceiling panels, so you can adjust the light in your living space. The Dark Rest Instant Cabin also has eight large windows for breathability and has a removable room divider so everyone can have some privacy. With enough room for either two queen airbeds or ten campers, the Dark Rest Instant Cabin is a great budget tent for a large family.

Looking for the best camping tent under $300? Look no further than the CORE 12 Person Instant Cabin Tent. This shelter from CORE can be pitched in under 2 minutes, thanks to the tent’s pop-up design. With pre-attached poles, all you need to do to get started is unpack, unfold, and extend the tent for a quick and easy set up.
The Instant Cabin tent is incredibly roomy on the inside and has a large double door design, which makes it easy to access the interior of the tent. Once you’re inside, you can zip up the privacy panels on the doors and windows, if you need some personal space. Or, you can use the hanging storage pockets to organize your gear. Plus, you can use the included room divider to split the tent in two and provide everyone with the personal space they desire.
Here are the 7 best tents, categorized by camping type:

As one of the best-selling, best quality two person backpacking tents ever, the MSR Hubba Hubba NX 2 is a great shelter for hikers who head to remote terrain. Designed specifically for mountain pursuits, the Hubba Hubba NX 2 strikes a nice balance between livability and packability.
The Hubba Hubba NX 2 uses Easton Syclone poles and MSR’s proprietary Xtreme Shield waterproof technology to provide ample weather-resistance in any storm. The tent itself features two large StayDry doors as well as two sizable vestibules for external gear storage. Or, you can use the interior gear storage pockets for organization. The best part? The Hubba Hubba NX 2 sets up in just minutes, thanks to its single pole, color-coded design.

Made to last, the all-weather Big Agnes Titan 6 mtnGLO tent is a car camper’s paradise. The Titan 6 has an external pole design, so you can set it up quickly as either a full tent or just as a shade shelter for a large group.
When it comes to livability, the Titan 6 is one of the most spacious six person tents around, thanks to its straight-wall design and high center height. You can even add on the large optional vestibule for added outdoor living space and extra shade. Oh, and the Titan 6 even comes with Big Agnes’ mtnGLO system, which illuminates the tent, wherever your adventures might take you.

Motorcycle campers are a unique breed and they need a tent that can handle the rough conditions of life on the road. Unlike other tents, which just offer a small place to lay your head at night, the Vuz Motorcycle Tent provides ample living space for maximum comfort.
This 18 foot (5.5m) long tent has four points of entry for your convenience. It’s a three-season camping tent that can withstand heavy rain and wind for use in any conditions. Although it’s quite spacious, the tent packs down into a small stuff sack, so it’s perfect for use with a motorcycle. If all of that wasn’t enough, the Vuz Motorcycle Tent even has a built-in motorcycle garage so you can keep your bike safe at night.

Are you looking for the perfect camping companion for your truck? The Napier Outdoors Sportz Truck Tent just might be exactly what you need. This affordable truck tent is one of the best out there for under $300 and offers plenty of space for life on the road.
The Sportz Truck Tent is quick and easy to set up, right on the bed of your truck so you don’t need to waste time looking for that perfect campsite each night. It features a full floor design for maximum warmth and comfort each night. Plus, it has a large, awning-style opening to provide extra shade and weather protection, wherever life might take you.

Canvas tents are well-known for their durability and versatility, and the Kodiak Canvas Flex-Bow 6 is no exception. Made with a durable, 100% cotton duck Hydra-Shield canvas, the Flex-Bow 6 is an ideal hunting tent for use in any conditions.
The Flex Bow 6 has a comfortable 6’6” ceiling height and two large D-shaped doors for your convenience while camping. It also has four large windows with no-see-um mesh and two vents to help keep air circulating in hot weather. The Flex Bow 6 even has a large awning over the opening to expand your living space into the outdoors for added comfort on your next hunting trip.

As one of the few tents out there that are specifically designed for bike camping, the Big Agnes Fly Creek HV UL is a must-have for any bikepacker. This award-winning tent has a vertical door and steep walls for maximum interior space for more comfort on your bike camping adventures.
Although it’s built to withstand the rigors of any three-season outing, the Fly Creek is made with some of the lightest materials on the market today, including DAC poles and high-quality ripstop nylon. It’s easy to pitch the tent in just minutes for the perfect night’s sleep on the road. At just about 1lb 11oz in weight, the Fly Creek HV UL is the perfect companion for those fast and light biking trips, anywhere on earth.

The Black Diamond Ahwahnee 2 is an incredibly versatile single wall tent that’s perfect for a desert camping adventure. Designed for two people, this single wall tent is both waterproof and highly breathable, cutting down weight thanks to its single wall design.
For desert camping, the Ahwahnee 2 is quick and easy to set up but is incredibly strong against the wind, so it’s great for exposed environments. Plus, the Ahwahnee 2 features two full side doors with integrated mesh that can be pitched out like awnings for extra shade and ventilation on those scorching hot desert days or for added weather protection during those occasional desert storms.
Here are the ten best tents, categorized by tent type:

Just because a tent is lightweight doesn’t mean it’s going to be an ideal ultralight backpacking shelter. While many ultralight tents struggle to balance livability and durability with weight savings, the Nemo Hornet Elite Ultralight seems to get it right. This super-compact tent is a top choice for minimalist backpackers that won’t sacrifice quality in their gear.
The Hornet Elite is made using top-of-the-line 7D ripstop nylon for the fly and DAC featherlight poles for durability and weight savings. The tent itself is remarkably spacious and contains black no-see-um mesh for added ventilation on hot nights. Oh, and the Hornet Elite comes with Nemo’s Divvy dual stage stuff sack so you can easily spread the tent’s weight between two hikers.

When it comes to staying dry in the rain, there really isn’t a better option than the Black Diamond Bombshelter 4. This expedition-style dome-shaped tent is made for adventures into the world’s most extreme environments.
Although it’s just a single-wall tent, the Bombshelter’s four intersecting poles provide incredible durability and stability in high winds as well as exceptional waterproofing in a storm. You can even set up the entire tent from the inside, so you can stay protected from the rain throughout the setup process. The Bombshelter even has an optional vestibule to add plenty of gear storage and outdoor living space during an expedition.

As one of the strongest expedition tents around, the Black Diamond Fitzroy 3 can house three adults or two adults and all of their gear on any winter outing. The Fitzroy has a steep-sided design that maximizes headroom and interior living space while also improving its durability in heavy snow.
The Fitzroy can be set up from the inside during a storm and is amazingly stable in high winds, thanks to the four crisscrossing poles. Inside the tent, there are mesh pockets for gear organization, while the two double doors with mesh paneling make it easy to enter and exit the tent or increase the ventilation, so it’s perfect for winter camping.

Superbly spacious, the Marmot Limestone 4 is a great family summer camping tent for warm-weather trips. The Limestone 4 features vertical walls for plenty of headroom, as well as a more comfortable camping experience.
When it comes to weather resistance, the Limestone is fully seam-taped and has a tub floor to keep you dry. But, on warm days it also features ample ventilation, thanks to the large mesh paneling in the inner tent. There are also plenty of interior pockets for organizing your gear as well as two large doors and vestibules for convenience and gear storage, making the Limestone 4 an excellent family tent.

Do you enjoy camping under the stars but hate having to set up your tent? Well, with the CORE 4 Person Instant Dome Tent, you don’t have to worry about spending hours pitching a tent when you arrive in camp.
This instant tent from CORE features pop-up technology that effectively pitches itself in 30 seconds or less. The tent can accommodate 4 people in sleeping bags or one queen-sized air mattress and has an interior height of 54 inches (137.2cm). Plus, the CORE has an internal gear loft for organization as well as an electrical cord access port so you can stay connected while camping.

If you long for life on the open road, the Tepui Explorer Kukenam just might be what you’re looking for. This rooftop tent can house up to three people all-year-round during any road trip. It’s made with high-quality 600D ripstop nylon and is both UV and mold-resistant for added durability.
During the summer months, the Tepui’s large mesh panels provide plenty of airflow while the overhanging canopy protects you from the rain. Oh, and the tent is quick and easy to set up so you can get a good night’s sleep wherever life takes you.

Built specifically for large families on a budget, the CORE 9 Person Instant Cabin Tent is a fantastic home away from home on a camping trip. The tent can be set up in just 60 seconds, thanks to its pre-attached poles. It also features CORE H2O Block Technology and fully sealed seams to keep you warm and dry at night.
The tent itself has large windows and doors for added ventilation and easy entry but also has zippered privacy panels for use in busy campgrounds. Inside, you can easily organize your gear with the hanging storage pockets or you can use the included room divider to give everyone the privacy they need.

A day at the beach should be comfortable and relaxing. With the Pacific Breeze Easy Set Up Beach Tent Deluxe XL, you can turn that concept into a reality. The Deluxe XL is both lightweight and compact, as well as incredibly easy to pitch in just seconds.
The tent itself provides UPF 50+ sun protection for those long beach days, as well as some shelter from the wind and the rain. The Deluxe CL has three large windows that allow for plenty of ventilation on hot summer days. Oh, and you can even zip up the extendable floor to turn it into a privacy shield for changing out of your wet swimsuit on the go.

There’s nothing wrong with camping in style, which is why the White Duck Outdoors Premium Luxury Avalon Canvas Bell Tent wins our award for the best canvas tent. This tent from White Duck Outdoors is made with ultra-durable water-repellent cotton canvas for maximum weather-resistance.
It features a stove jack opening, so it’s perfect in winter, but also has zippered mesh windows for summer ventilation. Inside, it’s incredibly spacious and offers a 9 foot (2.7m) center height, so it’s comfortable for the whole family during extended camping trips.

MSR Access is a fantastic 4 season camping tent for year-round adventures. The Acces comes in a one-person and a two-person model, both of which are perfect for use in the summer or winter. Ideal for treeline winter adventures, the Access is lighter than a traditional mountaineering tent, but also strong enough to hold up in heavy snowfall.
It offers superior warmth due to its limited mesh paneling but also ventilates well for a four season tent. The Access can even be set up in minutes, thanks to its single pole and color-coordinated system, which is ideal for colder environments.
Here are some of our top tips for making the most out of camping in a tent:
If you like to camp in the winter, you’ll need to find some way to insulate yourself from the cold. Thankfully there are a few different methods for insulating your tent for winter camping. Here are a few:
- Use a ground mat. A rug, blanket, or thick towels can be used as added insulation to protect you from the ground. If you’re backpacking and can’t bring anything too bulky, you’ll want to use two sleeping pads for extra warmth. One inflatable sleeping pad on top of a foam sleeping pad usually does the trick.
- Find a natural windbreak. Much of the cold that we feel while winter camping is due to the cooling effect of wind. To help insulate your tent against the wind, try pitching it somewhere with a natural windbreak. Behind a stand of large trees or boulders is generally a good idea.
- Use a thermal blanket. If it’s really cold out during a car camping trip, you can try taping a thermal blanket to the roof of your tent. This can help reflect your own body heat back toward you to make the entire tent warmer at night.
While “roughing it” can be fun for some, it’s not everyone’s idea of a good time. However, there are plenty of ways to stay comfortable while tent camping, the key is finding a system that works for you.
If you find that you’re generally uncomfortable while sleeping in a tent, the most important thing to consider is the quality of your sleeping pad. Since most of us are used to sleeping on a mattress, a thin foam sleeping pad can seem quite uncomfortable. So, it’s generally best to look for a thick inflatable sleeping pad which will better mimic the mattress you use at home.
Finally, if you don’t have one already, a camping pillow is a must-have. Although it might seem like a minor accessory while camping, a pillow can make you much more comfortable at night. There are plenty of great inflatable options out there, like this one from Exped, which adds comfort without extra bulk in your pack.
Staying warm at night is of the utmost importance while camping. If you’re struggling to stay warm, try the following techniques:
- Use a warmer sleeping bag. If it’s 30 degrees outside and your sleeping bag is only rated to 40 degrees, you’re probably going to have a miserable night’s sleep. Instead, try a warmer sleeping bag that’s designed for colder conditions.
- Try a sleeping bag liner. If you can’t quite afford a warmer sleeping bag, you can always try an insulating sleeping bag liner. Some, like this one from Sea to Summit, can increase the warmth of your sleeping bag by up to 25 degrees Fahrenheit (14 degrees Celsius).
- Wear a hat. We lose a lot of heat through our heads often because it’s the only part of our body that isn’t covered in clothing. So, wearing a hat at night can help you stay warm.
- Try a hot water bottle. Before you go to bed, boil some water and put it in a hard plastic water bottle, like a Nalgene. Then, take the water bottle into your tent and place it in your sleeping bag. Soon enough, you’ll start to feel the warmth from your hot water bottle, especially on a colder night.
- Wear insulating thermals. The clothes you sleep in have a huge impact on how warm you are at night. If you’re not already wearing insulating long underwear, it’s highly recommended, especially for your lower body.
- Don’t forget warm socks! More often than not, people have cold feet when they camp. Generally, this is because they don’t have a warm pair of socks to sleep in at night. Get one pair of dedicated sleep socks that are extra warm and keep them in your sleeping bag. These socks need to stay dry at all costs so you can have warm feet each night.
If you live somewhere that’s particularly warm and muggy in the summer, camping can seem a bit uncomfortable. However, there are ways to stay cool even while camping in the heat. Here are some options:
- Find some shade. Often, it’s warmer in a tent than outside of it, especially in the middle of the day. If it’s oppressively hot in your tent, try pitching your tent in the shade instead.
- Go for a swim. Swimming is a fun and easy way to cool off while camping. Plus, it’ll help you feel squeaky clean after a day on the trail.
- Get a cooler sleeping bag. If your sleeping bag is too warm for the conditions, you’ll have a hard time sleeping. A lightweight summer sleeping bag can make a huge difference.
- Try a tent fan. When you’re car camping in the heat, you can consider using a small tent fan. This will help keep air circulating in your tent and can provide some cooling relief.
- Vent your tent. Most tents come with some sort of built-in ventilation system. However, you can vent your tent even more by rolling up the rainfly, especially at the door/vestibule for added airflow.
The vast majority of quality camping tents will come from the factory fully waterproof. However, if yours didn’t, or you need to re-waterproof your tent, here’s what you want to do:
- Make sure your tent. is clean and completely dry.
- Check the seams for leaks. If your tent has leaky seams, you’ll want to buy some Seam Grip. Once you have the seam grip, you can go ahead and use the included brush to cover all the seams of your tent with the sealant. This will stop water from dripping into your shelter at night.
- Refresh the DWR coating. Most tents have a DWR coating on their rainfly. This helps water bead off of the fabric and keeps you dry in your tent. To refresh the DWR coating, you’ll need Nikwax Solarproof. First, you’ll spray the tent with some clean, fresh water to get it damp. Then, you evenly apply the waterproof spray on the outside of the rainfly. After a few minutes, use a damp cloth to wipe off the excess coating before setting your tent out to dry completely.
While every tent is different, there are some standard procedures you can follow to pitch your tent when you arrive at camp and fold it up at the end of your trip. Here are some of our top tips:
Setting up a tent may seem very complicated, but there is a method to this madness. These are the steps you should follow:
- Find a flat spot. No one likes camping on an uneven surface, so start by scouring camp for the flattest place to pitch your tent. Ideally, you’d find a nice grassy patch of ground, but if not, look for a place with minimal rocks and twigs.
- Prep the tent body. Generally speaking, you’ll then need to lay out the tent body where you plan to pitch it. Try to orient the tent so that the door is facing the way you want it to when everything is finished.
- Set up the poles. This step differs from tent to tent. While some tents use a “clip-on” method for their tent poles, others have sleeves that you insert the poles into. Regardless, step three of pitching a tent is to set up the poles. Once this is done, you should have a fully set-up tent body.
- Pitch the rainfly. After you’ve set up the tent body, it’s time to cover it with the tent fly. So, orient the fly to ensure it lines up with the doors of your tent. Then, attach the fly to your tent body. For some tents, this is a clip system and for others, you’ll need to skip this step and head right into staking out the tent.
- Stake out the tent. The last step in pitching a tent is staking it out. To do this, you’ll place your tent stakes in the ground at a slight angle away from the tent. Then, take the tent guylines, wrap them once around the stakes, and fasten them back to the tent using a knot of your choice. The trucker’s hitch is ideal for this purpose. Voila! You have a fully pitched tent!
At the end of your camping trip, you’ll need to pack up your tent. If you’re not quite sure how to do this, follow these steps:
- Disassemble the tent. Take the tend apart and separate the fly from the tent body and the poles.
- Lay out the tent fly and body. Lay the tent fly down on a flat piece of ground. Then, cover it with the tent body.
- Fold the fly and the body. Fold the tent fly and the body so that it creates one long, rectangular length of fabric. Place the folded poles at one end of the tent and roll the tent up tightly.
- Place the tent in the included stuff sack. Finally, place the rolled-up tent in its stuff sack to complete the process.
If you’re going to invest a substantial sum of money into a new camping tent, you’re certainly going to want to take care of it. Tent care, in general, is more of an on-going task, rather than something you do every once in a while. Here are some tips to help ensure that you get the most out of your tent:
- Zip carefully. A malfunctioning zipper is perhaps the most common issue we see with tents. Thankfully, it’s possible to avoid most zipper problems. Be careful when using your zippers and always zip slowly. Avoid simply “pulling” the door of your tent to open it, just slide the zipper open each time.
- Take care of your tent poles. After zippers, tent poles are the next most likely thing to break. When it comes to tent poles, never force them to bend too far, or you could risk snapping them. Additionally, if your tent uses pole sleeves, be careful when you insert the poles or you could risk poking a hole in your tent.
- Avoid rocks and twigs. Rocks and twigs under your tent are a surefire way to poke holes in your tent floor. Choose “soft” tent sites, like grass and pine needles, whenever possible.
- Push poles, don’t pull. If your tent has pole sleeves, always push your poles to remove them, never pull. If you pull the pole, you can snap the shock cord on the inside and break your tent poles.
- Never store a wet tent. As soon as you get home after a trip, hang your tent up to dry. Your tent should be completely dry before you roll it up and pack it away or it could grow mold and mildew.
- Clean your tent frequently. While you don’t have to do this after every night of camping, an occasional rinse off with fresh water can make a big difference in the life of your tent. If your tent is particularly dirty, you could even do some spot cleaning with a sponge and a non-detergent soap.
- Reapply waterproofing treatments regularly. Even the most waterproof of tents will require a reapplication of the waterproofing treatment every once in a while. Check out the section in this article about waterproofing your tent to learn more about the process.
Camping is a fantastic way to spend more time in the outdoors. But, it is possible to get hurt if you’re not careful. These are some of our top safety tips for tent camping:
- Never cook in your tent. During a storm, it may be tempting to simply cook your dinner inside your tent. However, doing so can expose you to carbon monoxide, a deadly gas. Carbon monoxide forms and builds up when fuels, like the isobutane found in your gas canisters, aren’t fully combusted. When this happens in an enclosed space, like your tent, it can lead to serious injury or death. So, do yourself a favor and only cook outside.
- Be careful where you pitch your tent. Before you select a campsite for the night, look above you. Is there a dead tree or branch waiting to fall? Is there a high likelihood of rockfall that could hit your tent? These are the kinds of things we should think about every night while camping to avoid any potential dangers.
- Store your food properly. If you’re camping in bear country, you shouldn’t have food in your tent. Generally, if you’re in bear country, you’ll need to either use a bear hang, a bear canister, or a bear box to protect your food from these loveable mammals. Check in with your local authorities to see what the regulations are.
- Camp away from your fire. While it might be convenient to have a fire right outside your tent, this can be dangerous. If the wind shifts, your campfire can quickly engulf your tent and your gear, potentially leaving you in the woods without any shelter for the night. Always keep your campfire at least 15-20 feet (4.5-6.1m) from your tent.
Buying a camping tent is a big investment, so you certainly want to get it right the first time. However, we often see a number of different mistakes from people who are perhaps over-eager to get a tent and get out into the mountains. Here are some of those mistakes and ways to avoid them:
- Buying a tent that is too small. Getting a tent that’s too small for your needs will make you feel cramped while you’re camping. Unless you’re planning on camping alone, you’ll probably find that you want more personal space in a tent with another person than a two person tent can provide. So, it’s worth considering a tent that’s rated for 1-2 people more than you actually need.
- Winter camping in a three-season tent. Since many people want to buy just one tent that they can use in a variety of settings, we often see people buy three season tents for winter use. While some three-season tents are okay for four season adventures, you risk damaging your tent in high winds and heavy snowfall if you do this. Thus, if you do think that you’ll camp in the winter, consider buying both a three-season and a four-season tent.
- Buying the wrong kind of tent. At this point, you’re well aware that there are many different kinds of tents out there. While some tents can be used for a variety of different camping styles, some are more discipline-specific. The issue we generally see is that people try and take a heavy, less robust car camping tent into the backcountry. So, if you do plan on going into the mountains, we recommend a tent that’s specifically made for that purpose.
At the end of the day, a camping tent is a major investment. As your home away from home when you’re outside, you need to be sure that the tent you buy is going to be reliable enough for any adventure.
That being said, there is no one-size-fits-all tent that excels in every environment. Instead, it’s important that you focus on the features that are most important to you so you can get the best camping tent for your needs. Happy trails!
Build Your Own Backyard Garden Climbing Wall: A Beginner's Guide – ABC OF ROCK CLIMBING
Views: 0

Your backyard garden can be more than just a place to grow fresh fruits and vegetables; it can also be a space where you can practice your passion for rock climbing. Building a climbing wall in your garden can provide a unique and thrilling way to stay active and challenge yourself physically. The wall can be constructed using durable materials and designed to replicate the natural features of a real rock face, creating a challenging and authentic climbing experience.
When I decided to build a climbing wall in my garden, I was a little intimidated by the idea. But with a little research and some help from friends, I was able to create a fun and safe climbing space that I now use regularly. Whether you’re a seasoned climber or just starting out, building a backyard climbing wall can be a great way to challenge yourself and improve your skills. Plus, it’s a great way to get outdoors and enjoy your garden in a new way.
Understanding the Basics of a Climbing Wall
Climbing Surface
The climbing surface is the most important component of a climbing wall. It is the part of the wall that the climber interacts with and is responsible for providing traction and grip. The climbing surface can be made of a variety of materials, including wood, plastic, and concrete.
Holds
Climbing holds are the grips that the climber uses to ascend the wall. They come in a variety of shapes and sizes, and can be made of plastic, resin, or other materials. It’s important to choose holds that are appropriate for your skill level and the type of climbing you plan to do.
Anchors
Anchors are the points where the climbing wall is attached to a stable structure, such as a building or a tree. They are responsible for supporting the weight of the wall and the climber, so it’s important to choose anchors that are strong and secure.
Safety Equipment
Safety equipment is essential for any climbing wall. This includes a harness, rope, and other devices that are used to protect the climber in case of a fall. It’s important to use safety equipment properly and to follow all safety guidelines when climbing.
By understanding these basic components of a climbing wall, I was able to design and build a safe and enjoyable climbing experience in my own backyard.
Choosing the Right Location for Your Climbing Wall
Here are some things to consider when choosing your location:
- Space: You will need enough space for the climbing wall and for climbers to move around it safely. Make sure to measure the area and plan accordingly.
- Accessibility: Consider how easy it will be to get to the climbing wall. You don’t want to have to navigate through a maze of obstacles just to get to it.
- Sun Exposure: Keep in mind that the sun can be a factor in the usability of your climbing wall. If it’s too hot or too bright, it may be uncomfortable or difficult to climb. Consider providing some shade or placing the wall in a shaded area.
- Privacy: Depending on where you live, you may want to consider the privacy of your climbing wall. If you have neighbors close by, you may want to position the wall so that it’s not visible from their property.
- Ground Surface: The ground surface should be level and stable. Uneven ground can make it difficult to climb and can also be dangerous.
- Weather Exposure: Consider how the climbing wall will hold up to different weather conditions. If you live in an area with harsh winters or frequent rain, you may need to take extra precautions to protect the wall.
Designing Your Backyard Climbing Wall
Choosing the Wall Type
When designing your backyard climbing wall, the first thing to consider is the type of wall you want to build. There are three main types of climbing walls: bouldering walls, top-rope walls, and lead climbing walls.
Bouldering walls are low to the ground and don’t require ropes or harnesses. Top-rope walls have an anchor at the top of the wall that the climber is attached to via a rope and harness. Lead climbing walls require the climber to attach their own rope to anchors as they climb up the wall.
Consider your skill level and the skill level of those who will be using the wall before deciding on the type of wall to build. Bouldering walls are best for beginners, while top-rope and lead climbing walls are better suited for more experienced climbers.
Determining the Wall Size
The next step is to determine the size of your climbing wall. Consider the available space in your backyard and the intended use of the wall. If you plan on using the wall for bouldering, a smaller wall may suffice. If you plan on using the wall for top-rope or lead climbing, a taller wall will be necessary.
It’s important to note that taller walls require more space and a larger budget. Keep this in mind when determining the size of your wall.
Planning the Wall Layout
Once you’ve determined the type and size of your climbing wall, it’s time to plan the layout. Consider the placement of the wall in your backyard and the orientation of the wall.
The wall should be placed in an area that is easily accessible and has enough space for climbers to move around. The orientation of the wall should also be considered. A south-facing wall will receive more sunlight, while a north-facing wall will be in the shade for most of the day.
Consider the features you want to include on the wall, such as handholds and footholds. These should be placed strategically to create a challenging and varied climbing experience.
Materials and Tools Needed
Essential Building Materials
Here are the essential materials you’ll need:
- Plywood sheets (4×8 feet)
- T-nuts (1/4 inch)
- Climbing holds
- Screws (2 inches)
- Wood glue
- Paint or sealant
The plywood sheets will serve as the base for the climbing wall. T-nuts are necessary for attaching the climbing holds securely to the plywood. Climbing holds come in different shapes and sizes, so choose ones that are appropriate for your skill level and the size of your wall. Screws will be used to fasten the plywood to the framing structure. Wood glue will help reinforce the joints between the plywood sheets. Finally, paint or sealant will protect the wood from the elements.
In addition to the materials, you’ll need a few tools to build your backyard climbing wall. Here are the tools you’ll need:
- Drill
- Drill bits (1/4 inch and 2 inches)
- Jigsaw
- Screwdriver
- Tape measure
- Level
- Pencil
- Safety glasses
The drill will be used to create the holes for the T-nuts and screws. The jigsaw will be used to cut the plywood sheets to the desired shape. The screwdriver will be used to fasten the screws. The tape measure and level will be used to ensure that the wall is straight and level. The pencil will be used to mark the holes and cuts on the plywood. Finally, safety glasses are essential to protect your eyes from flying debris while cutting and drilling.
With these materials and tools, you’ll be well on your way to building a backyard climbing wall that you can enjoy for years to come.
Building the Climbing Wall
Setting Up the Frame
To start building the climbing wall, I first needed to set up the frame. I decided to use pressure-treated 2x4s for the frame, which I cut to the desired lengths using a circular saw. I then used metal brackets to attach the pieces together, making sure to use a level to ensure everything was straight.
Next, I attached the frame to the wall of my house using lag bolts. I made sure to use a stud finder to locate the studs in the wall and attach the frame to them for added stability.
Installing the Climbing Surface
Once the frame was securely in place, I installed the climbing surface. I used 3/4 inch exterior-grade plywood for the surface, which I cut to size using a circular saw. I then attached the plywood to the frame using wood screws, making sure to space them evenly.
To protect the plywood from the elements, I applied a coat of outdoor paint to the surface. This not only added a pop of color to the climbing wall, but also helped to protect the wood from moisture and other weather-related damage.
Adding the Climbing Holds
With the climbing surface in place, it was time to add the climbing holds. I purchased a set of holds online, making sure to choose a variety of shapes and sizes to provide a range of challenges for climbers.
To install the holds, I used T-nuts, which are threaded inserts that provide a secure anchor point for the holds. I drilled holes in the plywood surface where I wanted the holds to go, then inserted the T-nuts and screwed the holds into place.
Safety Measures to Consider
Proper Use of Safety Gear
Before starting to climb on your backyard climbing wall, with a lot of climbing gear available, it is essential to ensure that you have the proper safety gear. As the owner of the wall, it is my responsibility to ensure that all climbers are equipped with a helmet, harness, and climbing shoes. I always make sure that the harness fits correctly and is tightened securely before allowing anyone to climb. Additionally, I always remind climbers to use the proper technique when belaying to prevent accidents.
Regular Maintenance and Inspection
To ensure the safety of all climbers, it is crucial to inspect your backyard climbing wall regularly. I make it a point to check the wall for any loose bolts, cracks, or signs of wear and tear. I also inspect the safety gear to ensure that it is in good condition and replace any worn-out equipment. Regular maintenance and inspection can prevent accidents and keep your backyard climbing wall in good condition for years to come.
Conclusion
Building a backyard climbing wall is a fun and rewarding project that can provide hours of entertainment for you and your family. As I have shown you, it is not a difficult task, and with a little bit of planning and effort, you can have a great climbing wall in your backyard.
Remember, have fun with your climbing wall! Experiment with different routes and techniques, and don’t be afraid to challenge yourself. Climbing is a great way to stay active and healthy, and building your own climbing wall is a great way to enjoy the sport in the comfort of your own backyard.
{ TOP 7 } Best Quickdraws – 2020 Reviews
Views: 0
Quickdraws are one of the first pieces of climbing gear you’ll buy as a climber, and they’re a staple in anyone’s gear kit. They are what connect your rope to the wall, serving as a critical point of contact to catch you when you fall.
When purchasing such an important piece of gear, you definitely want to make sure that you choose something effective. Luckily, there’s no shortage of awesome quickdraws on the market today. There’s a quickdraw for every budget, and while some may lack in features or ease of use, all the quickdraws recommended in this article are rated for climbing and can be trusted to perform without fail.
We’ve rounded up our top 7 best quickdraws for rock climbing to help narrow down your quickdraw search. We’ll also share some of the different types of quickdraws and what to look for when you’re shopping for your next set of draws.
The mechanics of a quickdraw are fairly simple. There are two carabiners connected by a sling, also called a dogbone. When climbing up a route, one of the carabiners is attached to a piece of protection on the wall and your rope feeds through the other biner. This will allow the system to catch you if you fall, since you’ll be attached to the wall at every point you set up a quickdraw.
There is a wide variety of quickdraws on the market today. There are plenty of options and some are better suited for certain types of climbing. However, most draws are universal enough to work in most situations. A beginner climber doesn’t need to worry too much about the specifications of their draws, but we’re going to provide a run down on the components of a quickdraw and the benefits of different types of draws. Once we cover the types and features of quickdraws, we’ll jump right into our top picks.
Quickdraw Features to Consider
Each quickdraw is made up of two carabiners and a sling. Now the type of carabiner and sling will affect how your draws perform under certain conditions. Here are the pros and cons of the different types of biners and slings.
These carabiners have solid gates that open and close more smoothly than other types of carabiners. They have a smooth notch where the nose of the carabiner connects to the gate. Not only does this provide for easier open/closing of the biner, it also prevents it from snagging on gear while cleaning. The downside to solid gate carabiners is that they are typically more expensive and heavier than wiregate biners. Some solid gate quickdraws will have a bent gate carabiner on one end. This helps you to clip the climbing rope faster and easier, so you should always make sure the bent gate is on the rope end if you have one.
Wiregate Carabiners
Wiregate carabiners are simpler by design. The gate is made up of a loop of stainless-steel wire. Wiregates are lighter than solid gate carabiners and are also less likely to freeze in cold temperatures. Both of these features make wiregates a better choice for ice climbing or mountaineering where you’ll want to reduce weight as much as possible and are often likely to be in cold conditions.
Carabiner Gate Opening
The width that the carabiner can open can affect the ease of clipping. It is easy to get your finger stuck in gates with too small of a clearance. On the other hand, gates with too wide a clearance can make the biner difficult to clip.
Sling Length
Shorter slings are useful for most sport climbs that are relatively straight. If you are climbing trad or even a long, meandering sport route, you might want to have a few longer draws on hand. Longer sling lengths reduce rope drag, but they can be heavier and bulkier. It is a good idea to have a mix of sling lengths if you’re climbing long, meandering routes.
Sling Width
The width of your sling affects the weight and ease of use of your quickdraw. Wider slings are easier to grab than flimsier, skinnier slings.
Now that we’ve covered what to look for in a quickdraw, it’s time for the reviews! Here are the top 7 quickdraws on the market today.

The Petzl Spirit Express is a common sighting at crags. The solid-gate carabiners open and close so smoothly that you’ll never find yourself fumbling with it on the wall. The rope end biner is curved making it easy to clip your rope in. The sling’s tapered shape makes it easy to grab as it fits comfortably in your hand.
The Spirit Express quickdraws come in two sling lengths, which gives you better control over reducing rope drag if you are working on routes that don’t go straight up the wall. They are lightweight and versatile, and really are the premier option for sport climbing.
- Easy to use
- Lightweight
- Comes in two sling lengths

If you’re just starting out or if you’re just working with a shoestring budget, the Mad Rock Concorde quickdraws are the way to go. You can even buy them in a 6-pack for an even deeper discount. Although you’re saving money with these draws, you aren’t sacrificing on usability. The Concorde draws are lightweight, with wire gate carabiners that provide smooth clipping and easy cleaning. The carabiners are tensioned perfectly to snap closed which adds a little extra security.
These draws might pose a problem for those with larger hands, since the carabiners are a bit on the smaller side. However, this isn’t a problem for most and for the price, this minor inconvenience is totally worth it.
- Affordable
- Lightweight
- Easy to clip
- High KN rating

The Black Diamond Posiwire’s offer the best of both worlds when it comes to biner gate types. These quickdraws feature a wiregate biner on one end and a Positron solid gate biner on the other, which is ideal for clipping into bolts or slings. This very obvious distinction makes it virtually impossible to confuse which side is for your rope.
They are lightweight and also have a sturdy, easy-to-grab sling. We’re recommending these for sport climbing but the truth is they perform just as well for trad routes or multi-pitch. The price is fair for these draws.
- Affordable
- Lightweight
- Easy to use
- Wiregate notch can snag while cleaning

The Petzl Ange Finesse quickdraws are ultra-light, durable and strong. These draws perform on any route, but are particularly suited for trad and alpine climbs. They feature unique MonoFil Keylock technology, which allows the gates to open and close fluid and solid for quick, secure clips. The straight keylock nose lets you clip and unclip snag-free, and you can even clip while wearing gloves!
The Ange Finesse quickdraws are lightweight and strong. The sling is 10mm wide and is easy to grab. These draws can be used in a wide variety of weather conditions, making them perfect for trad and alpine routes.
- Lightweight
- Customizable
- Easy clipping/unclipping

They Cypher Firefly II is ultra-lightweight and affordable. It’s so affordable, in fact, that they only cheaper option on this list is the Madrock Concorde quickdraw. These wiregate quickdraws are so compact that they take up little space on your rack, and they’re so lightweight you can carry as many as you need to send longer sport routes or trad routes.
The main drawback to the Cypher Firefly II’s is that they have noticeably smaller biners than other options on the market. This can make clipping a bit more difficult, but most people agree that the minor annoyance of clipping with smaller biners is worth the savings on weight.
- Small carabiners
- Notch in wiregate can snag
- Thin sling can be hard to grab

Perfect for beginners, the Petzl Djinn Axess quickdraws have some of the largest carabiners on the market. That makes clipping and cleaning a breeze, saving you time fumbling around with small biners when you’re learning to lead. This is also helpful for climbers with larger hands or even ice climbers who are wearing gloves.
The solid keylock gates open and close with ease, and won’t snag your rope or gear. The Djinn is durable, sturdy, and it’s sling is super easy to grab. It’s not as light as other quickdraws, but for the price, ease of use, and durability, it’s a fantastic option for beginners or anyone who wants an all-around quickdraw that will put in mileage without breaking the bank.
- Easy to clip
- Durable
- Large carabiners and gate openings

These alpine quickdraws are perfect for those of us who don’t want to make your own alpine draws out of carabiners and slings. The TRANGO Phase quickdraws are everything you need for your next alpine ascent. They are also great for trad climbing or even sport routes that meander.
Each quickdraw features wire gate carabiners connected with a 60-cm-long sling. The sling is low profile and easy to store, pack, and clip onto your harness. The Phase Alpine draws are also lightweight, with each weighing in at just 80 grams.
- Expensive
- Small carabiners
Quickdraws are necessary pieces of gear that connect your rope to the wall as you climb. Your choice in quickdraws isn’t likely to turn heads like some of your other gear might, but it’s just as important to choose the right set of draws to meet your needs.
For anyone just starting out climbing, any basic set of quickdraws will do. Once you start working on longer, harder routes or venturing into trad and alpine ascents, it’s time to expand your arsenal of quickdraws to include a variety of biners and sling lengths. You can even mix and match biners and slings to customize your rack as you see fit.
Whichever the best quickdraws you choose, you’ll be able to stay safe on the wall as you climb. Hopefully now you have a better idea of the different types of quickdraws and which ones you need for your next send. Happy climbing!
{ TOP 10 } Best Canvas Tent – 2020 Reviews
Views: 0
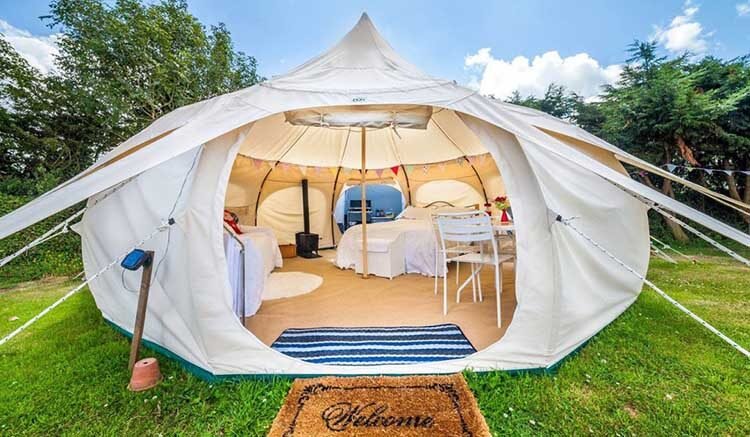
Every outdoor enthusiast knows that a quality camping tent is essential to enjoying your time in the woods or the mountains. However, not all tents are created equal and finding the right one is a bit of a challenge.Enter: the canvas tent. These highly durable and versatile shelters are perfect for family camping trips and hunting expeditions where you need a comfortable basecamp to lay your head at night. Canvas tents are certainly some of the best value tents around, but, with so many different options to choose from, it’s understandable if you’re feeling a bit overwhelmed.
That’s where we come in. Up next, we’ve got your ultimate guide to choosing the best canvas tent for all your adventures, complete with reviews of the top models on the market today. So, what are we waiting for? Let’s get to it!
A canvas tent is any outdoor shelter that’s made of canvas. Canvas is a cotton fabric that’s heavily woven to create a thick, durable, and lasting material. It’s made by tightly weaving cotton threads to create a solid sheet of fabric.
Canvas has traditionally been used to make a whole host of products, such as backpacks, sails, and shoes. When used to make a tent, canvas performs exceptionally well in a whole host of different environments.
With so many different tent options out there, you might be wondering why you should invest in a canvas tent. Well, simply put, canvas is a highly durable, incredibly versatile fabric that’s perfect for use in the great outdoors.
Unlike most other fabrics, canvas has the ability to keep you warm or cool, depending on the conditions outside. Plus, it’s incredibly naturally water-resistant and is perfect for use during the winter months. Cotton canvas is also an easily repairable fabric, so you can keep using your tent for years to come. Oh, and canvas tents look beautiful, so why wouldn’t you want one?
Before you drop a whole lot of money on a canvas tent, it’s good to know what you’re investing in. Here are some things to look out for when choosing your next tent:
There are a whole lot of different canvas tents out there, each made with their own unique materials. One of the most important materials in a canvas tent is, well, the canvas. However, not all canvas is created equal. In fact, there are many different canvas “weights,” and the kind you choose will impact your tent for years to come.
In general, the heavier the “canvas weight,” the more durable the canvas. However, heavier canvas is thicker, less packable, and more expensive. The vast majority of quality tent makers will use a 10.1 oz/sq. yd (340gsm) canvas, which should be considered the general minimum for your tent. We recommend avoiding anything that’s made of canvas less than 8.4 oz/sq. yd (285gsm) if possible, as these are quite low quality and are prone to damage.
The most popular canvas tents on the market today are bell tents and wall tents (e.g. cabin tents). Wall tents look much like a mini-cabin, with four straight walls and a typical A-frame roof. This kind of tent is generally quite spacious, however, they take a long time to set up, so they’re best for longer trips.
Bell tents, however, look a lot like a yurt and feature a circular design. Usually, they have an internal pole at the center and are fairly quickly easy to set up. They generally are smaller than wall tents, however, they often hold up better in the wind.
The size of a tent has a direct impact on your camping experience. However, we can’t make any recommendations about what size tent you need, as that all depends on the number of people you go camping with and the amount of gear you bring. If you camp alone, you probably don’t need to spend as much and can get a smaller tent. Alternatively, if you camp with your family and friends, you’ll probably want a larger model.
While the weight of a tent doesn’t really affect you after it’s set up, it does make a substantial difference to your ability to transport it to and from the campsite. Heavy tents are a burden when it comes to getting them from your garage to your car and finally to the tent platform. However, heavier tents are often made of more durable materials, so you need to decide what’s more valuable to you – durability or ease of transport.
Canvas tents are large pieces of gear, which is great for comfort when you’re outside. However, transporting a large tent is no walk in the park, especially if your vehicle is already filled with other camping supplies. Thus, it’s important to look for a canvas tent that has a reasonable packed size. The best portable tents are going to come complete with their own carry bag and be easy to fit in your car. That way, you can worry less about how you’re going to fit all of your camping gear in your car on your next trip.
No one wants to spend their first few hours at a campsite setting up their tent. Indeed, setting up a tent is a major source of anxiety and stress for a lot of people, but it doesn’t have to be that way. While many tents are very complex and tricky to set up, others come with simple, easy to set-up systems so you can spend more time enjoying your camping getaway.
The last thing anyone wants is to spend a whole lot of money on a canvas tent, only to have it break after one or two camping trips. Thus, durability is of the utmost concern when buying a canvas tent. Often, this comes down to choosing a tent with thick canvas and durable, quality tent poles. This might cost you a bit more in the short term, but in the long run, you’ll save money by having just one tent that lasts for years.
A quality canvas tent is like your home away from home in the great outdoors. So, you want to make sure it’s a tent that you’re comfortable living in for days on end. A simple way to ruin a camping experience, however, is to have a tent with a low interior height.
Tents with low interior heights mean you have less livable space and that the taller people in your group are going to spend a lot of their time hitting their head on the ceiling. Of course, this is less than ideal, so we recommend choosing a tent with a high center height. That being said, tents that are exceptionally tall are less stable in the wind, so you’ll have to be mindful about where you pitch your shelter.
If you live in a hot, muggy, environment, you’re going to want to get yourself a canvas tent that’s got a quality ventilation system. Canvas is a thick, heavy material that’s great for trapping in heat, so it’s important that you have some way of cooling the tent down during the warm summer months. Mesh paneling and windows are great for adding breathability to your tent, but they often come at a price of added cost and increased durability.
Any way you slice it, a canvas tent is likely to run you a significant bill. Tents are expensive, so it’s understandable if you’ve got a budget that you need to stick to. However, when it comes to big-ticket items, like tents, it’s usually best to spend as much as you’ve got in your budget instead of trying to cut corners here. While spending more money doesn’t necessarily mean you’re going to get a better tent, if there’s a tent out there that perfectly fits your needs but is slightly over your budget, it’s worth considering the extra investment.
We know that buying a canvas tent is a major investment, so it’s understandable if you want to find a reputable brand to purchase from. Here are three of the best rated canvas tent brands on the market today:
White Duck Outdoors is known as one of the top manufacturers of premium canvas tents. They use only traditional 100% breathable cotton canvas fabric in their tents and choose only materials that are proven to last a lifetime.
Born in the Rockies, Kodiak Canvas is known for making some of the best canvas tents in the world. A tent from Kodiak Canvas is reliable, comfortable, and durable. Made to last, Kodiak Canvas tents are designed using only the highest quality materials so you can spend less time worrying about your tent and more time exploring the mountains.
Dream House Tents was started to help bring people outside by providing them with the highest quality tents on the market. They put a lot of thought and consideration into every aspect of the tents they design and provide a multitude of different options so every camper has the shelter they need to enjoy the great outdoors.
Here are our reviews of the 10 best rated canvas tents on the market today:
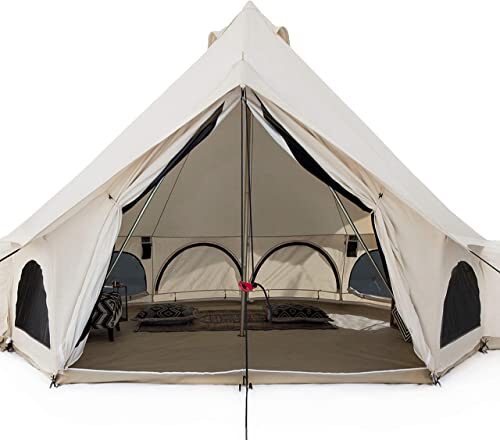
If you like to camp in luxury, then look no further than the White Duck Outdoors Premium Luxury Avalon Canvas Bell Tent. The White Duck Avalon is a glamper’s paradise, thanks to its spacious interior design and 3’ wall height, which allows for maximum livable space as a 6 person tent.
As one of the best 6 person canvas tents around, this shelter is made for all four seasons and features a no-see-um mesh door to keep the bugs out in summer, a stovepipe hole for staying warm in winter, as well as eight windows so you can enjoy the view from your humble abode. It even has strategically placed vents to keep things cool and comfortable during the hot dog days of summer and a fully waterproof construction to weather any storm. What more could you ask for?
- Spacious interior design and high wall height
- Four season design with stove pipe for winter and vents for summer
- Fully waterproof construction
- Windows allow for excellent views
- Comes with waterproof carry bag and can be pitched by one person
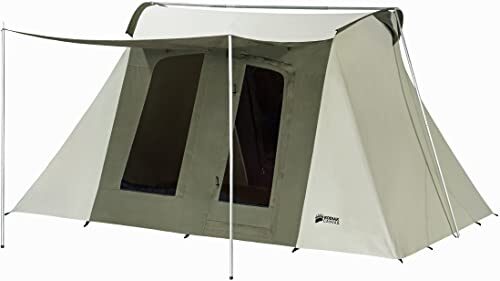
The Flex-Bow Deluxe is a unique 8 person canvas tent from Kodiak Canvas, which features an efficient, yet comfortable design. This tent is made with a 100% cotton duck canvas called Hydra-Shield, which is durable and waterproof in the harshest conditions.While it doesn’t have a traditional wall or bell tent appearance, the Flex-Bow Deluxe has a 6’6” ceiling height that allows campers to stand up tall and be comfortable in their home away from home. The Flex-Blow Deluxe even has two large D-shaped doors and four large windows, all equipped with no-see-um mesh for plenty of ventilation and airflow during the summer months.
Inside, campers can also find customizable gear loft options to stay organized when on the go, while a large awning provides some nice shade at the doorway. This super-strong tent is easy to set up, even if you’re alone, and is ready for even the heaviest of snow conditions. It’s a great addition to any camping set up and is particularly good for hunting, thanks to its sturdy design.
- High 6’6” ceiling allows maximum living space
- Very strong, even in rough conditions
- Large doors and windows with no-see-um mesh netting
- Can be pitched by just one person
- Not very aesthetically pleasing
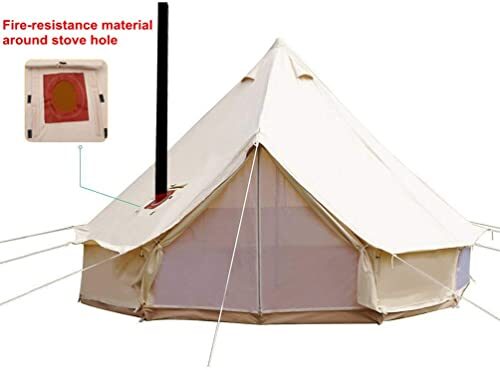
Made with premium high-strength cotton canvas, this shelter from Unistrength is a great family tent. Unistrength’s canvas tent features a classic bell-shape design with one stove pipe hole that’s surrounded by fire-resistant material for extra safety With enough space to house 6-8 people, the Unistrength canvas tent is a luxury home in the mountains when you’re tired at the end of a day of hiking or hunting.
The tent comes with four large side windows and four vents, each with mesh netting so you can stay cool during the summer months. You can even roll up the sides of the tent for a full 360-degree view on those, particularly nice days. That being said, the Unistrength canvas tent can hold its own in a storm, thanks to its watertight canvas and burly, waterproof groundsheet, which means it’s great for use in both bushcraft and as a family tent!
- One stove pipe hole with fire-resistant materials
- Spacious interior
- Windows and vents for airflow
- Can roll up sides for 360 degree view
- Many size options
- Durability concerns in high winds
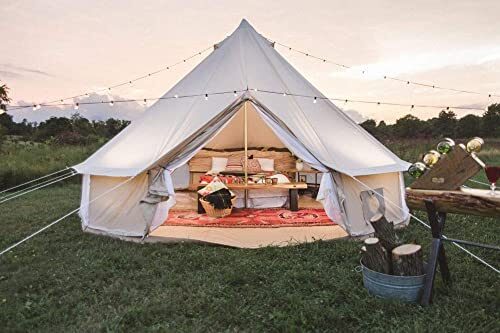
One of the best canvas family tents around, this shelter from Dream House is perfect for any camping getaway. Simple in design, the Dream House Canvas Family tent features a single central pole and a classic bell shape, which makes it easy to set up. Plus, the Family Tent has extra sturdy guylines, which allow for better stability in rough weather.
When it comes to keeping you dry, the Family tent has a removable groundsheet and a cotton canvas that’s waterproof tested up to 3000mm with fully sealed seams to weather any storm. It also has four ventilation holes on the top of the tent and the ability to roll up the sidewalls for extra fresh air. With enough room for the whole family, there’s a lot to love with the Dream House Waterproof Cotton Canvas Family Tent.
- Fully waterproof top and groundsheet with taped seams
- Stable in winds up to 30mph
- Lots of interior space
- Affordable
- Relatively low-quality canvas (285gsm)

If living life on the open road is your way to see the great outdoors, then the Kodiak Canvas Truck Bed tent just might be for you. This premium truck tent is made from Hydra-Shield 100% cotton duck canvas and can fit on the back of a wide variety of full-sized pick-up trucks.The Truck Bed tent has a unique tunnel design that allows you to maximize your interior space and enjoy tall 5-foot ceilings inside your home away from home. It also features a large D-shaped door that makes it easy to get in and out as well as two gear pockets for staying organized on the road.
With five windows, the truck bed tent provides lots of ventilation and even access to the rear cab window. Plus, thanks to its sturdy 3/4in steel tube frame, you can use the Truck Bed tent all year round.
- Easy to set up and install
- 100% waterproof Hydra-Shield canvas
- Lots of interior space
- Windows for fresh air and cab access
- Not great for a family
- Can’t stand upright while inside

Perfect for extended hunting trips and family outings, the uber-spacious White Duck Canvas Wall Tent is the perfect retreat at the end of a long day outside. Multi-functional to the core, the White Duck Canvas Wall Tent is a large canvas tent spacious enough to accommodate up to 10 people (depending on the size you buy) with ease.
Inside this cabin tent, you’ll find a waterproof groundsheet and a stovepipe hole, so you can hunker down in during the colder winter months. Or, you can roll up the canvas coverings and expose the tent’s large triangular windows for a view of the great outdoors. With a peak height of almost 9’, the White Duck Canvas Wall Tent has enough room for the whole family, and all of your gear, for the perfect glamping adventure.
- Lots of interior space (9’ ceiling height)
- Waterproof tent and groundsheet
- Large windows for natural light
- Stovepipe hole for winter use
- Expensive
- Heavy
- Takes two people to set up

If you love to camp out in the winter months, the double-walled Vidalido Dome Camping Tent just might be the canvas tent you’ve been looking for. Thanks to its conical shape, this tent easily sloughs off snow while keeping you warm and toasty on the inside.
But, just because it can keep you warm in the winter doesn’t mean it’s out of a job come summertime. In fact, the Vidalido Dome Camping Tent features a no-see-um mesh bug net inner that protects you from the creepie crawlies while providing lots of airflow. Oh, and with a quick, easy five minute set up, you’d be hard-pressed to find something to complain about with the Vidalido Dome Camping Tent.
- Very easy to set up
- Double wall for better winter and summer performance
- Lightweight
- Well ventilated
- Very affordable

Simple, yet effective, the Trek Tents Cotton Canvas Cabin Tent is everything you need – no more, and no less. Made from 100% cotton canvas in the walls and roof, this cabin tent features a heavy-duty vinyl-coated canvas floor to help reduce wear and tear over time while keeping you dry.
The tent also has three large screen windows with storm flaps, so you can get fresh air when the weather is nice or stay dry in a storm. Sewn-in interior pockets help you stay organized while you’re in camp while an easy setup system makes things quick and simple when you arrive.
- Simple, yet functional
- 100% waterproof canvas
- Heavy duty vinyl-covered floor
- Interior organization pockets

Incredibly spacious, this four-season tent from Dream House is perfect for large families and groups. With enough space to house up to 10 people, this Dream House tent is great for families that want a single tent that can do it all.
This Dream House tent is made from heavy-duty waterproof cotton canvas and has two large doors and four triangle-shaped windows for extra ventilation. In addition to its heavy-duty fabric, the tent features double stitching all around and extra-reinforced points at place of high wear for maximum durability and in rough conditions of up to 30mph of wind, making it a great choice for years of camping fun.
- Very durable
- Large and spacious enough for 10 people
- Highly waterproof
- Lots of ventilation
- Very heavy
- Takes multiple people to set up

Built to last, this heavy duty weatherproof bell tent from Danchel is a simple solution to all of your camping needs. The Danchel canvas tent has a single center support pole and one door pole, which allows for easy set up when you get to camp, making it one of the best car camping tent models available.
With two high-temperature resistant stove jackets (one on the top and one on the wall), the Danchel canvas tent makes it easy to stay warm in the cold winter months. The Danchel canvas tent even has a fully waterproof bathtub floor design to help you stay dry in a storm. It also comes with a handy carry bag and an industry-leading 5-year warranty so you can camp with peace of mind
- Easy to set up
- Fully waterproof with bathtub floor
- Comes with quality carry bag
- Industry-leading 5-year warranty
- Two stove pipe options
- Quite heavy
- Somewhat small
Ultimately, if we had to choose just one of these tents to take with us on our next adventure, we’d have to opt for the White Duck Outdoors Premium Luxury Avalon Canvas Bell Tent, for its fantastic spacious and functional design. Of course, this comes with a high price tag, but when you find the best canvas tent this luxurious, it just might be worth it.

A professional mountain guide and experienced outdoor educator, Gaby enjoys traveling and exploring the world’s most remote locales. As a writer and editor, Gaby has written for a variety of climbing and travel blogs, news sites, and climbing magazines. She is currently finishing a master’s degree in outdoor education but in her free time, Gaby loves a strong cup of coffee and searching for the next great adventure.
{ TOP 10 } Best Pop Up Tents – 2020 Reviews
Views: 0
Do you love camping but hate pitching a tent? Well, we have good news for you. With a pop up tent, you can enjoy spending time in the great outdoors without the hassle of having to set up your shelter when you arrive at camp.
Pop up tents make getting camp ready super easy, but with so many different models to choose from, finding the right one for your needs can be a challenge. To help make your decision a bit easier, we’ve created a guide to the best pop up tents on the market today. So, up next we have reviews of the 10 best rated pop up tent models around and our top tips to figuring out which tent is right for you.

Backpacking is a fantastic way to experience the true rugged beauty of the mountains. With the Quechua Instant 2, you can even head out on a backpacking trip without the need to waste your precious time on setting up a tent.
This instant backpacking tent from Quechua can be set up in just seconds, thanks to its pop up design. Once you stake it down, it’s strong enough to withstand moderate winds and a rainstorm. The Quechua Instant 2 even has three built-in vents to help maximize airflow on those warm summer days in the mountains.
- Sets up in 2 seconds
- Three built-in vents for airflow
- Can withstand moderate winds and rainstorms
- Lots of ventilation
- Not suitable for winter camping
- Not strong enough for snow
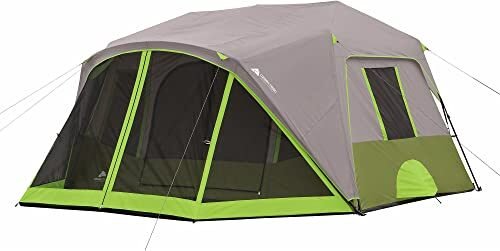
Built for families that camp but also appreciate their personal space, the Ozark Trail Instant Cabin 9 is a cabin-style tent for car camping adventures. This spacious tent has a 7’ ceiling height so it’s tall enough for everyone in the family.
Set up takes just 2 minutes with the Instant Cabin and then you have a comfortable abode for up to 9 people. You can even use the built-in divider to separate the Cabin into two bedrooms or separate living and sleeping spaces. The tent also has a large gear organizer to help reduce clutter in your living space to maximize your comfort in the outdoors.
- 2 minute set up system
- Can be split into two rooms
- Built-in gear organizer
- Has a large screen porch
- Mostly waterproof, but not great in a storm
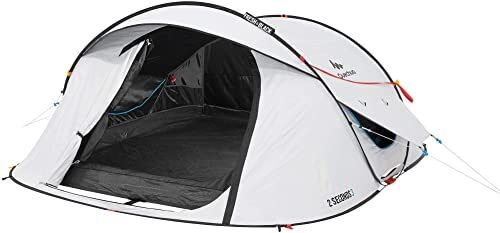
Aptly named, the Quechua 2 second is designed to be pitched in, well just 2 seconds. Inside this three-person tent is a dark exterior, which helps provide a relaxing and comfortable area to rest, even in broad daylight.
The tent has a fully waterproof and windproof construction, so it’s great for backpacking trips. Plus, it has two side panels that can be extended to open vents for maximum airflow throughout the tent on hot summer days.
- Can withstand bad wind and rain
- Takes just 2 seconds to pitch
- Easy to open vents for added airflow
- White exterior fabric stains easily
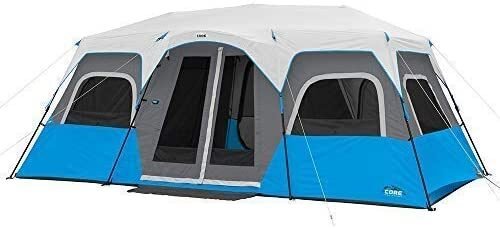
Built with your absolute comfort in mind, the CORE Lighted Instant Cabin 12 is the perfect home away from home for a large group. More like a cabin than a tent, this shelter from CORE even has built-in LEDs that are easy to turn on and off for added versatility at night or while you eat dinner.
The Lighted Instant Cabin has an 6.6’ center height that’s large enough to accommodate nearly every camper for added comfort. You can easily fit 3 queen-size airbeds inside the Instant Cabin or 12 campers in sleeping bags. Oh, and if it’s a hot, muggy night, you can even adjust the ventilation panels on each side of the tent to increase airflow for a better night’s sleep.
- Built-in lighting
- 2 minute set up
- Room for 3 queen-size airbeds
- Adjustable ventilation system
- Large tent but doesn’t have room dividers
- Not great in rain and wind
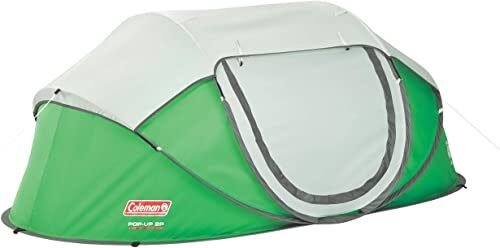
Perfect for festivals and short car camping trips, the Coleman Pop Up 2 is a great shelter option for any trip where you want to maximize your time spent outdoors. This sleek tent features a unique tunnel-shaped design that can keep you dry throughout those pesky afternoon showers.
The Pop Up 2 has one large door that can be rolled up to expose the night sky on a clear evening. Plus the entire tent is fully seam-taped so you don’t have to worry about getting wet in the rain. The best part? It’s super affordable, so the Pop Up 2 is a good choice for festival-goers on a budget.
- Very affordable
- Sets up in seconds
- Fully waterproof
- Lots of ventilation
- Not very breathable
- Durability concerns with long-term use
- Not very practical for short trips

A long-time stalwart of the world of pop up tents, the CORE Instant Cabin 9 is a simple and functional tent for car camping. This tent is both reasonably affordable and versatile enough for most car camping needs With the ability to be set up in just 60 seconds, the Instant Cabin 9 is perfect for people who hate pitching tents.
Inside the cabin tent, CORE installed an advanced venting system that keeps air flowing throughout the interior on hot days. All of the tent’s doors and windows have privacy panels that can easily be zipped. Oh, and it has an included room divider so everyone can get the privacy they need with the CORE Instant Cabin 9.
- Comfortable and spacious interior with included room divider
- 60 second set up
- Privacy panels on windows and doors
- Built-in ventilation system
- Not fully waterproof
- Unstable in high winds
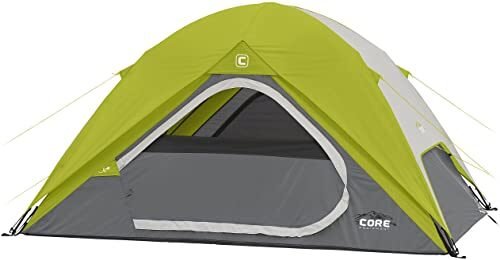
If camping in a small group is more your speed, the affordable CORE Instant Dome 4 is a sure bet. This tent can be pitched in just 30 seconds, allowing you to get right to the activities when you arrive in camp.
The Instant Dome 4 is a simple tent without a lot of added features. But, it does have zippered privacy panels on its doors and windows. Additionally, the tent has an included gear loft to help you stay organized as you camp.
- Simple design
- Sets up in 30 seconds
- Zippered privacy panels
- Gear loft for organization
- No vestibule for gear storage
- Not fully waterproof
- Not very spacious for 4 people
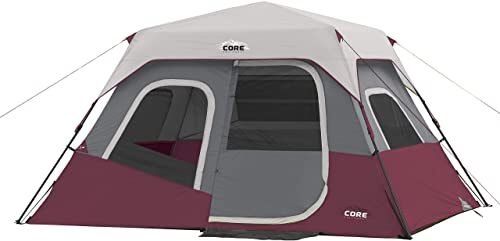
Designed to accommodate a modest-sized family, the CORE Instant Cabin 6 is a good all-around 6 person pop up tent. Thanks to its pre-attached poles, the Instant Cabin 8 can be set up in just 60 seconds.
It includes an advanced venting system that makes it easy to draw cool air into the tent on hot days. If you’re in a busy campground you can even zip up the privacy panels on the tent’s windows and doors for more personal space. Or, if you’re camping with kids, you can use the included gear loft and wall pocket to help keep everyone’s personal belongings organized at all times.
- 60 second set up
- Zippered privacy panels
- Gear loft and organizer pocket
- Adjustable ventilation
- Not tall enough for all campers to stand upright
- Not fully waterproof

Perfect for large groups and families, alike, the Coleman Instant Family Tent 8 is a great shelter for fair-weather car camping. This spacious tent has enough room for 4 queen-sized airbeds in its 14×10 foot layout.
Thanks to its pre-attached poles, you can pitch this tent in just 60 seconds. It’s easy to walk around the Instant Family Tent due to its tall 6’7” ceiling height, which is perfect for nearly every camper. Oh, and this 8 person tent is even built with a double-thick floor fabric for added durability for all of your camping adventures.
- Enough interior space for 4 queen-size airbeds
- 60 second set up process
- Very tall ceiling height
- Lots of ventilation
- Not waterproof
- Should only be used in good weather
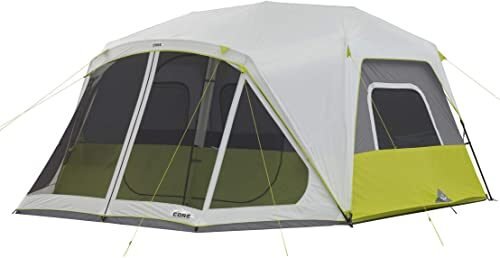
Perfect for families that like to spend time both inside and outside the tent, the CORE Instant Cabin 10 is a great option for summer camping trips. This 10 person tent can be set up in two minutes thanks to its pre-attached pole system.
It features a front screen porch that allows you plenty of space to hang out and enjoy some fun in the sun without the bugs. You can easily stay organized with the Instant Cabin 10 thanks to all of the hanging storage pockets. The Instant Cabin 10 is particularly good for families with older children and teens that like their privacy, thanks to its optional room divider and zippered privacy panels on all windows and doors.
- Included room divider
- Spacious screen porch for relaxation
- Plenty of gear storage options
- Privacy panels on windows and doors
- Expensive
- Bulky and heavy
- Not fully waterproof
Buying a pop up tent might seem like a complex process, but once you know what you’re looking for, it’s not too difficult to find the right model for your needs. Here are some things to keep in mind as you search for that perfect pop up tent:
Intended Use
If you plan on mostly car camping, your tent needs are going to be very different from someone who primarily likes to backpack. For the most part, car camping tents are going to be more spacious and luxurious than a backpacking shelter.
But, what backpacking tents lack in space, they make up for in weight savings, a more compact size, and added durability in foul weather. So, your intended use is going to have a huge effect on the kind of pop up tent that you’re looking for.
Capacity
The size of tent you need will wholly depend on the number of people you plan to camp with. Small groups of friends, as you might imagine, will need a smaller tent than a large family.
But, just because you only have 4 people in your family doesn’t mean you have to buy a 4 person tent. In fact, if you’re planning on car camping, buying a tent that’s bigger than you actually need can be quite advantageous.
This is especially true if you have a lot of gear that you need to store or if you have older kids that want more independence and privacy. So, it’s often a good idea to get a tent that’s designed for one or two people more than you actually need.
Weather-Resistance
The main reason to have a tent is to get some protection from the elements. Unfortunately, the vast majority of pop up tents don’t actually provide full waterproof protection. Even though these tents claim to be waterproof, they have exposed mesh windows and doors that will get soaked in a storm. So, if you live somewhere with a wet climate, a tent with full rainfly coverage is key.
Vestibules/Screen Porches
Vestibules are an often overlooked feature of a tent. A vestibule provides covered storage space for your gear without getting the inside of your tent wet or dirty. However, many pop up tents include screen porches, which provide many of the benefits of a vestibule while also giving campers a nice place to hang out and enjoy the sunshine without being attacked by bugs.
Room Dividers
If you’re camping with another family or with older children, having room dividers can help everyone maintain some semblance of privacy in the outdoors. Or, you can simply use the room divider to create a living room/hang out area and a sleeping space in your tent.
The Verdict
Pop up tents are a great option for anyone that likes to camp but doesn’t like to spend time pitching a tent. Even though there are hundreds of models on the market today, finding the right pop up tent for your needs doesn’t have to be a struggle. Whichever the best pop up tent you end up with, it’s sure to become your companion for years of camping fun.
{ TOP 7 } Best Belay Device – 2020 Reviews
Views: 0
Rock climbing belay devices have grown more complicated and diverse in design over the years since rock climbing first became a sport. Whereas earlier climbers used a simple figure eight device or a sticht plate, now climbers can choose between different types of belay devices with a wide range of safety features and capabilities.
This also means, of course, that climbers have a choice to make when it comes to belay devices. Understanding the difference between different types of belay devices and what type of climbing each belay device is ideal for will help you buy the best belay device.
The tube design is the simplest belay device design. They are so named because they are, in fact, roughly one inch sections of tube — although the design has begun to look less and less so like a tube as the device evolves. Despite these evolutions, the concept of a tube design belay device remains the same — pass a bight of rope through the tube-shaped slot, clip a carabiner through the bight of rope, and let the bend in the rope do the braking.
Tube design belay devices are often referred to simply as ATC’s. Black Diamond created a tube belay device product early in the game and named it the Air Traffic Controller or ATC. That specific product was so popularly used that its name was adopted as the general name for tube design belay devices. Since this early design, many tube design belay devices have evolved to include asymmetric shaping for easier braking. They also almost always now include double tubes — this way, they can be used for repelling which is often necessary in outdoor and multi-pitch climbing situations.
Beyond just asymmetric shaping and dual tube design features, there are also tube design belay devices with auto-locking and anchoring features. These come in handy on multi-pitch routes — the anchoring loop on the inside of the belay device allows a climber to clip into an anchor using a locking carabiner and belay the second climber. The auto-locking features of these types of belay devices have a similar purpose – they make it easier to belay from halfway up the cliff face of a multi-pitch climb.
Overall, tube design belay devices are the genesis of belay devices and the simplest of all modern designs. There are pros and cons to this. The simple design of tube belay devices is perfect for beginner climbers — get the crucial basics of rock climbing down with a solid understanding of how belaying actually works before moving on to devices with more complex mechanisms and designs. Tube design belay devices are also, in almost every case, the lightest and least expensive option for belay devices. Whether you’re just starting out climbing and don’t want to splurge on expensive gear or you’re looking to be as lightweight as possible for that advanced multi-pitch climb, tube design belay devices are the way to go.
However, belay devices with more complex designs are arguably safer in some ways. As will be explained further down, there are plenty of belay device designs that auto-lock more effectively than tube design belay devices are able. There are also plenty of wrong ways to orient some of the more modern tube design belay devices that can make things difficult or even dangers on the wall. So while tube design belay devices are some of the most popular, the most tried and true, and the most common belay devices out there, there’s also a lot to keep in mind before choosing one to climb with.
Assisted Braking (Passive and Active)
For non-beginners, there are more complex belay device designs available to make belaying easier and safer — if used correctly. These are called assisted braking belay devices and there are two general types — passive and active.
Assisted braking devices essentially pinch the climbing rope using a range of mechanisms to catch a fall or take some of the weight off the belayer’s hand strength. Again, they can do this either passively or actively. Passive assisted braking devices are more simple, mechanically, than active assisted braking devices. Passive assisted braking devices require the belayer to pinch the rope between the belay device and a carabiner. They’re lighter and less expensive, but still require a significant amount of hand strength and know-how from the belayer.
Active assisted braking devices do much more of the work for the belayer, pinching the rope using mechanisms inside the belay device itself. Many of these devices can take all of the weight off the belayer’s hand strength during a fall or just the climber taking a break halfway up the route. Just like with the other types of belay devices, active assisted braking belay devices take some practice — arguably the most practice, in fact, as the complicated design of these devices necessitate more complicated handling.
Active assisted braking devices do so much work for the belayer, in fact, that accidents tend to happen — belayers put too much faith in the belay device and pay less attention to proper belaying safety practices. Again, for that reason, belayers should learn how to belay with tube design belay devices before moving on to assisted braking devices. And — as with every belay device — proper safety techniques should be used. Active assisted braking devices are also the most expensive and heaviest of the belay device types.
As described above, the range of belay devices available on the rock climbing market continues to evolve and expand. The type of belay device you need varies depending on your experience level, where you’re climbing, and what type of climbing you plan to do. Below are seven of the top rock climbing belay devices available on Amazon. No matter what you’re looking for, one of these devices is sure to fit your needs.
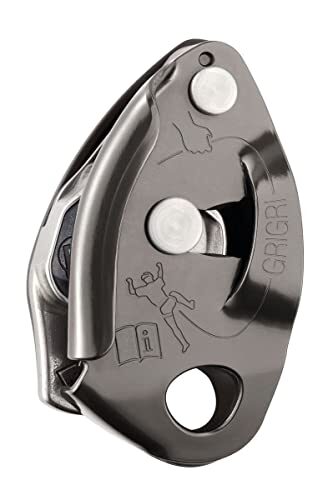
Just about every serious rock climber you see at the crag or in the gym will have a Petzl GriGri 2 clipped somewhere. It’s heavy and expensive, but the Petzl GriGri 2 has proven time and time again that it’s the best belay device on the market for top rope, sport, multi-pitch climbing — you name it. The Petzl GriGri 2 is an active assisted braking belay device — meaning it’s capable of doing all the work for you (even though you should never intentionally ask it to do so). Mechanisms within the belay device itself will cam the rope’s upward movement in the case of falls or takes. Lowering and paying out slack involve pulling back on a lever and guiding the rope around the curved edge of the device for a smoother glide. Obviously, this belay device does take a little practice to handle correctly — it might not be the best option for beginner climbers just learning how to belay.
The Petzl GriGri 2 does have some drawbacks. It only has one rope slot necessitating an additional tube belay device for rappelling. It’s also one of the heavier options for belay devices weighing in at 175 grams. And while it’s not quite as steep a cost as some of the other assisted braking devices, it is still no drop in the bucket. Again, despite all this, it’s still the top pick for a belay device — almost every climber has a Petzl GriGri.
- Type: Active assisted braking
- Weight: 175 grams
- Rope Size Compatibility: 8.5-11 mm
- Rope slots: 1
- Arguably the safest belay device
- Can only handle one rope necessitating an additional tube belay device
- Heavy
- Expensive
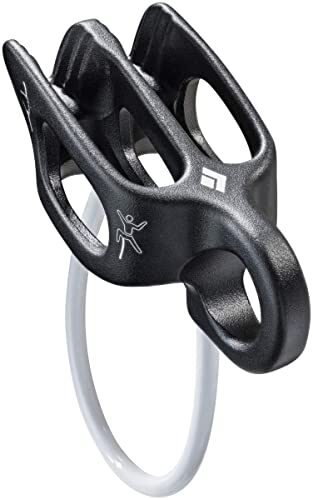
If you’re a bigger fan of unassisted braking, try out the Black Diamond ATC Guide. This tube design belay device only weighs 80 grams, and have a good price (although there are cheaper tube design belay devices available if you’re willing to part with some of the Black Diamond ATC Guide’s additional features). It’s compatible with thinner ropes than the Petzl GriGri 2 — you can use anywhere from a 7.7 to 11 mm rope with the Black Diamond ATC Guide. And its dual rope slots can handle two ropes — perfect for multi-pitch and rappelling.
While the Black Diamond ATC Guide is just a tube design belay device, it does have some of those additional features discussed above that make it a little less like a tube, a little heavier, a little more expensive, and a little more versatile. The Black Diamond ATC Guide has an asymmetric shape — this helps guide the rope smoothly and keep the belay device correctly oriented whether you’re lowering, taking, catching, or paying out slack. It also has an auto-block feature for unexpected falls and an additional anchor loop for belaying a second climber. The major downside to the Black Diamond ATC Guide is mainly its unassisted braking design.
- Type: Tube
- Weight: 80 grams
- Rope Size Compatibility: 7.7-11 mm
- Rope slots: 2
- Dual rope slots
- Great for multi-pitch climbing
- Auto-block feature
- Asymmetric shape
- Lightweight, inexpensive
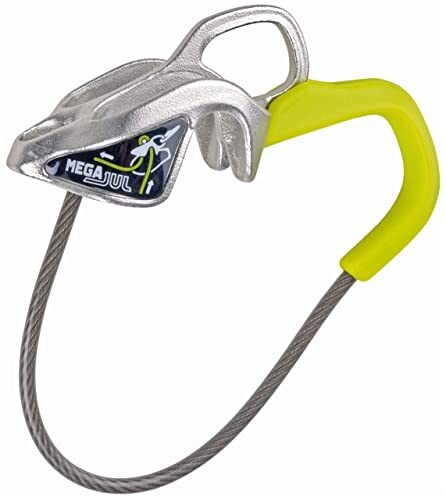
The Edelrid MegaJul Belay Device is a great option for climbers looking for something a little more sophisticated than a tube design belay device but don’t want all the weight, mechanisms, and cost of an active assisted braking device like the Petzl GriGri. The Edelrid MegaJul belay device is a passive assisted braking device meaning the belayer can pinch the rope between the device and a locking carabiner to stop a fall. This all takes that much stress and weight off of the belayer’s hand strength.
At 65 grams and with its price, the Edelrid MegaJul belay device is moderately priced and lightweight — which is appropriate considering it is essentially the moderate option between a tube design and active assisted braking design on the sophistication scale of belay devices. It’s compatible with ropes from 7.8 to 10.5 mm and has two rope slots making it perfect for multi-pitch climbing. It also offers much easier slack payout than assisted braking devices do. This belay device also comes with auto-block and anchor capabilities. The only notable downside of the Edelrid MegaJul is the complexity — you can tell just by looking at the device that it’s not your average tube design belay device and it takes that much more practice to be able to handle it correctly.
- Type: Passive Assisted Braking
- Weight: 65 grams
- Rope Size Compatibility: 7.8-10.5 mm
- Rope slots: 2
- Great for lead climbing, easy slack payout
- Designed for multi-pitch climbing with auto-block and anchor capabilities
- Lightweight
- More complex than tube belay devices without the benefits of active assisted braking
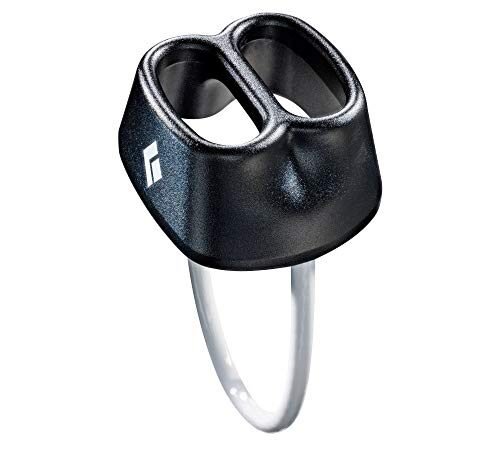
The Black Diamond ATC device is about as simple as it gets for modern belay devices — making it perfect for beginner belayers to really learn how to belay and understand the physics behind belaying. This is important to nail down before progressing on to belay devices that might do a lot of the work for you — if you don’t understand how your gear works, you won’t truly understand how to safely and correctly use it. The Black Diamond ATC weighs in at 65 grams and will just cost a little making it by far the cheapest belay device on this list. It’s compatible with ropes from 7.7 to 11 mm and has two rope slots for rappelling. And, it’s just as lightweight as the Edelrid MegaJul without the extra cost.
One of its greatest advantages is also its most significant drawback, however. The simple design means there’s no assisted braking and no anchoring features — while the Black Diamond ATC is a great little device to have on hand, you’ll likely need to supplement it with additional belay devices once you progress from a beginner belayer to more advanced climbing like multi-pitch.
- Type: Tube
- Weight: 65 grams
- Rope Size Compatibility: 7.7-11 mm
- Rope slots: 2
- Simple design perfect for learning the basic mechanics of belaying
- Dual rope slot for belaying
- Inexpensive
- Unassisted breaking
- No anchoring features
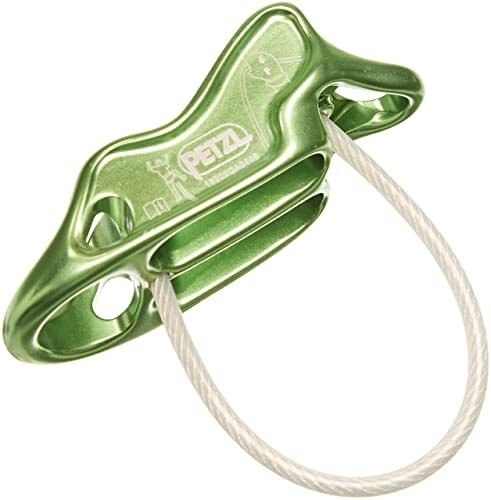
If you’re trying to carry as little weight with you as possible to the crag or up the cliff face, the Petzl Reverso might be the right option for you. At just 56 grams this is the most lightweight belay device available on the market that certainly doesn’t sacrifice anywhere else in its design or functionality to hit that minimal weight.
It will cost you a little more than your average tube design belay device — but the lightweight design and other additional features might be exactly what you’re looking for for just a little additional dough. In fact, the Petzl Reverso has all the same features as the Black Diamond ATC Guide for the same price — and less the weight.
The Petzl Reverso does have a problem with thicker climbing ropes — to play it safe, it’s suggested that only ropes from 6.9 to 9.5 mm thickness are used with this belay device. But it does have two rope slots for rappelling. The aluminum material used to make this device has also been known to be slightly less durable and wear more significantly with use than some of the more heavy duty belay devices. Keep all this in mind — this is the lightest weight belay device out there, but how badly do you really need to shave off those extra 9 grams?
- Type: Tube
- Weight: 56 grams
- Rope Size Compatibility: 6.9-9.5 mm
- Rope slots: 2
- Ultra lightweight
- Same price as Black Diamond ATC Guide with less weight
- Aluminum known to be less durable
- Doesn’t perform as well with ropes over 9.5 mm
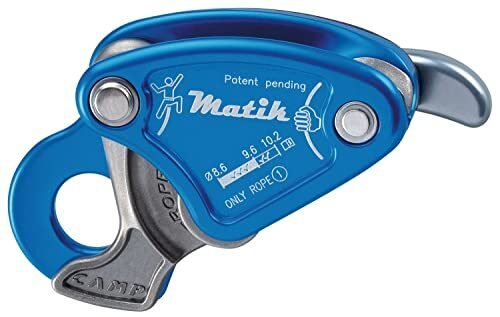
The Camp USA Matik belay device is arguably the safest belay device on the market. This device goes beyond just active assisted braking and includes an anti-panic braking system unique to the Camp USA Matik — no other belay device on the market has quite the same mechanisms as the Camp USA Matik. Again, however, this shouldn’t be mistaken for a self-belaying gadget. It’s still crucial that proper belay technique is used, and this device might not be the best option for beginner climbers who are still working on developing strong belay techniques.
Additionally, you’re certainly paying for your safety. The Camp USA Matik belay device has higher price tag — making it the most expensive belay device on this list. It’s steep for a belay device — another reason why it might not be the right option for beginner belayers. The Camp USA Matik is also the most expensive belay device on this list — by a lot. This hunk of gear weighs in at 275 grams. If you’re working towards a lightweight ascent, the Camp USA Matik might not be the option for you. It also only accommodates one rope. However, it is better for lefties.
- Type: Active Assisted Braking
- Weight: 275 grams
- Rope Size Compatibility: 8.6-10.2 mm
- Rope slots: 1
- Anti-panic braking system
- Better for lefties
- Extremely heavy
- Most expensive
- Single rope only
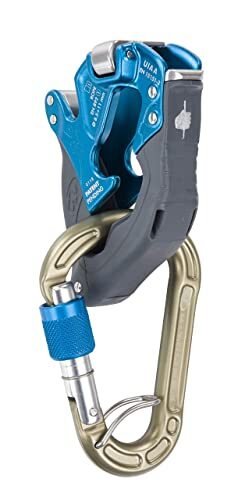
Looking to stay on the forward edge of rock climbing technology? Try out the Climbing Technology Click Up belay device. This is a passive assisted braking device that claims to be error proof. Even if you load the ropes in inverted, the assisted braking mechanisms will still work.
This is the most expensive passive assisted braking device, and it’s also the most expensive of these types of belay devices so it might not be the right move for your primary belay device, but if you’re interested in trying out new tech, this is the up and coming design for belay devices — whether it ultimately fails or not is yet to be seen. It’s not ideal for lead climbing as slack payout proves difficult.
- Type: Passive Assisted Braking
- Weight: 122 grams
- Rope Size Compatibility: 8.6-10.5 mm
- Rope slots: 1
- Still safe if ropes loaded inverted
- “Error-proof”
- Not ideal for lead climbing
- Most expensive passive assisted braking
Being confident and comfortable with your chosen belay device is crucial for rock climbing safety, but picking the right belay device can be just as important. This guide offers the top options for all levels and types of climbers so no matter where, what, or how you’re climbing, you can find the best belay device to fit your needs.