Your cart is currently empty!
Blog
{ TOP 10 } Best 3 Person Tents – 2020 Reviews
Views: 0
Camping with two people is great, but camping with three provides even more fun. However, high-quality 3 person tents are notoriously hard to find, since it’s just not a common size for many groups.
That being said, there are plenty of great 3 person tents out there, if you know where to look. So, to get you started, we’ve created this ultimate guide to the best 3 person tent, complete with everything you need to know to buy the tent of your dreams. We’ve even included reviews of our favorite 3 person tents so you don’t need to spend hours of your time on research.

Lightweight and compact, yet with room enough for three, the MSR Zoic 3 is a fantastic backpacking tent for three-season use. The Zoic 3 has an extra spacious interior with plenty of room for storing gear and stretching out for some afternoon relaxation.
The tent can be set up in just a few minutes, thanks to its single hub pole design. As far as functionality goes, the tent features large mesh paneling throughout the inner body, which provides ample ventilation in the summer months while cutting weight. Plus, it has two large doors with vestibules and three built-in gear lofts for maximum gear storage opportunities.
- Very well ventilated for the summer
- Lightweight yet spacious
- Three gear lofts and two vestibules for gear storage
- Three gear lofts and two vestibules for gear storage
- Low ceiling height
- Fairly expensive

Decidedly spacious, the Marmot Limelight 3 is a superb option for a 3 person car camping tent. The Limelight 3 has vertical walls that provide lots of headroom and personal space inside the tent for added comfort.
To ensure easy entry and exit, the tent has one super-sized double door and one rear D-shaped door that both have vestibules for gear storage. Inside, you can find interior pockets for gear organization, as well as a lampshade pocket that suspends your headlamp for lots of ambient light at night.
- Vertical walls allow plenty of headroom
- Large doors for easy access
- Plenty of gear storage space
- Not great in strong winds because of high ceiling height
- Heavy compared to most other similar options
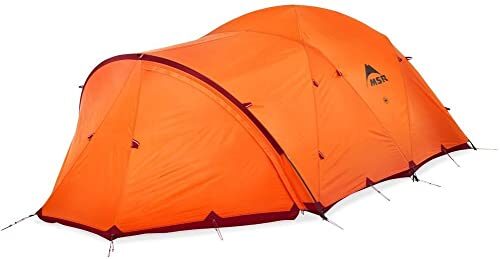
Designed with year-round adventures in mind, the MSR Remote 3 is a mountaineering tent that focuses on combining livability with functionality. The Remote 3 uses Easton Syclone poles that provide a large support frame to maximize interior space while holding up in foul weather.
Inside, you can open or close the door vents to add breathability or insulation as the conditions dictate. Plus, there are built-in gear loops to set up a drying rack inside the tents on remote expeditions.
- Built to withstand any weather conditions
- Lots of interior living space
- Can set up drying lines inside
- Doors can be zipped or unzipped for breathability and insulation
- Very expensive
- Very heavy
- Bulky

Functional, yet affordable, the Marmot Tungsten UL 3 is a solid all-around tent for hiking. The Tungsten UL 3 uses a strategic clip placement system for the poles that offers more interior space than other similar models.
At the same time, the Tungsten UL 3 is incredibly easy to set up, thanks to its color-coded easy pitch clips. If a storm arrives, you can also rest easy knowing that the Tungsten UL 3 has your back. The tent features a large seam-taped floor and a full-coverage fly that can keep you dry, even in the rain.
- Affordable
- Vertical walls for a roomy sleeping area
- Easy-pitch system
- Fully waterproof
- High ceiling height is susceptible to damage in high winds
- Heavy

Crafted with alpine pursuits in mind, the Mountain Hardwear Trango 3 doesn’t mess around when it comes to durability. First built in 1995, the current rendition of the Trango uses DAC Featherlite poles to create a secure and robust frame for your shelter.
The tent has two large vestibules and doors that make it easy to get inside the tent in a storm. Plus, the tent has zippered windows that make it easy to increase ventilation or get a view to the outside world. The Trango 3 even has snow flaps on its front vestibule to help keep out spindrift in a winter storm.
- Durable enough for alpine pursuits
- Lots of interior living space and gear storage
- Large vestibules that seal out snow
- Expensive
- Five pole system can be difficult to pitch
- Very heavy and bulky

Your home away from home when you’re on the trail, the Big Agnes Copper Hotel HV UL 3 combines all the luxuries of a large tent without the added weight. This ultralight 3 person backpacking tent has a high-volume design that maximizes interior living space and organization with its interior pockets.
When pitched with the standard fly, the Copper Spur Hotel has two vestibules that can be pitched out as awnings for extra shade on sunny days. Or, you can swap out the standard fly for the accessory option, which more than doubles your vestibule space for gear storage in wet environments.
- Very spacious interior
- Vestibules can turn into awnings
- Can swap out fly for larger vestibules
- Amazingly lightweight
- Expensive
- Some durability concerns with lightweight fabrics
- Not suitable for big storms

One of the best selling 3 person backpacking tents of all time, the MSR Mutha Hubba NX 3 maximizes interior livability for summer camping trips. The tent is built with premium features, such as Easton Syclone poles that provide lots of interior space for three campers.
The Mutha Hubba’s light grey rainfly provides a neutral light in the morning that’s easy to wake up to. Or, you can even roll up the vestibules and the rainfly for a stargazer view on those clear summer nights. What more could you ask for?
- Single pole design is durable and easy to pitch
- Tent fly can roll up for nighttime views
- Lots of interior living space
- Lightweight for a durable 3 person tent
- Expensive
- Relatively small vestibules
- Few features

If you’re camping on a budget, you don’t have to settle for second best when it comes to the North Face Stormbreak 3. This classic camping tent has a simple dome-shaped design that provides a high center height for added comfort.
Inside the tent, there are high-low vents to increase airflow while the fully sealed fly and floor keep water out. The Stormbreak 3 has two large, twin-zip doors that are easy to operate, as well as vestibules that can even be configured as awnings to maximize your outdoor living space.
- Very affordable
- Versatile vestibule design
- Simple yet functional
- Heavy and bulky
- No interior gear storage options

Who says a lightweight tent can’t be affordable? With the Nemo Aurora 3, you can combine the benefits of a high-end tent with the economic advantages of a budget-friendly model.
The Aurora 3 has vertical sidewalls to provide a huge interior space and added headroom. The tent also has two doors and two vestibules that make access convenient and gear storage a no-brainer. Plus, the Aurora 3 even has vents built into the fly to help you stay comfortable on those warm summer nights.
- Well ventilated for summer use
- Lots of interior living space and headroom
- Affordable
- Not ideal for stormy conditions

Waterproof to the core, the Nemo Chogori 3 is a 3 person mountaineering tent that can handle whatever the mountains throw at it. A four-season tent designed for year-round adventure, the Chogori 3 has an integrated fly and pole structure that cuts set up time in half and saves weight.
Inside the tent, there’s plenty of room for three people to stretch out and you can even connect two Chogori tents together for added space. Oh, and the oversized vestibule on this tent provides plenty of gear storage space, but it can also be propped up as an awning in good conditions.
- Versatile tent that can be used in very remote environments.
- Integrated fly and pole makes set up quick and easy
- Large vestibule for gear storage can also be used as an awning
- Too warm for low-elevation summer trips
- Very expensive
- Heavy and bulky
- Only one door
Buying a 3 person tent can be tricky, especially if it’s your first time. So, to help you narrow down your options, here are some things to think about as you’re shopping around:
Key Features For Any Tent
A tent is a complex piece of gear. These are some of the key features to consider when buying a tent:
Weight
Even though you have friends to split the load, you don’t want to carry around more weight than you need to while backpacking. So, a lightweight tent is an advantage for nearly every situation.
Vestibules
Vestibules are an often overlooked feature of a tent. A tent without vestibules really limits your gear storage options and means that you might have to bring your wet gear inside the tent. Of course, vestibules add weight to your pack, but we think they more than make up for it in terms of their usefulness.
Waterproofing
A tent that isn’t waterproof is more or less useless. When you buy a tent, you do so in order to get protection from the elements. So, when buying a tent, look for high-quality rainfly fabrics, like ripstop nylon, and fully sealed seams whenever possible.
Packed Size
The packed size of a tent makes a big difference on a backpacking trip. If you need to pack up your tent each morning, you’ll want a model that’s compact enough to fit into your backpack. If not, packing up camp each morning will be a struggle, to say the least.
Things To Prioritize In A 3 Person Tent
A 3 person tent is a pretty unique piece of gear. Since they’re not that common, many people think that buying a 3 person model is just like buying any tent. But, when buying for 3 people, you’ll want to prioritize the following:
Interior Space.
In a 2 person tent, no one is stuck in the middle. However, in a three-person tent, someone will always have to draw the short straw. So, to keep everyone happy, opt for a model that has a lot of interior space.
Organization Options
Three people seem to have exponentially more gear than two people, so you’ll want to be sure that you have enough space to store all of your equipment. Plus, with three people in a tent, it’s easy to take up too much space. If everyone has gear storage options inside the tent, like interior pockets, things will be significantly less frustrating over time.
Multiple Doors.
Although a tent with one door saves weight, it is much more frustrating. When you have three people, any tent with just one door becomes an obstacle course at night. Having multiple doors prevents you from having to crawl too much over your tent mates to get out of your tent while you’re camping.
The Verdict
A 3 person tent is a great way to share the joys of the great outdoors in a small group. But, when you’re shopping around, remember that buying a 3 person tent is not the same as selecting a 2 person tent. Groups of 3 have their own unique needs, so don’t forget to prioritize convenience, organization, and personal space when buying the best 3 person tent.
{ TOP 10 } Best 2 Person Tents – 2020 Reviews
Views: 0
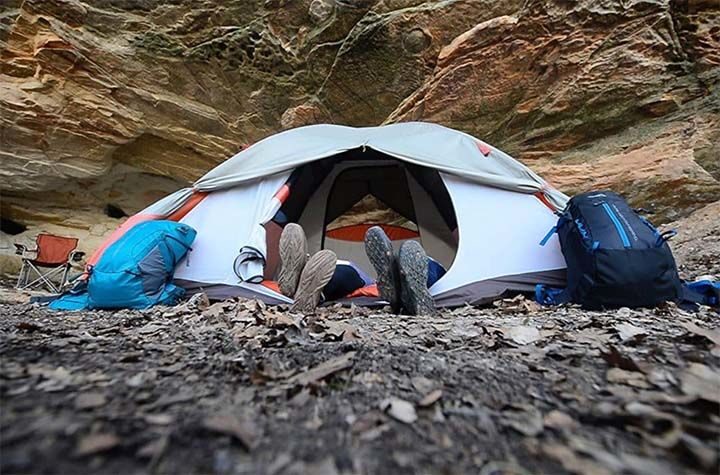
Camping is one of the best ways to enjoy the great outdoors. A night under the starry sky is a sure-fire way to relax and rewind from the hustle and bustle of city life.
Plus, when you get a 2 person tent, you can share all the joys of the outdoors with a friend or partner. Unfortunately, finding the right 2 person tent for your needs can be tricky, to say the least.
To help minimize the time you need to spend on researching your gear, we’ve created this buyer’s guide to choosing the right 2 person tent. Up next, we’ll review the ten best 2 person tents on the market today. Then, we’ll offer our advice on how to find the right 2 person tent for all your camping adventures.
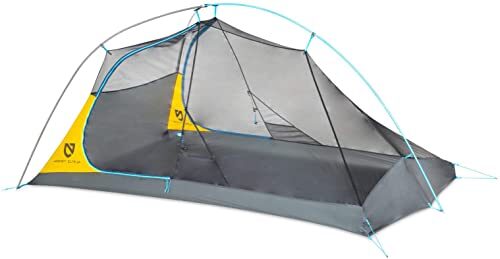
If you value weight savings above all else, the Nemo Hornet Elite 2 just might be the tent you’ve always needed. This tent packs down to a measly 1lb 11oz (770g) thanks to its ultralight 7D ripstop nylon fly and DAC Featherlite poles.
But, even though the Hornet Elite 2 is one of the lightest tents out there, it’s still incredibly comfortable, thanks to its Flybar volumizing pole clips and volumizing guy outs, which add plenty of headroom and interior space. Oh, and the Hornet Elite 2 has two large doors and vestibules, so each member of your camping party has the space they need to store all of their gear at night.
- Very lightweight
- Plenty of interior living space
- Two large doors and vestibules for access and gear storage
- Very thin fabric is prone to rips
- Very expensive
- Only suitable for three-season use
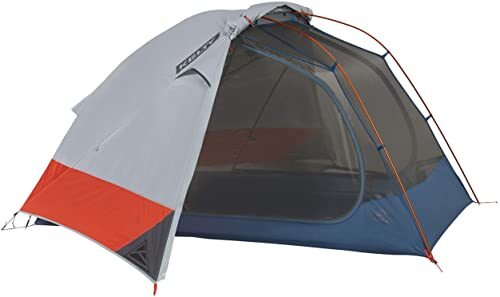
A trip into the outdoors doesn’t have to take you far from the road. If you enjoy car camping, the Kelty Dirt Motel 2 is a budget-friendly 2 person tent for all your frontcountry needs. Built to have an incredibly spacious interior, the Dirt Motel is surprisingly comfortable, especially after a long day of hiking.
Plus, the tent has a 2 door, 2 vestibule design that provides plenty of gear storage and easy access in and out of the shelter. If that wasn’t enough, you can even open and close the unique “stargazing fly” from inside the Dirt Motel, for added ventilation and a wonderful view of the night sky without getting out of bed.
- Very spacious
- Large vestibules provide lots of gear storage
- Hubbed pole system is easy to set up
- Stargazing fly for night sky views and added ventilation
- Heavy and bulky
- Not ideal for use in a storm
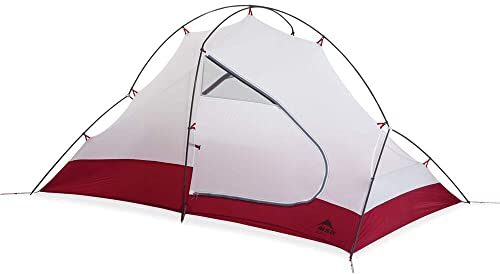
Winter outdoor enthusiasts can rejoice with the MSR Access 2. This burly four-season tent blends comfort and functionality into one small package. The Access 2 is built with treeline winter outings in mind, making it perfect for snowshoers, backcountry skiers, and splitboarders, alike.
The tent itself has limited mesh paneling, which helps increase warmth at night. It has a robust frame design, thanks to its hubbed Easton Syclone poles, which are quick and easy to set up. Additionally, the tent is incredibly durable and waterproof, due to its strong ripstop nylon fly and fully seam taped construction.
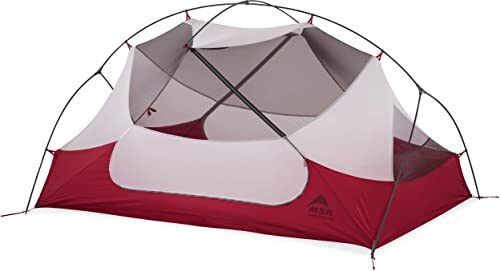
One of the best-selling 2 person backpacking tents ever, the MSR Hubba Hubba NX 2 provides the durability and compactness you’ve always wanted from your outdoor shelter. The Hubba Hubba NX 2 is a do-anything tent that’s lightweight and extremely compact when it’s packed away.
The tent itself uses Easton Syclone poles, which are incredibly durable, even in very high winds. The Hubba Hubba NX 2 even has an Xtreme Shield waterproof coating for maximum weather resistance. Finally, the tent’s two large doors and vestibules make gear storage and access a breeze, regardless of the conditions you face.
- Lightweight and compact
- Fully waterproof and durable
- Quick and easy set up
- Lots of gear storage space in vestibules
- Very expensive
- Short tent is not great for very tall campers
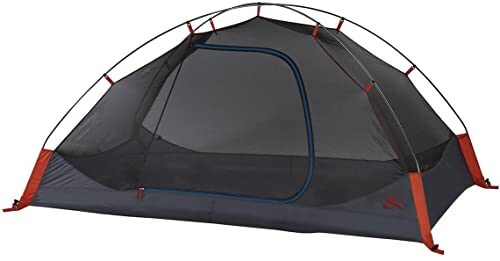
Looking to camp on a budget? Well, the Kelty Late Start 2 might be your answer. This backpacking tent is roomy and comfortable, yet rugged enough for the demands of the trail.
Kelty built the Late Start 2 with quick-corner technology and pre-bent poles, which make it easy to set up the tent in just minutes, even in the dark. The tent has a full-coverage waterproof rain fly and a simple design that minimizes hassle while camping. Oh, and it even has a vestibule for added gear storage.
- Affordable
- Can be pitched quickly
- Vestibule for gear storage
- Heavy and bulky
- Only one door and vestibule
- Pole sleeves can be annoying for set-up
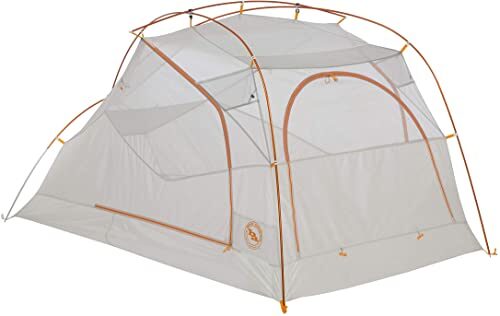
Comfort is truly king when it comes to the Big Agnes Salt Creek SL 2. This 2 person tent is made for maximum livability with its three oversized doors that provide easy access to shelter. The tent itself has two vestibules and an awning-style entrance to maximize your outdoor living space.
The Salt Creek SL 2 has steep-sided walls for added headroom as well as an overhead pocket to store all of your smaller items. The best part? While the Salt Creek SL 2 is ideal for car camping, it’s light enough for all of your backcountry adventures.
- Three entrances
- Two vestibules and an awning
- Steep sided walls for maximum headroom
- Over-head pocket for gear storage
- Not great in foul weather
- Can take a while to set up

Functional and stylish, the Nemo Aurora 2 is a backpacking tent for any backcountry adventure. The Aurora 2 has a fun, vibrant color for easy visibility as well as steep-sided walls for ample living space.
Inside, strutted vents allow for plenty of ventilation during the warmer months while gear pockets make it easy to stay organized. Plus, the Aurora 2 is quick and easy to set up in just minutes so you can spend more time enjoying your time outside.
- Large interior space and vertical walls
- Great colors
- Lots of ventilation
- Interior organization pockets
- Heavy
- Tall ceiling height isn’t great in high winds

Ultralight yet watertight, the Marmot Superalloy 2 is a beautifully designed tent that can handle any rainstorm. As a semi-freestanding tent, the Superalloy 2 saves weight with limited tent poles but has tall walls for maximum interior space.
The tent has a vented and fully seam-taped fly and a durable bathtub floor that will keep you dry in the rain. Plus, the tent fly has a unique design that doesn’t stretch out as it gets wet, for long-term rain protection during an extended storm.
- Very lightweight – less than 1.5lbs per person!
- Lots of headroom and living space
- Fully seam taped fly that won’t stretch when wet
- Easy to pitch
- Great colors
- Expensive
- Not suitable for cold weather use or heavy snow

If motorcycle camping is your thing, then the Vuz Moto tent is just what you need. This incredibly spacious tent is designed for two or three people and has four access points for added convenience.
The living space inside the Vuz Moto is very spacious, which adds plenty of comfort for life on the road. If that wasn’t good enough, the Vuz Moto even has a large garage space, which provides ample space for storing your bikes and gear at night with ease.
- Garage space for storing motorcycles
- Four points of access
- Lots of interior space
- Packs down small
- Not great for anything but motorcycle camping
- Heavy

If you’re headed out on a hunting trip with your buddies, you need a tent you can rely on. The ALPS Mountaineering Extreme 2 is a freestanding three-season tent with plenty of interior space for relaxing after a long day of hunting.
The tent has a fully sealed fly and floor for added water-resistance as well as a simple set up design that saves you time when you arrive at camp. Designed with hunters in mind, the Extreme 2 even has a neutral, earth-tone colored fly for stealth camping in nearly any environment.
- Affordable
- Easy to set up
- Two doors and vestibules for gear storage
- Earth-tone fly for reduced visibility
- Very heavy
- Quite bulky when packed
- Not very practical for short trips
As an avid camper, buying a 2 person tent is one of the best investments you’ll make. However, since there are so many different models to choose from, it’s important that you’re systematic about how you make your decision.
Since it’s easy to be swayed by marketing and shiny features when you’re buying a new tent, having a plan can help ensure that you’re sticking with your priorities and your budget. So, here are some top tips for finding the right tent for your needs:
Decide What You’ll Use The Tent For
The intended use of your tent is perhaps the most important consideration when shopping for a new outdoor shelter. Tents come in so many different shapes and sizes that are crafted with a specific use in mind. So, ask yourself what you plan to use your tent for. A thorough understanding of your intended use will help you determine what features are important in your tent and which are just a bonus.
Determine A Budget
Before you get too far ahead of yourself, you need to decide what your budget is. Unfortunately, we can’t tell you what your budget should be. But, we can say that when investing in something like a tent, you should spend as much as you’re comfortable with to get the model that best fits your needs.
Prioritize Your Wishlist
Everyone has a list of desired features that they want in a tent. But, when we’re working with a budget, we often have to prioritize some features over others. If weight savings and compactness are most important to you, you may have to sacrifice some durability unless you’re willing to pay a premium in your tent.
Consider Gear Storage
One of the most overlooked aspects of any tent is its gear storage options. People often don’t realize how much gear they have until it’s exploded all over their tent floor. So, think about how you like to store your gear (inside or outside the tent) and consider what features you might need to help you stay organized. Large vestibules and interior pockets are always great options.
Narrow Down Your List
As you’re shopping, don’t be afraid to disqualify a tent from your list of contenders. The easiest way to remove a tent from your shortlist is based on price, but if a tent doesn’t have the basic features you need, there’s no point in even considering it. Once you get down to a list of 2-3 top picks, you can look more into the nitty-gritty of the tent specifications to make your decision.
The Verdict
Buying a 2 person tent is one of the most important things you can do if you love to camp. With the best 2 person tent, you can have a relaxing and enjoyable time in the great outdoors. Choose the wrong tent, though, and your camping trip can be uncomfortable and miserable. The key is to prioritize your needs when selecting a tent so you end up with the right model for all of your adventures.

A professional mountain guide and experienced outdoor educator, Gaby enjoys traveling and exploring the world’s most remote locales. As a writer and editor, Gaby has written for a variety of climbing and travel blogs, news sites, and climbing magazines. She is currently finishing a master’s degree in outdoor education but in her free time, Gaby loves a strong cup of coffee and searching for the next great adventure.
Featured Post Camping Archives – ABC OF ROCK CLIMBING
Views: 0

As the temperatures warm and the days start to get longer, many of us get excited for our upcoming trip to the beach. There, we can soak up the sun and have some fun in the water all while enjoying our time in the great outdoors.That being said, the beach can be a hot and windy environment, which can easily turn a lovely day outside into an uncomfortable affair. The answer? A … [Read more…]
If you’re an avid camper, at some point you’re going to want to test your mettle and head out into the great outdoors during the winter months. Even when the temperatures drop and the snow starts to cover the landscape, the mountains are a great place to enjoy some fresh air and adventure during the colder months of the year.However, heading into the backcountry in the winter … [Read more…]

Every outdoor enthusiast knows that a quality camping tent is essential to enjoying your time in the woods or the mountains. However, not all tents are created equal and finding the right one is a bit of a challenge.Enter: the canvas tent. These highly durable and versatile shelters are perfect for family camping trips and hunting expeditions where you need a comfortable … [Read more…]

If you spend enough time camping out in the great outdoors, at some point, you’ll get caught in a rainstorm. When you do, you’d better hope that your tent is actually waterproof.However, while many tents on the market today masquerade as quality outdoor shelters, few actually meet the requirements necessary for full protection from the elements. Indeed, finding the best … [Read more…]
There is no better way to enjoy the great outdoors than with the whole family. However, finding a tent that your entire family will love is a challenge in itself.To help you choose the perfect shelter for your next camping trip, we’ve created this ultimate family tent guide to get you started. Up next, we’ll introduce you to ten of our favorite family camping tents. Then, we’ll … [Read more…]
Backpacking is one of the best ways to enjoy the great outdoors. Sleeping under the stars is a fantastic experience for both new and experienced backpackers, alike.But, backpacking is a gear-intensive pursuit. One of the most important things you can buy for outdoor activities is a quality tent. Unfortunately, with so many different models available today, it can be tricky to … [Read more…]
The time of year is upon us where it’s time to head the outdoors and get a little taste of nature that has eluded us through the winter. The popularity of camping, hunting, hiking, and backpacking grow steadily and companies supplying gear are more plentiful than ever.It’s great to have options but so many options only makes matters more confusing. To clear the … [Read more…]
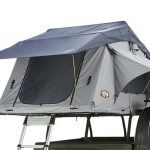
A roof top tent is one of the best ways to enjoy life on the open road without having to look for a campsite at night. When you have a roof top tent, your car or truck is your campsite.That being said, roof top tents are quite complex pieces of gear. There’s a lot of technology that goes into building a quality roof top tent. Plus, you need to be sure that you have a model that … [Read more…]

Do you love camping but hate pitching a tent? Well, we have good news for you. With a pop up tent, you can enjoy spending time in the great outdoors without the hassle of having to set up your shelter when you arrive at camp.Pop up tents make getting camp ready super easy, but with so many different models to choose from, finding the right one for your needs can be a challenge. … [Read more…]

Camping in a large group is one of the most exciting ways to spend time outside. Whether you’re just out for a weekend with the kids or you’re co-camping with another family, a quality 8 person tent is the way to go.That being said, there are dozens of different 8 person tents available on the market today. With so many options, it’s easy to be overwhelmed. So, to simplify the … [Read more…]
{ TOP 7 } Best Climbing Holds – 2020 Reviews
Views: 0
If you’re building an in-home rock climbing wall you’ve probably done a considerable amount of research and have a strong understanding of rock climbing — but picking the best climbing holds is the single most important step in building an at-home rig…and the most expensive. Here are a couple of things you’ll definitely need to keep in mind when choosing which holds to buy.
Things to Consider When Choosing Rock Climbing Holds
Type of Training
For your first pack of holds, it’s in your best interest — and your budget’s best interest — to buy a rock climbing hold pack with the widest variety you can find. Later on, you’ll be able to purchase additional holds to diversify your at-home route setting capabilities — but in the beginning, you’re going to need a solid variety just to get some basic routes on the wall. It doesn’t make sense to buy just a chip pack, just a jug pack, or just a pinch pack. Have you ever climbed a route — indoor or outdoor — that only had one type of hold? Of course not.
There are plenty of packs that offer a great mix of hold types so you can get those first couple of routes up on the wall relatively inexpensively. Once you’ve established your foundational collection of rock climbing holds, diversify based on what you want to train. If you’re lousy at pinches and are looking to improve, purchase a couple — or a bunch — of pinch holds to mix into your routes and build up that grip strength. Crimps causing you issues? Same idea — buy a pack of crimpy chips to push your finger strength to the limit.
Bolt-On versus Screw-On
Bolt-on holds are arguably more secure — but they also offer less versatility. For obvious reasons, you can only place bolt-on holds where there are bolt holes. This means the holds are bolted in and therefore more secure — but if you want a hold in that negative space between the bolt holes you screwed in you’re — pun intended — screwed. Screw-on holds offer a little more versatility as they can be placed anywhere. That being said, a lot of rock climbing hold packs come with a mix of bolt-on and screw-on holds. This is probably the best option if you’re unsure of which type of security you’re really looking for.
You should also keep in mind how often you plan to switch out your routes. If you plan to set routes that offer a diverse range of training or routes that train areas you’ll always need improvement in — for example, you’ll always need routes to train endurance regardless of your current climbing level — then maybe you won’t need to switch out your routes very often and it makes sense to purchase mostly bolt-on holds. However, if you plan to switch it up pretty regularly, it might be in your best interested to purchase easier-to-remove screw-on holds.
Texture
Indoor rock climbing holds come in a wide range of different textures depending on the brand, manufacturing style, and type of hold. Different brands use different processes for manufacturing — this often results in different types of hold textures. Generally, you’re going to find rock climbing holds that fall somewhere on a spectrum from rough, gritty, grippy, and sharp to smooth and slippery. Since no indoor rock climbing hold is ever truly going to be able to mimic real rock (although there are some manufacturers experimenting with producing real-rock climbing holds for), the texture you purchase for your at-home gym really comes down to preference. You’ll notice that rock climbing walls in gyms use a variety of different textures depending on the type of hold — this is a good route to go if you want to mimic the style of route setting you’re going to find in indoor gyms.
Since at-home rock climbing rigs are generally working with a limited amount of space, it’s a good idea to pay attention to the footprint of your rock climbing holds. A general rule guide to follow when planning out your rock climbing wall is at least one hold per square foot of wall surface — but most of the at-home rock climbing rigs you’re going to find squeeze in a hold on every square inch of space possible in order to maximize that one or two sheets of plywood that fit in your garage/attic/backyard. Pay attention to how many big, feature holds you’re going to need — if you really need any at all. Holds like volumes and large jugs are going to take up a significant amount of your footprint, and — in most cases — aren’t going to provide a ton of opportunity to train.
It might be helpful to pick rock climbing holds that can serve different purposes. In general, you want 60% of the holds you buy to be medium holds, 10% to be small/crimp holds, 10% to be large/jug holds, and 20% to be footholds. But if you can find types of holds that can serve dual purposes — a crimp you could also get a toe on later in the route, a jug that could serve as a toe-hook or bat hang hold, an irregular hold with multiple surfaces that can be used for different routes from different angles — you’re increasing the versatility of your rock climbing holds and therefore making it easier to set diverse, effective training routes in your at-home gym.
Best Climbing Holds on the Market Review
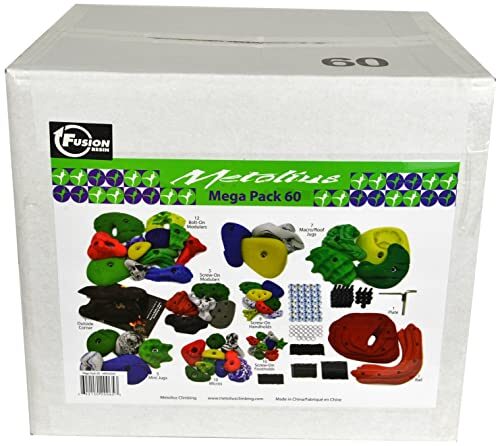
A lot of the hold packs on the list are going to be Metolius brand rock climbing holds — because they’ve been in the game for 20 years and they’re good at it. Most of their rock climbing holds come with a rough texture that relatively closely mimics the texture you would find on real rock making your training that much more effective for your trips to the crag. They also come in just about the widest variety you’ll find in a rock climbing hold pack. You can just a pack with 30, 40, 50, or 60 holds in a whole variety of sizes, shapes, and styles. Not sure if you need bolt-on or screw-on style holds? This pack comes with a mix. But don’t get overwhelmed — this pack also comes with all the hardware you need and a How to Build a Home Bouldering Wall booklet.
And when they say variety — they mean variety. These packs include footholds, rails, modulars, micros, mini jugs, roof jugs, big, medium, small, and everything in between. As mentioned above, it’s in your best interest to choose a pack with a wide variety when you’re first setting up your at-home rock climbing wall. This is the perfect pack for that. Metolius holds aren’t cheap, but you’re paying for the high-quality polyurethane resin production that you get. And, again, it comes with all the hardware. No additional costs on tools and hardware to worry about. The only downside to these is they’ve been known to crack if over-torqued. Read the manual first.
- Number of Holds: 30, 40, 50, 60
- Size: Variety
- Type: Variety
- Bolt-On/Screw-On: Mix
- Polyurethane Resin
- Wide variety of hold types
- Includes hardware and How to Build a Home Bouldering Wall booklet
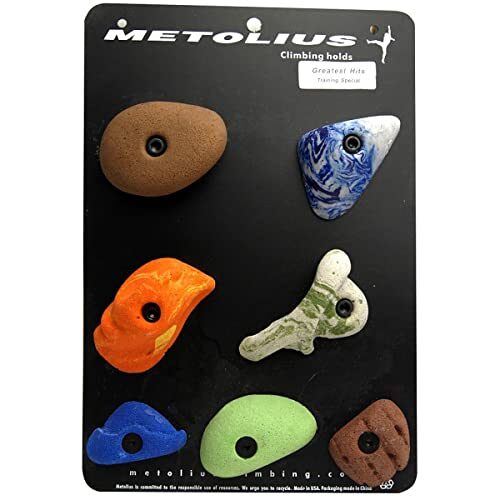
Again, Metolius is really the leader of the pack when it comes to rock climbing holds. This smaller, more budget-friendly pack still has the quality, hardware, and variety you can expect from Metolius’s bigger rock climbing hold packs. Each of the Metolius Super 7 packs come with 4 modular and 3 micro holds of varying sizes, colors, and styles. Metolius is great at designing holds that can be used for different purposes depending on which orientation you secure them in. The micro holds offer surfaces for crimps, toe hooks, toe holds, side pulls — you name it. These holds are bolt-on so they’re not quite as versatile as screw-on holds would be — but they’re sure not going to budge once you get them into the wall.
Again, these holds come with all the hardware you’ll need to get them onto your at-home rock climbing wall. You can’t exactly build a foundation off of these little buds since there are only seven of them — but they’re perfect for expanding your collection little by little as your budget allows once you’ve gotten the foundations set. These also can up the technicality of your rock climbing wall. Some of the micro holds make great crimps to start training finger strength once you hit that level. They also make great, tiny footholds for footwork.
- Number of Holds: 7
- Size: Small, Medium
- Type: 4 modular, 3 micro
- Bolt-On/Screw-On: Bolt-On
- Hardware included
- Inexpensive
- Great variety
- Supplemental rather than foundational
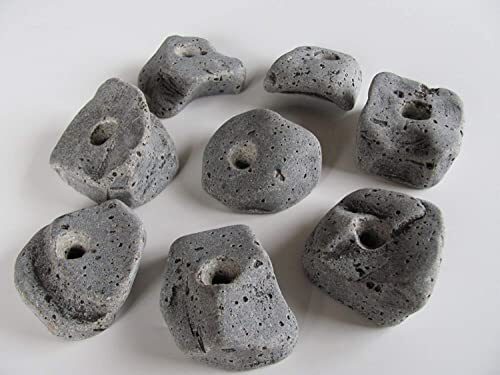
Introducing the first rock climbing pack on this list that wasn’t produced by Metolius, the Rocky Mountain Climbing Gear Holds pack is a great, basic, inexpensive pack of holds to add to your at-home rock climbing wall. These Rocky Mountain holds are quirky and unique because of their 100% recycled material. These are made of a combination of polyurethane, vinyl ester, polyester, plastics, epoxy, vegetable oil, and other organic materials. If environmental impact is particularly important to you, keep these holds in mind.
The Rocky Mountain climbing gear holds pack is tantalizingly cheap — 25 holds for just about $35. But there’s a reason for this. While Rocky Mountain holds are great for supplementing your wall with some boxy, juggy holds, these aren’t, by any stretch of the imagination, technical holds. While there is some variety, these holds are more or less all the same type of hold. This makes them great for kids, beginners, and endurance training — but you won’t get a lot of technical training out of them. Don’t write them off for this reason, however. Every rock climbing wall needs a wide variety of types of holds. And the real rock texture of these holds is great for training for trips to the crag.
- Number of Holds: 25
- Size: Variety
- Type: Variety
- Bolt-On/Screw-On: Screw-On
- Real-rock texture
- Versatile, screw-on style
- Made from recycled material
- Over 200 unique shapes
- Does not include hardware
- Less technical
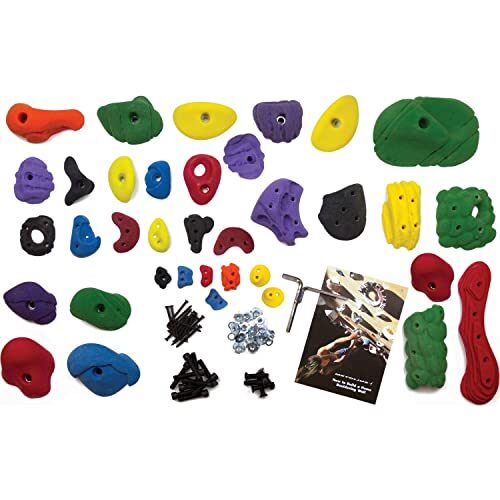
And right back to Metolius. The Mega Hold Pack is the best for variety, but the Foundations Pack is certainly a close second. This pack comes with the same helpful How to Build a Home Bouldering Wall booklet and all of the hardware you’ll need to put these guys up on your at-home rock climbing wall. It also comes in not just a 35, not just a 65, but also a 105 piece pack. That’s more than enough holds to build the beginnings of your at-home rock climbing wall.
As a foundational pack, this pack has a huge range of styles, types, and sizes of holds. And — like Metolius’s other packs — each of the holds can be oriented in different directions to serve different purposes as crimps, side pulls, jugs, footholds, or whatever else your at-home rig needs. Some climbers have managed to crack the pieces rather easily so read the how-to guide beforehand and make sure you’re not over-torquing the holds as you secure them into the wall. However, the variety extends to the style of the holds — these come in both bolt-on and screw-on so you can move them around to your heart’s content or keep them secure and solid in one spot for eternity.
- Number of Holds: 35, 65, 105
- Size: Variety
- Type: Variety
- Bolt-On/Screw-On: Variety
- Comes with a How to Build a Home Bouldering Wall booklet
- Includes multi-wrench
- Up to 105 pieces
- Some pieces have been known to crack easily
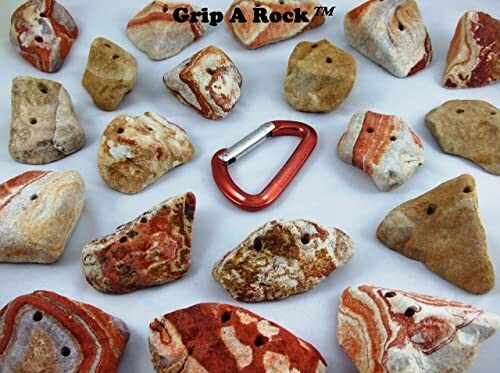
The Grip a Rock 20-piece rock climbing hold pack is by far the most authentic rock climbing holds you’re going to find on the market — because they’re real rock. Grip a Rock produces their holds from real, rainbow sandstone rock that have been styled with a screw-on securing system. A set of 20 of these rocks will set you back about $46.99 — so they’re not as expensive as Metolius holds, but they are pricier than some of the other less technical packs on this list. And they are certainly that — less technical. Similar to the Rocky Mountain Climbing Holds, the aesthetics of these holds come at the price of technicality. As authentic as they are, they’re not the training crimps, pinches, and jugs you’ll find in Metolius’s packs or on the wall at your local indoor rock climbing gym.
That being said, they’re certainly aesthetically pleasing and they still make a great supplemental set for your at-home rock climbing rig. These don’t come with included hardware so keep that in mind when you’re budgeting and planning. The screw-on secure style is relatively easy to manage and easy to remove and rearrange.
- Number of Holds: 20
- Size: Small
- Type: Variety
- Bolt-On/Screw-On: Screw-On
- Aesthetically pleasing
- Real rainbow sandstone rock
- Not technical
- Hardware not included
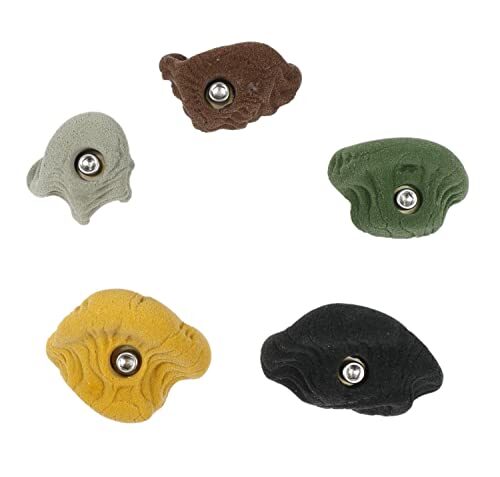
Who doesn’t love a good set of jugs? Atomik is another prominent brand of rock climbing holds, and they make a great pack of jugs to supplement your at-home rock climbing wall. These are rather pricey buggers — a set of five holds will set you back about $38.65 — but this is because of the size of these holds. The more material, the more expensive, and these are some of the larger holds on this list as they are jug holds.
Similar to Metolius, Atomik rock climbing holds are produced with a polyurethane plastic that mimics real rock with a relatively rough, gritty texture. These are bolt-on holds so they’re not going to budge much which is exactly what you’re looking for in a jug that you might dyno, throw, or rest on. These holds don’t include hardware so keep this in mind when you’re planning and budgeting. There are also only five holds so keep this in mind as a supplemental purchase to a foundational pack rather than a method to build your entire collection out of.
- Number of Holds: 5
- Size: Medium
- Type: Jug
- Bolt-On/Screw-On: Bolt-On
- Realistic, rough texture
- Supplemental variety
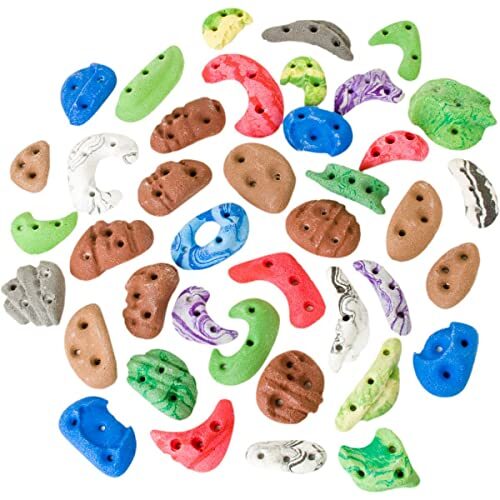
Lastly, but certainly not least, is the rock climbing hold pack for more advanced climbers. Once again, Metolius proves to offer the best option for more advanced rock climbers with its Greatest Chips rock climbing hold pack. These crimpy buggers are made of the same rough, grippy material as Metolius’s other holds. A set of 40 will only set you back about $40 — just like bigger holds that use more material will cost more, smaller holds that use less material will cost less per hold.
This screw-on set includes all the hardware you need for securing these holds to your at-home rock climbing rig as well as smears and slabs for some tricky footholds — everything you need to set some tricky routes. These holds aren’t meant to be a foundational set or even a set for beginner climbers — these are for the big kids that want some serious finger strength training. Which means, of course, that they are actually for big kids — if you’re looking for a set of rock climbing holds to set up a route for your kids, this isn’t the one. But it is a must-have for any rock climber serious about developing the finger strength it takes to overcome the rock.
- Number of Holds: 40
- Size: Small
- Type: Crimp
- Bolt-On/Screw-On: Screw-On
- Polyurethane
- Include smears and slabs for footholds
- Great for training crimps and finger strength
- Includes hardware
If you’re serious about rock climbing, there’s a chance you’ll be building an at-home rig at some point in your life. The trickiest, most expensive part of that process is selecting your rock climbing holds. Regardless of if you’re looking for a foundational set, some holds to set fun routes for your kids, or crimpy buggers to push your finger strength to the edge, this list has the best rock climbing holds for you.
{ TOP 10 } Best 1 Person Tents – 2020 Reviews
Views: 0
If you enjoy solo adventures in the outdoors, then a 1 person tent is a must-have piece of gear. Designed to be lightweight and compact, yet provide plenty of living space, 1 person tents are a great companion for individual missions in the mountains.
But, there are so many different 1 person tents out there today. So, it’s understandable if you’re having trouble finding the right one for you. To help you out, we’ve put together your guide to the best 1 person tents, complete with advice to choosing the right model for your upcoming adventures.

Crafted with solo mountain adventures in mind, the MSR Hubba NX 1 is a top-of-the-line mountaineering and backpacking tent. The tent maximizes interior living space with a freestanding design and high ceiling height.
Built with Easton Syclone Poles, the Hubba NX 1 is durable enough for resisting high wind speeds in the mountains. It also has MSR’s Xtreme Shield waterproof coating to help keep you dry.
Other features include a spacious vestibule, which is ideal for gear storage during bad weather. Plus, the tent can be stripped down to a paltry 2lb 7oz (1.12kg) weight for those fast and light alpine missions.

Designed for technical outdoor pursuits, the Big Agnes Tiger Wall UL 1 is a performance-driven shelter for backcountry expeditions. The tent has a simple DAC Featherlite pole structure that provides ample headroom for a one person tent.
If that wasn’t enough, unlike most ultralight tents, the Tiger Wall UL 1 doesn’t sacrifice comfort. Big Agnes built this tent with added comforts like storage pockets, an oversized door, and a single pole, which makes set-up a breeze.

When it comes to ultralight backpacking performance, it’s hard to beat the MSR Carbon Reflex 1. This high-end backpacking tent uses carbon fiber poles, a zipper-free vestibule, and top-of-the-line lightweight fabrics to cut weight and bulk wherever possible.
However, even though the Carbon Reflex 1 is incredibly light (1lb 7oz/660g), it is spacious inside for maximum livability. It even has internal mesh storage pockets to help you stay organized on the go, all without adding weight to your pack.
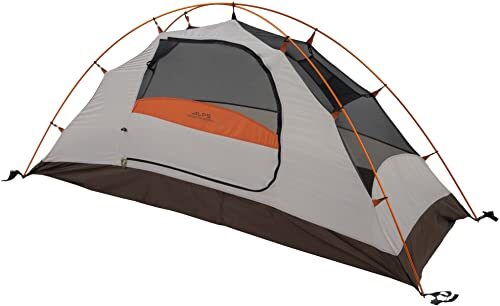
The ALPS Mountaineering Lynx 1 is a freestanding tent that’s great for any solo trekking trip. Affordable, yet functional, the Lynx 1 is easy to set up, thanks to its clip-on design.
The Lynx has walls that are made mostly of mesh, which is ideal for added ventilation in the hot summer months. But, the Lynx also has fully taped seams and a waterproof coating to help keep you dry, regardless of the weather.
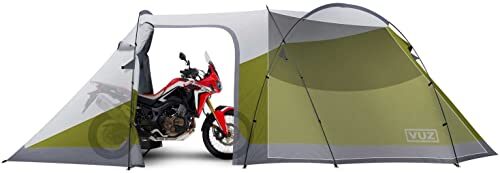
Motorcycle owners can rejoice with the Vuz Moto 1. This purpose-built motorcycle tent has a large interior living space for you to crash at night wherever life on the road might take you. The tent has four points of entrance for easy access as well as plenty of space to hang out and relax at the end of the day.
The best part? The Vuz Moto 1 even has space for your bike. The tent has a large bike garage that helps protect your ride and your gear at night. Plus, it packs down small, so it’s great for any cross-country bike trip.
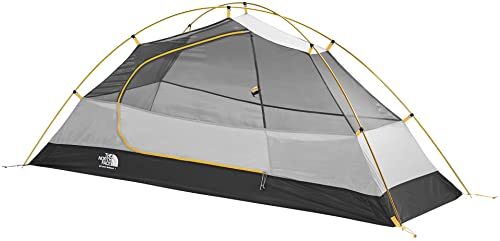
A budget-friendly companion for solo trips, the North Face Stormbreak 1 is a great all-around tent for backcountry use. The tent has a fully seam-taped design that helps keep you dry even in a storm. The Stormbreak 1 also has built-in high/low ventilation for added comfort in the heat.
As a three-season tent, the Stormbreak 1 thrives on short backpacking trips, where it provides a good mix of comfort and value. You can even add a square gear loft into the tent to maximize your interior living space while also staying organized in camp.
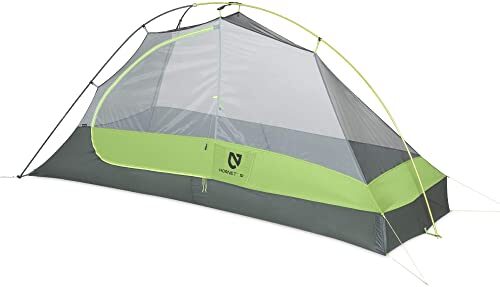
If cycling is your thing, then the Nemo Hornet Ultralight 1 just might be your next bikepacking tent. Designed to provide lots of livability while cutting weight, the Hornet is an ultralight shelter with plenty of interior space.
The tent uses a minimalistic pole structure to reduce weight while incorporating high-end fabrics for added performance. Plus, the simple pole design of the Hornet Ultralight 1 means set up takes just minutes, while the whole thing can pack down small for transport.
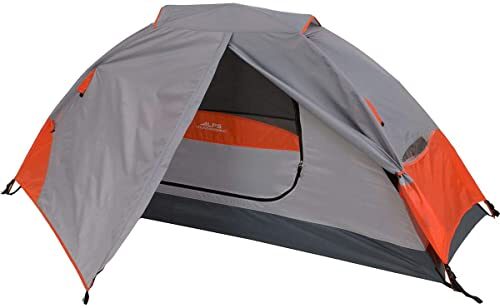
Perfect for the budget-conscious camper, the ALPS Mountaineering Koda 1 is one of the best 1 person tents on the market today for less than $100. This tent is designed for three-season use, thanks to its mesh walls, which provide ample ventilation.
It also has a UV and water-resistant rainfly for comfort during those summertime storms. Inside, there’s plenty of room for both you and your gear, thanks to the built-in gear loft and mesh storage pockets. Oh, and there’s even a vestibule for added gear storage outside the Koda 1 for added versatility.
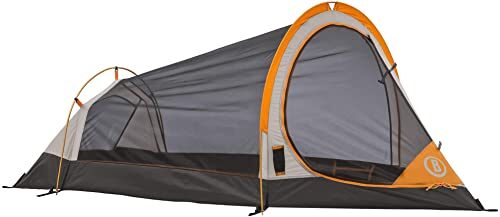
Built by hunters, for hunters, the Bushnell Roam 1 is a solid 1 person tent for those hunting trips with your buddies where everyone wants their own personal space. The Roam 1 has a simple two-pole design that allows for quick and easy setup, wherever life’s adventures might take you.
Plus, the tent has large mesh paneling, which adds plenty of ventilation in the summer months and a great view of the sky above. If that wasn’t enough, the tent has a few interior pockets that make it easy to stay organized. It even has a flashlight pocket right outside the door, just in case you need to answer nature’s call in the middle of the night.
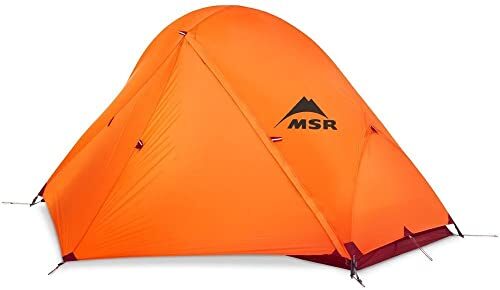
If you love spending time outside in the winter months, then the MSR Access 1 just might be what you’re looking for. Designed with snowshoers, backcountry skiers, and splitboarders in mind, the Access 1 is a great four-season tent for year-round use at tree-line.
The tent uses limited mesh to help insulate you from the cold while still staying light and compact for transport. The Access 1 also uses Easton Syclone poles, which are surprisingly durable, yet lightweight, for use during wintertime backcountry adventures. Oh, and the tent’s fully waterproof construction keeps rain and snow out for maximum comfort in the winter months.
There are dozens of different 1 person tents for sale. So, finding just one that’s going to be perfect for all of your favorite outdoor activities can be tricky, to say the least. Up next, we’ll give you some advice on finding the right 1 person tent for you.
How to Choose A 1 Person Tent?
When you buy a tent, there are a few things you need to think about before you even start shopping around. These include:
What are you going to use the tent for? Do you like backpacking, motorcycle camping, bikepacking, or perhaps mountaineering? All of these different pursuits demand unique gear, so you need to decide what you plan to use your tent for right off the bat.
Season
Modern tents are either three- or four-season models. If you don’t plan on doing any winter camping, a three-season tent is probably enough. Anyone that wants to camp in the winter will need a four-season model, instead.
Priorities
Buying a piece of gear is all about compromise. Unless you have a huge budget, you’re probably going to have to choose between livability, durability, and weight savings in your tent. Before you start shopping, you should determine your gear priorities, which will help guide your decision making.
Budget
Unfortunately, most of us are on a budget when buying gear. Although we’d love to spend lots of money on equipment, it’s not always possible. So, determine a budget before you start shopping and stick with it as you peruse different models.
Key Considerations
Modern tents are feature-filled shelters. So, here are some key things to look out for as you shop around:
Vestibules
A vestibule is like a covered garage space at your tent entrance. They are great protected places to store gear without getting the inside of your tent wet or dirty. However, larger vestibules add weight and cost to a tent, so there are advantages and disadvantages here.
Storage Options
If you camp with lots of gear, having some sort of storage system to help you stay organized is ideal. Many tents will have built-in storage pockets or even a gear loft to make it easier to find your most important pieces of gear at night.
Poles
The size, quantity, and quality of your tent poles will make a huge difference. While some lightweight tents opt for one, small, high-quality pole, other more affordable options will have multiple heavier poles in their design. Fewer poles mean an easier set-up while tents with many poles tend to be a bit cheaper, even if they are cumbersome.
Packed Size
A 1 person tent is generally designed to be compact since you won’t have anyone to split your gear with on a solo trip. Some solo tents are a bit more compact than others, thanks to their lightweight, high-end fabrics.
Weight
No one likes to carry heavy gear, and a tent is no exception. Since you have to carry a solo tent all by yourself, it’s beneficial to get a lightweight model that won’t slow you down on the trail.
Most 1 person tents are quite compact, even when they’re set up. But, some tents have a large “footprint,” which means they take up a lot of space when you pitch them. A tent with a large footprint will often be quite comfortable, but will be more difficult to find a good site for. This is particularly true if you’re camping somewhere with rocky terrain, where flat ground can be hard to come by.
Ceiling Height
A tent with a high ceiling height is nice, especially if you like to be comfortable while you camp. However, keep in mind that a tent with a high ceiling height is going to be less robust in the wind. Additionally, higher ceiling height often means a heavier tent because you need longer poles to keep the tent upright.
Water-Resistance
The main reason to buy a tent is so that you have shelter from the elements. Thus, water-resistance is a key consideration regardless of what kind of shelter you choose. Tents get their water-resistance from a combination of factors.
The most important factor in determining water-resistance is the rainfly fabric. Most rain flies will be made from ripstop nylon or polyester. Both are waterproof, but polyester is cheaper, heavier, bulkier, and less durable.
Additionally, a fully water-resistant tent will have taped seams that stop water from seeping in through the floor or fly. Finally, the best tents will use a durable water repellent (DWR) coating on their rainfly. This DWR coating helps encourage water to bead off the fly instead of soaking through, which keeps you warm, comfortable, and dry, even in a storm
The Verdict
If you love to enjoy the beauty of the outdoors on your own, a 1 person tent is an essential piece of gear. Since there are so many different solo tents on the market today, it’s important to know what you’re looking for before you start shopping around. Solo camping can be one of the best ways to enjoy the many wonders of the natural world, so you need the best 1 person tent that’s perfect for your needs.
{ TOP 10 } Best Chalk Bag – 2020 Reviews
Views: 0

Your chalk bag is one of the most used and least appreciated pieces of climbing gear. Whether you’re a boulderer, trad dad, or brand new climber, chances are your chalk bag is the first thing you grab from your kit when you’re going to climb. You can get a lot of mileage out of one chalk bag, so it’s important to pick the best one for you to dip your hands in.
Part fashion accessory, part performance mechanism, there are a lot of factors that go into choosing the right chalk bag. You want it to be sturdy enough to keep its shape, yet supple enough to not feel bulky on your harness. Then there are the aesthetics of it; why not choose a chalk bag that will make a statement?
With all the options available on the market, it’s hard to find a place to start! But don’t worry, we’re here to help. This guide will serve as a jumping off point to finding that perfect chalk bag of your dreams. First, we’ll provide a run-down of the top features to consider when shopping for a chalk bag. Then, we’ll give our definitive list of the 10 best chalk bags on the market today.
There are many different types of chalk bags to choose from, and because of that there are quite a few choices you need to make before deciding which one will work for you. While many of the choices boil down to personal preference, there are a few things you need to watch out for depending on certain factors. For example, if you have big hands, you might want to purchase a larger bag than if you have small hands. Similarly, if you boulder a lot, it might be worth it to buy a dedicated chalk bucket, whereas if you mainly sport climb it would be useful to choose a bag with a sturdy opening to allow you to dip your hands and chalk up at the crux.
Given all the options available, it’s helpful to have a list of key features to keep in mind when you’re out shopping for a new chalk bag. We’ve taken the guesswork out for you. Here’s our list of the top chalk bag features to look for.
Although there aren’t standardized sizes for chalk bags, their sizes do vary. Some manufactures do provide size options for certain bags, but most do not. That’s why it’s very important to look at the size of the bag and decide if that’s a good choice for you.
Here are the benefits of each size:
- Small bags: Generally used by people with small hands, small bags also tend to be light and supple and don’t get in the way while hanging on your harness. Smaller bags stay put regardless of which body position you might be in during a climb.
- Large bags: Larger bags make it easier to chalk up since you don’t have to fumble finding a small bag. They can hold more chalk and are the obvious choice for climbers with large hands.
- Buckets: A staple for any boulderer, buckets sit on the ground, hold lots of chalk, and make it easy to dip both hands in and chalk up before bouldering. They can also come in handy if you’re bouldering in a group and would all like to share one big bucket.
The shape of your chalk bag can affect how it feels when it hangs against your body, and whether it will stand upright on the floor. There are two main shapes, although there are plenty of novelty bags that have creative, fun shapes ranging from Pokémon characters to dino tails.
- Cylindrical bags: These bags tend to be larger, so they can hold more chalk. They’re also ideal for larger hands and work nicely in the gym since you can attach them to your harness for sport climbs or stand them on the ground when you boulder.
- Tapered bags: Tapered bags are well suited for sport and trad routes. They tend to be soft and supple and don’t add extra weight to your harness.
The spectrum of chalk bag features spans from a minimalistic approach where the bag literally just holds chalk to an array of pockets, loops, and designs. Some people prefer to keep their bag simple, while others like to have tactical features. Which of these features you need boils down to personal preference.
Here are the benefits of the most common features available:
- Stiffened rim: Most bags come standard with this feature, as it allows you to easily dip your hands in to chalk up.
- Zippered pocket: Stash small items in pockets for easy access. Many of the bags on our list feature pockets for the convenience of it, but some people don’t like the added bulk that the items in the pocket can create.
- Brush loop: Keeps your brush handy to clean holds.
- Paracord closure: The better the closure on your bag, the less likely chalk will spill out while it’s in storage. Have a bag that doesn’t seal all the way shut? You can always dedicate a large Ziploc bag to store your chalk bag and contain the mess.
- Bag belt: Easily sling your chalk bag around your waist with a bag belt. This also makes it easy to slide your bag to either side if needed during your climb. Another option to attach your bag to your harness is with a carabiner. Some people like this because it gives you a backup if you need it in a pinch, but carabiners are also heavier and bulkier, and if you were to fall on them, it would hurt.
- Fleece lining: For extra comfort while chalking up, choose a bag with a fleece lining. The fleece also helps to contain any chalk dust from puffing out while you chalk up.
Whether your bag is rigid or supple depends on the materials that go into its construction. If you already know what you want out of your bag, you can shop for ones that are made with materials to produce that effect. Generally, the rigid materials tend to be more durable, but if your bag is made of quality materials, even the soft ones will hold up against frequent use.
- Nylon – If you’d like the best of both worlds, nylon provides a durable material that is very supple but will keep its shape. It is a popular synthetic known for its durability.
- Polyester – This synthetic fiber is flexible yet strong. Like nylon, chalk bags made from polyester will remain soft without sacrificing any durability.
- Canvas – Chalk bags made from canvas are rigid and durable. They will keep their shape hold up well.
- Thermoplastic polyurethane – Some bags will have a TPU coating on the bottom to add additional rigidity and durability to your bag.
If performance isn’t your main concern, or if you are just looking for a fun addition to your gym climbing kit, consider making your own chalk bag. There are plenty of tutorials that show you how to sew, knit, or even make your bag out of duct tape. The sky’s the limit with homemade chalk bags, and whatever you come up with is sure to turn heads.
Now that you know what to look for in a chalk bag, let’s dive into the reviews! Here are the top 10 chalk bags on the market today.

The Arc’teryx C80 is the perfect chalk bag for any climber. It’s loaded with useful features and is designed with unmatched craftsmanship. There’s a sturdy rim that makes it easy to dip your hands into, an efficient draw cord system that prevents any chalk from spilling out while it’s closed, and a convenient pocket to stash smaller items like keys or credit cards. The belt system even doubles as a bottle opener!
The outside of this bag is super rugged, made from Burly™ Double Weave four-way stretch fabric, but the inside is soft and supple, providing a comfortable chalking up experience. This bag is the industry standard, and it has the price tag to prove it. Although this bag is significantly more expensive than most other bags on the list, you really do get what you pay for.
- Durable
- Lightweight
- Deep basket
- Has a pocket
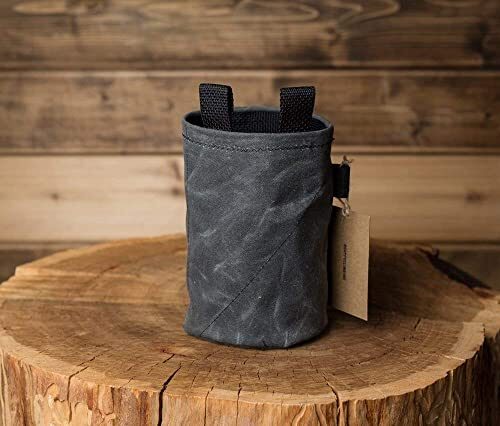
Hand crafted in Southern California, the Static Waxed Canvas bag offers a stylish design and supreme durability. This bag is beautifully designed, comprised of sturdy waxed canvas on the outside and a soft fleece lining on the inside. The rugged canvas can withstand frequent use. The fleece lining feels nice and soft on your hands, and even doubles as a chalk reserve for when you run out. The paracord closure cinches shut nicely, so you don’t lose any chalk.
Classic and functional, the Static Waxed Canvas bag also comes in a variety of colors. To add to the aesthetic benefits of this bag, it comes infused with USDA Organic San Diego Lavender. It’s quite large and even stands upright so it can double as a miniature chalk bucket. The one thing this bag doesn’t come with, however, is a belt.
- Durable
- Hand made in California
- Large enough for big hands
- Expensive
- Doesn’t come with a belt
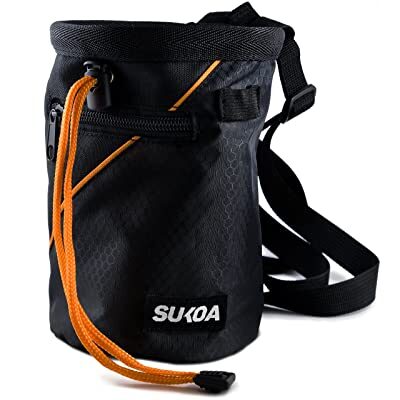
This bag has just about any feature you’d want in a chalk bag, with a price tag that makes it hard to pass up. The Sukoa has not one, but two zipper pockets! This enables you to stash your phone in one and use the smaller pocket for your keys, cards, or whatever else you can fit in there. The durable material holds up with regular use, and the bag is deep enough to hold several days’ worth of chalk.
The main complaint for the Sukoa is its faulty closure system. Some complain that it doesn’t cinch completely closed, allowing chalk to spill out while not in use. There are also complaints that the draw cord breaks easily. Despite this, this is still the cheapest chalk bag on our list, and the features and overall quality of the bag make it worth much more than its price tag.
- Inexpensive
- Two pockets for storing large valuables
- Large main compartment

Classic, affordable, and durable, this Black Diamond chalk bag offers pretty much everything you would need in a chalk bag. Its cylindrical shape makes it easy to chalk up, leaving plenty of room for you to fit your hands inside. It also stands upright, which comes in handy if you’d like your bag to perform while climbing ropes or while bouldering. The rear pocket is a good place to stash cards or a topo. The bag is also available in a variety of colors, and its design is streamlined.
The price, features, and quality make this bag an industry standard, thus it is a great baseline for which other bags can be judged.
- Durable
- Available in different sizes for large or small hands
Chances are that you’ve seen this bag at your local bouldering gym. It is one of the most popular chalk buckets, and for good reason! The ORGANIC Lunch Bag Chalk Bucket is built to last, large enough to fit both hands in it, stays open while you’re bouldering, and comes in a wide variety of flashy colors and designs. On top of its unique flashiness, this bag is made from recycled scrap fabric. There is a large outer pocket and two elastic brush loops.
The simple, time-tested design of the Lunch Bag leaves little room for complaints. Although it doesn’t have as many burly features as other chalk buckets on the market, it has everything you need, including personalized, eye-catching designs.
- Fun, flashy designs
- Made from durable, recycled materials
- Minimalistic (could also be a pro)

This is a great option for anyone looking for a soft, supple, no frills chalk bag. The Saka is well constructed and features a reinforced rim that makes it easy to place your hands inside while climbing. Its soft microfleece interior feels good on your hands and the wide, round shape makes it easy to chalk up. The main complaint about this bag? It’s not very deep, so it wouldn’t be the best choice for someone with large hands.

The prAna chalk bag is a staple for many climbers. The bag is simple in design, lightweight and pliable. It works for indoor climbing, outdoor climbing and even stays put while bouldering. This is a bag that really checks all the boxes for what you might want in a chalk bag: it cinches great, forms to your hands, comes in a variety of colors (and fun graphics), and is made of super soft polyester.
- Cinches great
- Lightweight
- Durable construction
- Soft on the inside
- Small hand opening
- No pockets

The main thing that distinguishes the Togir from other bags on this list is its stretchy spandex material. The bag is nice and stretchy, making it easy to chalk up before your next send. There is a stable opening to keep the rim open and accessible, and a plush fleece lining.
There are also some extra features like a zippered pocket to store tape and other small items, and a handy brush holder.
- Stretchy spandex material
- Zippered pocket

This heavy-duty bag looks the part of a high-performance chalk bucket, and it executes as expected. From the zip pocket for secure storage to a side Velcro pocket and four brush holders, this bucket will hold all your essentials. As durable as it is functional, the DMM Edge works hard holding your chalk and supplies so you can work hard on your projects.
The carry handles and the stable base make it a cinch to use, and the double-seal chalk closure keeps your chalk where you want it.
- Durable
- Convenient carry handle

Instead of sticking with the more common paracord closure, the EDELRID Trifid chalk bag uses a unique twist closure system. There are fans on both side of the spectrum for this. Some argue that it doesn’t work as well as the typical paracord closure, while others swear by the design.
The Trifid is large sized and lightweight, made of a pliable nylon exterior and soft fleece-lined chalk reservoir.
- Pliable nylon material
- Unique twist closure
- Some complain that the closure system is clumsy
Chalk bags perform double duty on your harness. They are a necessary piece of gear that demands performance, but they are also a statement accessory. Now that we’ve covered the types of chalk bags and our top picks, you are ready to get out there and start shopping!
Remember that the type of bag that works for one person may not be the bag of your dreams. Take time to research, test, and really pin down how you’ll be using your chalk bag. The good thing about chalk bags is that they are generally less expensive than other pieces of gear in your kit, so you can likely afford to keep a couple on rotation.
Whether you’re looking for a chalk bucket for your next bouldering session, a lightweight bag for your hard sport project, or a flashy accessory for the gym, remember that at the end of the day your best chalk bag is so much more than just a bag that holds chalk.

Brianne is a freelance writer from Southern California. She loves spending time outdoors climbing, hiking, and cycling, or simply walking her dog Archie around town. Follow her adventures on Instagram @brianneschaer.
{ TOP 7 } Best Climbing Cams – 2020 Reviews
Views: 0
Once you start to trad climb, you’ll quickly find yourself investing in lots of camming devices, or cams. Officially called Spring Loaded Camming Devices, cams are inserted into features on a rock to provide protection as you move up the wall. When a cam is weighted, its opposing lobes cam outward to remain in place on the wall. A good cam placement will save you when you fall.
The thing about the best climbing cams is that they are expensive. Financial constraints (and the crippling fear of leading on your own gear placements) can create a barrier to entry for trad climbing. But if you’re brave enough and willing to invest in good gear, you can climb virtually any route you’d like, including some of the most famous faces on Earth that are only accessible by trad climbing.
Your rack will grow and change over time as you discover what types of climbs you prefer and lead more climbs to learn which types and sizes of cams best serve you. And we’re here to help you along in your trad journey by front loading some of your research and making our recommendations of the 7 best camming devices available on the market today.
Camming Device Buyer’s Guide
A single cam can easily cost upwards of $40, and a small rack should have 10-15 pieces, so you’ll no doubt be investing a good amount of money in your rack. Additionally, different crags will require different types and sizes of cams (a rack for climbing in Yosemite will look very different than one used in Indian Creek, for example). It’s important to know the types of cams available and which ones will put in the most work in the areas you climb in the most.
What to Look for in a Camming Device?
These are the key points to consider before buying a cam:
- Size: Be careful when you are building a rack of different brands of cams. There is no standardized size, so it’s important to pay attention to the size of each cam.
- Range: Another thing to consider when building your rack is your cam’s expansion range. This is how far the cam expands when the lobes are fully contracted to fully expanded. A wider expansion range means you can use one piece in a wider variety of placements, meaning you will need less piece overall, which means your rack is smaller and lighter (which is a very good thing).
- Weight: Even the smallest of trad racks is going to weigh much more than a sport climbing rack, so it’s important to consider the weight of the cams you are buying. There are many great ultralight options on the market today, but remember to never sacrifice performance for weight.
- Number of cam lobes: Most cams will have either three or four spring-loaded cam lobes. Four-lobe cams are the standard, and work well to provide as much contact with the rock as possible to make a secure placement. The downside to four-lobe cams is that they can be bulky. Three-lobe cams, on the other hand, offer a narrower profile to allow them to fit into tighter, smaller places. They tend to be lighter than four-lobe cams but can be prone to walking and feel less secure than four-lobe cams due to them making less contact with the rock.
- Slings: All cams come with a sling attached, but some have extendable slings. This is a good option for climbing meandering routes and reducing rope drag.
- Stem design: Older cams may have rigid stems, but the standard today is to have flexible cam stems. There are two main types of stems: single-cable and U-stems. Single-cable stems require you to use your forefinger, middle finger and thumb to pull the trigger, but they are slim enough to fit into smaller spaces than U-stems, which only require the forefinger and thumb to operate.
It’s relatively straightforward to start sport climbing. You can buy a rope, harness, and some quickdraws and, for the most part, be good to go. However, trad climbing is a whole different ball game. You still need all of those things, but you also have to buy cams (active protection), nuts (passive protection), and gear to make anchors. Here are a few of our recommendations for extras you should include in your rack.
- Cams: It is important to always research the gear required for any climbs you would like to attempt, as each route requires different sizes of cams. A good beginner rack might have 6-10 cams and 3-5 micro cams to start.
- Nuts: Nuts are a form of passive protection and are useful when placing gear in cracks. They’re also significantly cheaper than cams.
- Carabiners: Remember that cams don’t come with carabiners attached, so for every cam you buy, you’ll need a carabiner to connect it to the climbing rope.
- Quickdraws: Don’t forget your draws! Sometimes there are bolts that you can clip into or you can use them to extend your cam placements.
- Slings: Slings are also a nice way to extend your placements.
- Cordelette: You can buy one or make your own, and use it to build anchors.
- Locking carabiners: It’s good to have at least 3-4 locking carabiners to use for belays, building anchors, and to auto block your rappel.
- Nut tool: These come in handy for the follower to easily remove any gear that may have walked or got stuck in the rock.
Now that we’ve covered how to choose a camming device, it’s time for the reviews! Here are our recommendations for the 7 best cams on the market today.
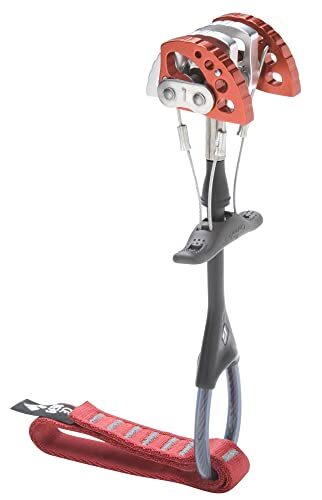
If you’re looking for an all-around well performing cam that won’t break the bank and will get plenty of mileage, the Black Diamond Camalot is a great option for you. These cams are durable, affordable, and come in a wide range of sizes. They are great for beginners and experienced trad climbers alike, as they come in handy on any rack and last for years.
Black Diamond Camalots have a double-axle design that gives them a larger expansion range than other cams on the market. The cable loop and trigger are easy to use, and the sings are large enough to grab with gloves on. These are the (self proclaimed) gold standard for camming units, and we couldn’t agree more.
- Affordable
- Durable
- Available in a wide range of sizes
- Heavy compared to modern lightweight options
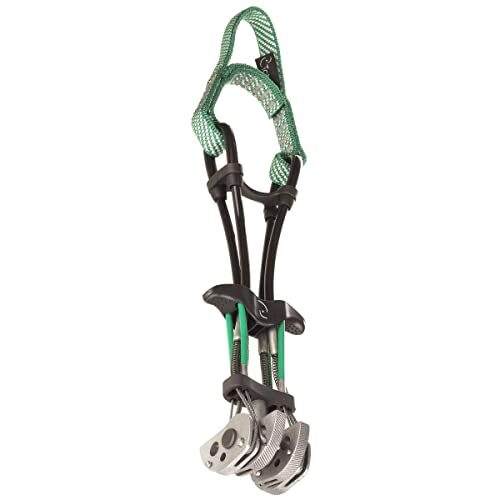
Whether you’re aid climbing up El Capitan or working a trad line in Basque Country (where these cams were created), having a few Totem cams in your rack will help you make bomber placements in difficult situations. Totem cams have a unique ability to engage only two lobes at a time using their patented technology. This means you can use them to make weight-only placements while aid climbing. They come in a wide variety of sizes, even small sizes to place in tiny pockets and holes that other cams just wouldn’t fit.
A number of additional features make this cam well-suited for any big wall adventure, including large, flat cam heads to make cleaning easier, flexible dual stems that can be placed horizontally and vertically, and a trigger large enough to use while wearing gloves.
- Unique design allows for more placements
- Great for trad, aid climbing, and big walls
- Can fit in small cracks and pin scars
- Expensive
- Often out of stock
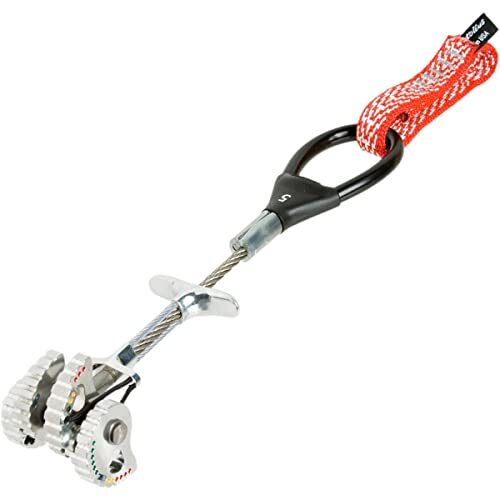
Metolius’s offset cams have different sized lobes on one side than the other (two small lobes and two large ones) to increase the range of possible placements. These cams will work well in pin scars or flaring cracks, and also come in handy when aid climbing. They are lightweight (40% lighter than conventional cams), secure, and color-coded by size.
- Lightweight
- Able to place in pin scars and flares
- Lobes aren’t anodized to coordinate with color-coded slings

Fixe Hardware’s Alien Cams are small enough to protect your climb in placements that other cams just can’t. Their light, flexible, and durable. They are available in six regular sizes and five offset sizes to protect pin scars and horizontal or flared cracks. Some people complain that they don’t feel as secure as other cams, but if you’re on a route that requires small cams, then they are sometimes the only option.
- Flexible stems
- Small enough to fit in pin scars and flared cracks
- Offset option
- Expensive
- Not very versatile & durable
- Smallest three sizes are rated to 7 kN and under

If cost is a limiting factor, then the Trango Flex Cams are a good option for building your rack. They are lightweight, color-coded, have adjustable slings, and are cheaper than other cams. They’re definitely not the best cams you can buy, but they are cheaper than most other options and just as safe. The major complaint with the Flex Cams is that they are prone to walking, which can become a problem if they end up getting stuck in the rock or if they move so much that the placement is no longer secure. That being said, they are still an excellent option for people on a shoestring budget or for those that are looking for a few quality, affordable cams to test the waters and see if trad climbing is for them. If you are part of the second camp and decide to upgrade your rack later, you can still use these for doubles (or you can buy them new to use as doubles) in places that require multiple cams of the same size, like Indian Creek.
- Lightweight
- Affordable
- Wide range of sizes
- Durable
- Prone to walking
- Not as high-end as other options available

Wild Country Friends have been around since 1977. Over the course of time, they have evolved to meet modern climbing standards and needs. The new Friends are lightweight, ergonomic, and are available in standardized sizes to match the Black Diamond Camalot and DMM Dragons. They even come with an adjustable sling to minimize the need to carry additional quickdraws on meandering routes, which is a huge weight saver.
- Lightweight
- Adjustable slings
- Ergonomic thumb loop
- Smaller size range than other cams
If you’re climbing in wide-crack meccas like Yosemite Valley or Vedauwoo, you may find that your traditional rack stops short as crack widths widen. This is where Valley Giants cams come in to play. These oversize cams are available in two large sizes to fit cracks from 5.7 inches to 12 inches. They are designed like regular cams and are strong enough to use in belays, hanging bivouacs and as rescue anchors.
- Sturdy
- Reliable
- Designed like regular cams
Now that we’ve gone over the different types of the best climbing cams and their best uses, you can make confident decisions as you begin to build your rack! Once you start trad climbing, you’ll quickly notice that your rack may never be “complete.” That’s okay! As long as you do your research on each route you plan to climb, you can always buy any more missing pieces as needed. Also remember that your partner may have some of the pieces that you are missing, so it’s always a good idea to share pieces to make sure you have enough for your climb.
Feature Post Climbing Archives – ABC OF ROCK CLIMBING
Views: 0

A lot of the rock climbing season is during the warmer months — a.k.a. shorts season. Depending on your preferences and the environment, rock climbing pants might not be the ideal clothing for your trip to the crag. If you’re interested in giving your legs a little more freedom and breathing room without sacrificing durability, flexibility, and functionality, these are the best … [Read more…]
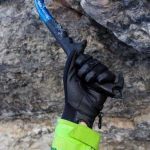
Your hands take on a lot of use and abuse from rock climbing. They face the elements, sharp rock, and sometimes difficult to manage equipment. Since healthy skin is necessary to climb your best, it’s worth taking some time to research and buy a pair of the best climbing gloves to protect your hands. While it’s not common to don a pair of gloves for face climbing, gloves … [Read more…]

No climber likes sweaty hands. Sweaty hands can make the difference between the send and the Weekend Whipper. Chalk can prevent you from falling victim to the latter.Not only does chalk help reduce moisture and increase your grip on the wall, it also gives climbers a little something extra to enhance performance. The type of chalk you use comes down to personal preference. … [Read more…]

Just like with most types of rock climbing gear, the range of rock climbing carabiners available out there can be overwhelming. When considering which carabiner to buy you have to pay attention to what type of rock climbing you’ll be doing, what type of carabiner opening you’re most comfortable with, how much you’re willing to spend, how much weight you want to carry up the … [Read more…]
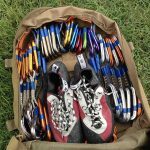
Whether you’re a seasoned trad climber or a new pebble wrestler, at some point, you’ll have to buy some new gear. Anyone who’s spent time out on the rock will tell you that most climbing disciplines are gear-intensive enterprises, so there’s no denying that you’ll need to spend some time, money, and energy to get the gear you need.Especially when it comes to a pursuit like … [Read more…]
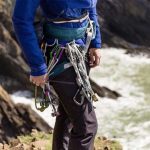
While climbing in leggings, gym shorts, or even street pants is perfectly acceptable and relatively common, specially designed rock climbing pants will help to ensure that no aspect of your gear or clothing will inhibit your climbing abilities. When buying the best climbing pants you’ll want to pay attention to materials, the type of climbing you’ll be doing, the waistband and … [Read more…]

Your harness puts in a lot of mileage. It’s there when you’re sitting at a hanging belay, taking a whipper, or sending a multi-pitch climb. It’s one of the most important pieces of gear in your kit. So it’s worth investing some time and money to make sure you have a good one.The best climbing harness is as important as a competent climber, good belayer, and quality rope. It … [Read more…]

With eight prominent brands, three general categories, and countless combinations of additional features, options for rock climbing shoes can be overwhelming. Some of the key things to keep in mind when purchasing a pair of climbing shoes is the type of shoe best-suited for your needs, your personal preference for additional features, and how your shoes should fit. See … [Read more…]

Your chalk bag is one of the most used and least appreciated pieces of climbing gear. Whether you’re a boulderer, trad dad, or brand new climber, chances are your chalk bag is the first thing you grab from your kit when you’re going to climb. You can get a lot of mileage out of one chalk bag, so it’s important to pick the best one for you to dip your hands in. Part fashion … [Read more…]
One of the smartest things a climber can do is buy the best climbing helmet. They generally aren’t that expensive, and a helmet can truly mean the difference between life and death. When climbing outside, it is clear that having a helmet is better than not having one.Helmets, like heads, come in all shapes and sizes. Some helmets are better for ice climbing, while others are … [Read more…]
{ TOP 10 } Best Family Tent – 2020 Reviews
Views: 0
There is no better way to enjoy the great outdoors than with the whole family. However, finding a tent that your entire family will love is a challenge in itself.
To help you choose the perfect shelter for your next camping trip, we’ve created this ultimate family tent guide to get you started. Up next, we’ll introduce you to ten of our favorite family camping tents. Then, we’ll walk you through the basics of selecting a tent so you can get the model that’s best for your family.
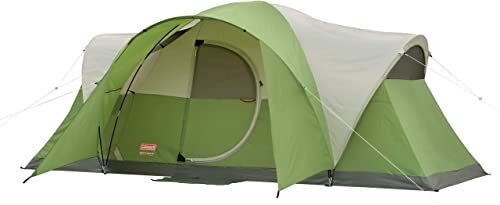
Functional yet affordable, the Coleman Montana 8 is your home away from home for families on a budget. This cabin tent has a roomy interior with a 6’2” center height that can accommodate most campers.
The tent has a single hinged door that opens up for easy access to the interior. When you walk inside, you find that there’s plenty of space for up to three queen-sized beds as well as an abundance of storage pockets for staying organized. Plus, the Coleman Montana 8 comes with an included carry bag and a 1-year warranty so you can feel confident about your purchase.
- Affordable
- Lots of interior room
- Can fit 3 queen-size airbeds
- Plenty of gear storage pockets
- Not fully waterproof
- Will not hold up well in a storm
- Some durability concerns with long-term use
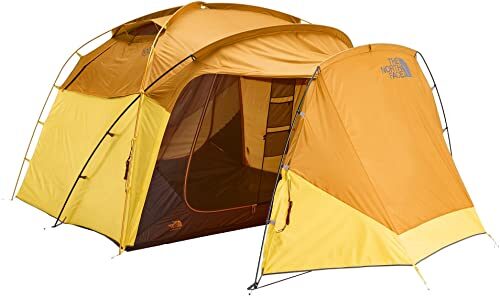
If you need a truly waterproof family tent that doesn’t skimp on comfort, the North Face Wawona 6 might just be what you’re looking for. This beast of a tent is easy to set up, thanks to its single-wall design. The inside of the tent has enough room to house 6 campers, as well as ample headroom for standing upright.
The Wawona 6 has a large front vestibule with two doors for easy entry and exit. There’s plenty of space to store gear inside the vestibule, which can also be used as a mudroom in bad weather. The tent also has large windows for added ventilation, as well as gear pockets and an internal drying line for plentiful gear organization.
- Very waterproof
- Massive vestibule for gear storage
- Internal drying lines and gear organizing pockets
- Large windows for ventilation
- Easy to set up
- Very heavy
- Only one room
- Expensive
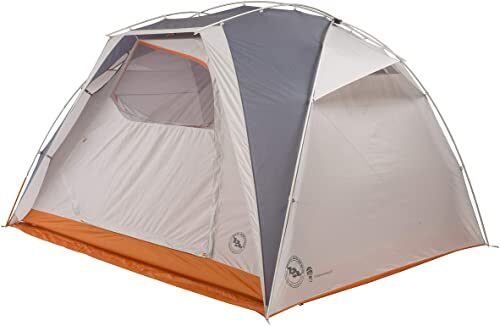
Built specifically with car camping families in mind, the Big Agnes Titan mtnGLO 6 is a new take on a classic tent design. The Titan uses an external pole construction which makes set up a walk in the park. Inside, the tent is quite spacious and can comfortably sleep 6 campers, so it’s perfect for a small family.
The Titan can be pitched with an optional vestibule to double your living space and provide plenty of gear storage. It has built-in loops for installing a gear loft for added organization. The best part? You can easily string up some Big Agnes mtnGLO lights to illuminate the whole tent for some nighttime family fun!
- Easy to set up
- Plenty of gear storage options
- Can be used with mtnGLO lighting system
- Heavy
- Expensive
- Need to buy the vestibule separately
- Not fully waterproof without vestibule
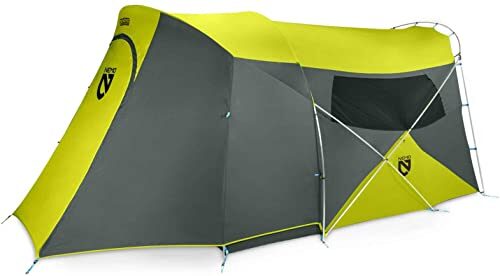
The Nemo Wagontop 6 is all about luxury and comfort. This family camping tent has a unique design that prioritizes both functionality and livability all at the same time. The Wagontop has a fantastic peak height of 6’6”, so it can accommodate nearly every camper.
As far as livability goes, the Wagontop has vertical walls that allow for plenty of interior space, as well as overhangs at both ends with built-in ventilation. The tent has a single wall construction which is easy to set up, as well as large side windows for great views in the mountains. Plus, it has a huge vestibule that can be extended even further with the optional “garage” for all your gear storage needs.
- Lots of interior space
- Plenty of gear storage in massive vestibule
- Large windows for ventilation
- Easy to set up
- Very tall ceiling height
- Expensive
- Heavy
- Not great in very windy conditions
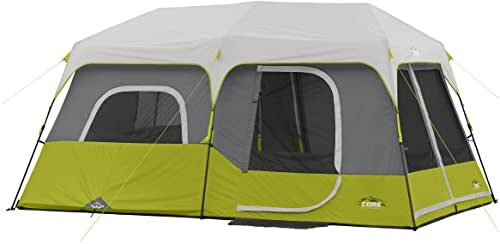
The CORE Instant Cabin Tent is a time-honored classic family tent design. This tent features instant setup technology, which allows it to be pitched in just 60 seconds, thanks to its pre-attached poles.
The CORE Instant Cabin has enough space for 9 campers to sleep comfortably at night. It has ample hanging storage pockets, as well as a two room divider, so you can have separate living and sleeping spaces in your tent. Plus, the Instant cabin has an integrated ventilation system to help keep things cool and comfortable in the warm summer months.
- Very spacious
- Lots of interior gear storage options
- Included room divider
- Large windows for ventilation
- Instant set up design
- Not waterproof
- Not great in high winds
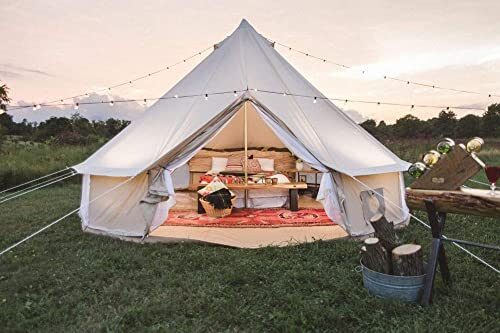
If you like to camp all year round, the Dream House Outdoor Canvas Tent is a must-have for your family. This bell-shaped tent has a simple design and only one central pole. The entire tent is made of a robust cotton canvas that is warm in the winter and breathable in the summer.
The tent is fully waterproof and has four ventilation holes for maximum comfort. There is plenty of room inside the tent to sleep a small family. Plus, the tent has a removable groundsheet that can be deployed for camping on snow or muddy terrain all year long.
- Very spacious with lots of living space
- Fully waterproof design
- Built-in windows and ventilation
- Removable groundsheet
- Good for four-season use
- Very heavy
- Takes a while to set up
- Car camping only
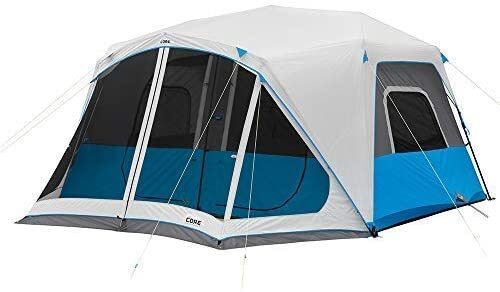
When it comes to sheer functionality, it’s hard to beat the CORE Lighted Instant Cabin 10. This ideal family tent can be set up in just minutes, thanks to its pop-up design. The tent has a staggering 7’ ceiling height so it is comfortable for pretty much every camper.
Inside, you can easily fit two air beds or 10 campers in their sleeping bags. The tent also has a massive screen room, which is perfect for outdoor relaxation, even when the bugs are out in full force. If all of that wasn’t enough, the tent also has built-in LED lights to illuminate your living space at night with just the flick of a switch.
- Built-in LED lighting system
- Massive screen porch for added living space
- Plenty of interior space
- Easy to set up
- Expensive
- Not fully waterproof
- No interior room divider
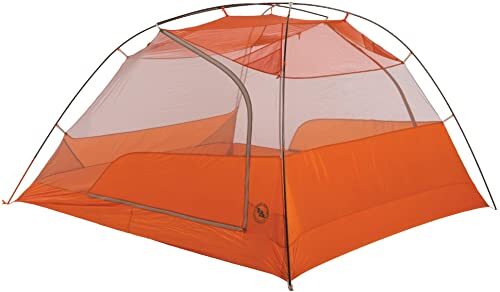
If your family loves to backpack, you’re going to have a hard time finding a better tent than the Big Agnes Copper Spur HV UL 4. As one of the best-selling 4 person backpacking tents around, the Copper Spur is the perfect companion for any family trip to the mountains.
This tent has steep-sided walls that maximize the interior living space. It also has two large vestibules that can easily be converted into awnings for a bit of extra shade. Inside, there are plenty of built-in gear pockets to keep things organized, while the tent’s rainfly keeps you dry in any weather. Oh, and this tent is super light, so it’s great for any family adventure.
- Very lightweight
- Vestibules can be converted into awnings
- Plenty of interior gear storage
- Steep sided walls for comfort
- Can’t stand fully upright
- Three season use only
- Very expensive
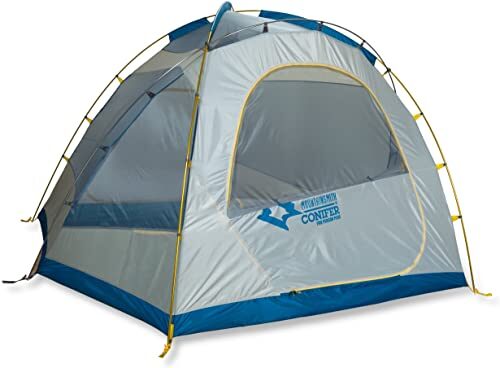
With room for a family of 5, the Mountainsmith Conifer 5 is a solid all-around family tent for car camping. This tent is designed mostly for base camping and has a nice 6’2” interior height for your comfort. With 84 square feet of floor space, the Conifer 5 has plenty of room for everyone in the family to stretch out and relax.
The tent has a handful of gear storage pockets to keep things organized. It has two doors and two vestibules, which provide ample storage for the whole family. Plus, the tent fly has ventilation windows to provide maximum breathability during those warm summer nights.
- Fully waterproof
- Large vestibules for gear storage
- Interior gear pockets
- Tall center height
- Some durability concerns
- Very heavy
- Large packed size
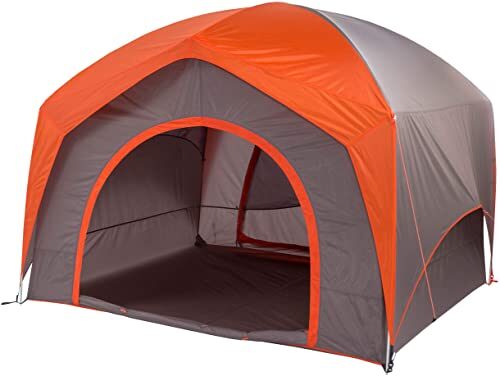
Housing the entire family is super simple with the Big Agnes Big House 6. This car camping tent can comfortably fit 6 campers for a weekend trip in the woods. Featuring straight-sided walls, the Big House 6 maximizes interior living space to keep you comfortable, even when you’re away from home.
The tent has two large doors with windows so you can ventilate the shelter on warm nights. It also has corner bin pockets for stashing your gear so everyone can have the personal space they need. Oh, and the tent can be pitched with just the fly if you need a quick shelter on your family hike.
- Quick and easy to set up
- Tall center height
- Lots of interior space
- Built-in gear storage
- Good ventilation
- No vestibules
- Not fully waterproof
- Heavy
Since a family tent needs to be trusted to comfortably and safely house your partner and your children, you need to be sure that you’re buying the right shelter for your needs. So, in this section, we’ll discuss some of the many things you should know when buying a family tent.
How to Choose a Family Tent?
Before we even get into the nitty-gritty details of family tents, let’s talk first about how you go about choosing one in the first place. With so many different tents on the market today, it’s imperative that you find a family tent that works for you. Here’s what you should consider before you start shopping:
Sleeping Capacity
The number of people that can fit comfortably inside a tent at any given time is known as the tent’s “sleeping capacity.” The sleeping capacity of a tent has a direct correlation on the overall size of the shelter. So, you can expect that a 10 person tent will be substantially larger and heavier than a 5 person model.
However, we can’t really give you advice on the size tent you need. Indeed, this is something you have to determine based on the needs of your family. What we can say, however, is that it’s wise to consider getting a slightly larger tent than you actually need.
This is particularly true for families with children, as kids seem to take up a whole lot of space. Plus, as your children get older, they’ll want more personal space. So, a larger tent can help accommodate everyone’s privacy needs while also giving everyone the space they need to stretch out and relax.
Seasons
The vast majority of family tents are made for “three season” use. This means that they’re not designed to be used during the winter months.
If you plan to camp in the winter, though, you’ll need to look for a four season tent. These tents are going to be reinforced to handle the extra weight and pressure of heavy snow and high winds. However, they will also be heavier and more expensive than their three season counterparts.
Some of the best four season family tents will be made from canvas, which is a highly durable and versatile material. Canvas tents are great for year round use as they are spacious and comfortable. But, they can be tricky to set up and quite expensive, so they’re not ideal for infrequent campers.
Number of Rooms
Some modern family tents even come with built-in room dividers so everyone can have some privacy, even when you’re outside. These room dividers are particularly useful for families with children. As children age, they’ll start craving personal space, so having a tent with room dividers can keep everyone happy.
A tent with room dividers can also help separate your living and sleeping areas. Or, it can create two separate sleeping quarters if you’re camping with extended family or even some friends.
However, not all family tents have room dividers, so you should pay close attention as you read tent reviews if this is something you’d value in your next family camping shelter. If you do want room dividers, you can sometimes find a tent that has 3 or more rooms for added comfort and flexibility while camping.
Key Considerations for Choosing a Family Tent
Once you have a general idea of the kind of family tent you want, it’s time to start digging into the details of specific models. Here are some of the top things that you should look out for as you’re comparing different family tent models:
Ease of Set Up
Setting up a tent can be a tricky task, especially if you’re new to camping. Regardless of your camping experience, though, no one likes to waste time pitching a tent when they could be enjoying the great outdoors instead.
Thankfully, many tents now come with instant set-up technology, which allows them to be pitched in just a matter of minutes. This is ideal for busy families with young children that just want to get camp set up so they can maximize their time outside.
Keep in mind, though, that instant tents tend to be heavier than other options. Additionally, most instant tents are not fully waterproof, so they’re not ideal for backpacking or for use in particularly rainy environments.
If an instant tent isn’t right for you, you can always look for a tent with other good set-up features. Tents that are easy to set up will often have very few poles, as well as color-coded designs that simplify the entire pitching process.
Weight
The weight of a tent is one of the most important features to consider, particularly if you’re going to be backpacking with your family. Since no one wants to carry around more weight than they need to, a lightweight tent is ideal.
But, even if you’re not planning to backpack, the weight of your tent is still important. A very heavy tent is difficult to transport, even if it’s just from your car to the tent site.
However, always remember that some very lightweight tents sacrifice durability in favor of weight savings. So, lighter tents aren’t necessarily the best option.
Weather-Resistance
The main reason to buy a tent is so that you have some form of weather protection while you’re camping. Tents were originally designed to be waterproof shelters where you could rest for the night without getting soaked in a storm.
But, as tent styles evolved and manufacturers started creating tents more for comfort than for performance, their water-resistance started to flounder. Indeed, many of the larger cabin-style tents are not truly waterproof.
While they will keep you dry in a light drizzle, they will not hold up well in a major storm. The easiest way to see if a tent is truly waterproof is to look at its rainfly. If the rainfly doesn’t cover the whole tent, then the shelter is not completely waterproof.
This is fine for most car camping adventures in dry climates. But you should always look for a tent with a full-coverage rainfly for backpacking trips in remote terrain.
Gear Storage
A family goes camping with a whole lot of gear. So, it’s imperative that you have a way to store all of your gear and stay organized wherever life’s adventures might take you.
Most family camping tents will offer some form of gear storage. The vast majority of these tents will have built-in pockets that allow you to organize small pieces of gear, like clothing and headlamps inside the tent.
Additionally, the best tents will have some sort of vestibule or screen porch where you can safely store your gear outside. This is particularly beneficial in wet environments, where you need a place to stash your gear at night without bringing dirty equipment in the tent.
Doors and Entrances
The doors of a tent might seem like a relatively minor feature. But, if you think about how often you have to use a tent door, you’ll start to realize why they’re so important.
Small tent doors make it difficult to get in and out of your shelter at night. Plus, if your tent only has one door, you’ll have to crawl over your tent mates just to answer nature’s call.
At the same time, tents with many doors tend to be heavier and bulkier than their single-door counterparts. That being said, if you have a family, having a tent with multiple entrances will make things way more convenient for you in the long run. So, it’s probably worth the extra weight to have multiple doors.
Durability
The very last thing you want when you buy a new family tent is to have it break after just one trip. Thus, durability is one of the most important considerations in any family tent.
Tent durability is generally the result of the tent’s materials and design. Shelters built with more robust materials, like ripstop nylon, are going to last longer than those made with low-end fabrics. Of course, high-end products cost more, so you might have to pay a premium for that durability.
Additionally, tents that are designed well tend to last a long time. Unfortunately, while cabin-style tents are quite convenient and comfortable, they are not great for long-term durability. This is because they often get blown around in the wind and can rip easily in a storm.
The Verdict
Camping with the whole family is a great way to bond and enjoy the wonderful world of the outdoors. But, finding the best family tent is crucial to a successful trip. Every family is unique, so it’s important that you keep your family’s needs in mind when searching for that perfect tent.
{ TOP 7 } Best Climbing Chalk Review – 2020 Reviews
Views: 0
No climber likes sweaty hands. Sweaty hands can make the difference between the send and the Weekend Whipper. Chalk can prevent you from falling victim to the latter.
Not only does chalk help reduce moisture and increase your grip on the wall, it also gives climbers a little something extra to enhance performance.
The type of chalk you use comes down to personal preference. There are tons of options to choose from, ranging from the extremely inexpensive to high-end chalk that will dry every pore in your hands. From traditional powder chalk to liquid chalk, there is certainly an option for every climber.
The good thing about chalk is that most of it is affordable enough to have a couple of different types on hand, and once you run out of a certain type, if you weren’t in love with it, you can easily try a different option next. We’re sharing our top 7 favorite chalks and our tips and tricks for choosing the best climbing chalk for your purposes.
Chalk Buyer’s Guide
The chalk market is extremely varied. There are powders, chalk blocks, liquid chalk, chalk balls, chalk for sweaty hands, chalk for sensitive skin, environmentally friendly chalk, and the list goes on. As far as powders go, they’re all essentially made up of the same main ingredient: magnesium carbonate. Add in a few drying agents and differences in formula and preparation, and that’s how different types of chalk are born.
As with other pieces of gear, it’s not uncommon to find climbers who swear by a certain brand or type of chalk. But before you blindly trust someone else’s word, it’s worth it to test out a few different chalk types and brands to find the best one for you.
Despite all of the varied marketing claims by different chalk producers, it’s tough to say how much better one brand is over the next. One thing is certain; however, that there are definitive differences in texture, type, and overall performance.
- Loose chalk: This is the most common type of chalk. There are fine or chunky grinds and you can find pure chalk as well as options with additional drying agents. Loose chalk is packaged ready to use, all you have to do is fill up your chalk bag with it.
- Chalk blocks: If you prefer to grind your chalk to your desired consistency yourself, consider chalk blocks. Blocks of chalk are generally cheaper than loose chalk and give you the ability to crush it yourself to as fine or coarse a grind as you’d like.
- Liquid chalk: Liquid chalk is a blend of chalk and alcohol that rubs on as a liquid and dries as powder chalk. This offers a less messy way to chalk up, avoiding large clouds of chalk that happen when you dip into a chalk bag. You can also get a more even coating from liquid chalk, but it doesn’t always last as long or offer as much grip as traditional powder chalk.
- Eco chalk: Eco chalk was developed in response to environmental concerns that white powder chalk is leaving unsightly marks on outdoor crags. It’s made of a colorless drying agent and is a good option for those truly committed to leave no trace principles.
Once you choose the type of chalk you’d like to use, there are a couple of options to use it. Liquid chalk comes in its own tube and doesn’t require anything else to use it. (This makes it easy for travel, since you can easily throw the tube in your carry on and be on your way).
Powder chalk simply needs to be transferred into a chalk bag and you can start climbing. However, dipping chalk directly from a chalk bag can cause clouds of chalk dust to form and is also prone to spillage. This is why many climbers choose to fill up a chalk ball and put that in their bag.
Here are the pros and cons of each method.
- Chalk bag: Using your chalk straight from the chalk bag is the simplest way to chalk up. No added accessories are needed and you can get a thicker coat of chalk. However, it can be messy and spills happen.
- Chalk ball: A chalk ball will minimize excessive chalk dust and waste. It’s a cleaner, spill proof way to carry your chalk. However, it’s difficult to get a thick coat using a chalk ball.
Now that we’ve covered what to look for in climbing chalk, it’s time for the reviews! Here are the top 7 choices of chalk on the market today.
As far as chalk is concerned, FrictionLabs is the clear leader. Their chalk is made with a silica-free formula that is non-toxic and free of artificial drying agents. There are three varieties: Unicorn Dust is fine powder chalk with small chunks, Gorilla Grip is medium chunky chalk with some powder, and Bam Bam is Super Chunky chalk with some powder (closest to gym chalk block). These options allow you to choose a courser grind if that’s what you prefer without having to buy a chalk block.
It applies smooth and evenly, and lasts a long time. FrictionLabs is expensive, but for most people it’s worth it for the value and quality you receive.
- Smooth and even application
- Long lasting
Black Diamond’s White Gold seems to check all the boxes for a decent all-around chalk. It’s affordable, provides good coverage, and, most importantly, dries out your hands. It dries them so well that even climbers with the sweatiest hands can attest to its effectiveness.
With all of the drying power in White Gold comes a downside. It can dry your hands out so much that it becomes painful to climb and your skin can even tear. This is especially true for climbers with sensitive skin. So it really depends on your skin and how much you sweat. If you need something to remove all traces of moisture, White Gold is the way to go.
Popular among weightlifters and crossfitters, Primo Chalk is also making its way into the climbing world. The Primo formula includes 5 essential oils and epsom salt, along with the main ingredient of clean magnesium carbonate. This mix provides natural protection against tearing and dryness while conditioning skin—and it’s also antibacterial. It even smells good.
Primo recommends using just a small amount of chalk at a time rather than becoming a “chalk monster.” When used this way, it can last twice as long as other chalks. However, some people disagree and say that it doesn’t last as long as other chalks.
- Conditions skin
- Antibacterial
- Smells good
- Expensive
- May not last as long as other chalks
Frank Endo chalk is cheap, effective, and trusted by climbing and gymnastics gyms across the U.S. It keeps your hands dry by absorbing sweat and ensures a reliable and strong grip that prevents you from slipping off the wall. This is a chalk where you really get what you pay for. It’s super affordable while still exceeding expectations.
Since Frank Endo chalk only comes as a block, depending on your preference, this can be seen as a positive or a negative. Chalk blocks are less messy than loose chalk, but they do require you to crush them yourself. This is only a problem if you like super fine chalk, but even then you can still grind it down yourself to your desired fineness.
With 4.8 stars on Amazon, there aren’t many complaints about Frank Endo chalk. It’s definitely worth checking out if you’re new to climbing and are looking for premium chalk at a bargain price.
- Affordable
- Grippy
- Not as messy as other loose chalk

FrictionLabs is undeniably one of the best chalk brands on the market, and their Secret Stuff Chalk Cream is no different. This liquid chalk is perfect for indoor and outdoor rock climbing, as well as a variety of other sports that require grip aids. The silica-free formula is non-toxic and free of artificial drying agents.
Secret Stuff works in a variety of weather conditions as it repels sweat, rain, humidity and oils. Use it alone or layer it under powder chalk for an even stronger grip. FrictionLabs claims that a single 75ml bottle will last at least 100 uses, so you’re sure to get some mileage out of this one.
The downside to Secret Stuff, and liquid chalk in general, is that it’s difficult to re-apply if you’re climbing outside on long or multi-pitch routes. Its best use is in the gym or bouldering.
- Better performance in weather conditions
- Protects skin from over-drying and cracking
- Difficult to apply on long or multi-pitch routes
If you’re just starting to climb or if you’re on a serious budget, Metolius is the chalk for you. It’s readily available at most climbing gyms and is the cheapest chalk on this list. Does it dry your hand? Yes. Does it give you a little extra grip on the wall? Yes. Is it long-lasting? No. Overall, the Super Chalk does the things that a chalk should do, but it doesn’t do anything particularly well. It is a good option, though, for beginners who aren’t sure they want to invest in more expensive options yet.
- Affordable
- Dries your hands
White chalk leaves unsightly marks on rock. High-trafficked crags can be covered in chalk marks, which leaves a lasting eyesore for other climbers and hikers. Metolius offers a solution to this problem with their Eco Ball Non-Marking Chalk Substitute. The Eco Ball does as advertised—it doesn’t leave any marks on climbing holds. It’s a great option for crags and gyms that don’t allow chalk or for people who are making an effort to leave no trace when they climb.
There are, unfortunately, a few cons to the eco ball. First, it’s not refillable, so you must continue to buy new balls every time you run out of chalk rather than refilling your original one. Since it’s a chalk alternative, it’s made of synthetic materials, and in my research I wasn’t able to find out what exactly these materials are. Some users also report that the balls release large clouds of dust while chalking up.
- Not refillable
- Releases large dust clouds
At the end of the day, most climbers can agree that, to a certain extent, chalk is just that—chalk. We all need that extra grip aid to keep us feeling secure on the wall while reducing moisture. Whether you need ultra drying options for sweaty hands, conditioning formulas for sensitive skin, or non-marking chalk for leave no trace principles, there is definitely a chalk out there for you.
We’ve covered all of the various types of chalk, best ways to use your chalk, and the different options for different needs. Now it’s time for you to confidently choose the best climbing chalk for your next trip.
